
You did some cleaning on your Windows 11 computer or rebooted after an update, and now the This PC icon is missing from your desktop. Not to worry since recovering the useful icon is quick and easy. Now you can immediately access all the files on your computer without opening File Explorer. Or, you can use the keyboard combination meant to open File Explorer to access This PC. Read on to see how.
You’ll also see other desktop icons you can add whether you’ve lost them or would like faster access. If you ever change your mind, follow the same steps to add the icon, but by simply unchecking the box, you can make This PC icon disappear from your desktop.
Contents
How to Recover This PC Icon on Your Desktop for Windows 11
You must access Personalize in Settings to get your This PC icon back. The fastest way to access this option is to right-click on the desktop and choose Personalize. Or you can open settings by clicking on the Windows + I keys. Once in Settings, click the Personalization option, followed by the Themes option. In Themes, click on the Desktop icon settings option. When the small window appears, check the box for the Allow themes to change desktop icons.
![]()
But, as long as you’re there, you can add icons such as User’s files, Network, Recycling bin, and Control Panel; once you’ve made your choices click OK. Now you should see the icon on your desktop. But what if you don’t want someone to see the icons on your computer? You can temporarily hide them by right-clicking on your desktop and placing the cursor on View, followed by the Show desktop icons option.
![]()
Since it’ll already be checked, you’ll see how all your desktop icons disappear. When you’re ready to return them, follow the same steps to click on the Show Desktop icon.
Could you have done this before, and that’s why they are gone in the first place? You forgot to enable them after and forgot the steps to bring them back. It happens. But you can also pin This PC to the Start menu if you like to open your apps from there.
How to Pin This PC to Start Menu
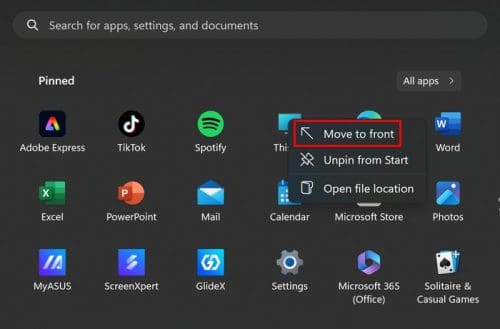
Once you’ve added This PC to your desktop, pin it to the Start menu for more options. The more options you have to open This PC, the better. Locate This PC on your desktop and right-click. Click on the Pin to Start option, and you’ll find it there. To check, click on the Start menu, and if you don’t see it among the first options, place the cursor on the dots to the right and click on the arrow pointing down to go to the next page. It might be the last one on the list, but you can also move it to the front. To make finding it more accessible, right-click the This PC icon and choose the Move to Front option. It should be the first icon on the list.
How to Enable This PC Icon to Desktop Using File Explorer on Windows 11
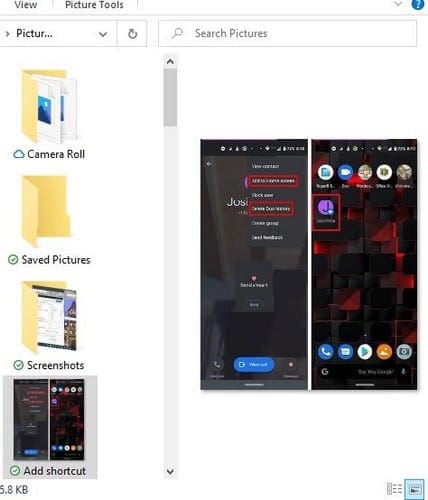
Another way you can add the This PC icon on your desktop is using File Explorer. You can open File Explorer by pressing the Windows + E keys. Once it’s open, click and drag the This PC icon to your desktop. You can’t do this if the File Explorer takes up your whole screen, so you must make it smaller. When you drag it to your desktop, it says This PC – Shortcut.
You can always rename the icon to eliminate the word Shortcut. You can do this by right-clicking on the icon and choosing More options. In the following list of options, you’ll see the option to rename it. Simply erase the shortcut part, and you’re good to go.
How to Open This PC with Keyboard Shortcut
When you press the Windows + E keys, you expect to open File Explorer. But with a few clicks here and there, you can use those keyboard combinations to open This PC. Press Windows + E, click on the three dots at the top, and choose options. Make sure you’re on the General tab. On the dropdown menu for Open File Explorer to select This PC. Click Apply > Ok, and the next time you press those keys, and you’ll open This PC.

Further Reading
Here’s some more reading material to keep learning other helpful things. For example, you can automate your work using the Mac shortcuts app, here’ show. Or you can see how you can make Windows desktop shortcuts for a specific browser. But since there are times when you have to deal with errors, here is how you can fix the OneDrive Error Unable to move shortcut. Also, see how you can fix Microsoft Teams Keyboard Shortcuts not working.
Conclusion
Thanks to shortcuts, you have faster access to your files. On Windows 11, you can add a shortcut to This PC on your desktop in multiple ways. You can dig a little deeper into settings, or you can use the drag-and-drop method. You can also change what a keyboard combination does so that it opens to This PC. Which option you decide to go with is up to you. Which one did you choose? Let me know in the comments below, and don’t forget to share the article with others on social media.


Nothing does not work properly.
Only displays for the current user not all users.
How can we do this for all users in active directory?
This doesn’t enable it for all users, only the user following these steps
A long way, you can finish step by step, and then you can’t reach without a foot
Solved the problem. Steps were very easy to comprehend. Thanks.