
Windows operating system has undergone quite a change. With updates to Windows 10, users now have features that make their work that much easier. From key shortcuts to better command prompts and games, exclusive apps, and so much more, Microsoft has improved their user experience.
One such improvement is the Cortana voice assistant. Cortana is much like Apple’s Siri or Amazon’s Alexa, a digital assistant that offers customizable and personal functions to make your life easier. Cortana was initially a feature of the Windows phone but Windows has now made it an essential element of their laptops and desktops.
Cortana is not enabled on Windows 10 by default. You’ll have to enable her to get her functions.
Fun fact, Cortana is named after the AI character in Microsoft’s Halo game series.
Contents
1. Sign in to Your Microsoft Account
Cortana has some basic functions that you can use without signing into your Microsoft Account, but to get the full experience of having a digital assistant, you’ll need to sign in. If you have not done so already, sign in to Windows using your Microsoft account.
2. Activate Cortana
There are several ways to activate Cortana. The best thing is that you won’t have to install special software; you just need to switch the default setting.
First, you can:
- Use the Search icon on the bottom left of your Windows screen.
- Type in Cortana.
- Select your language settings.
- Done! The basic set up is complete.
The second option is to:
- On the bottom lefthand corner of your screen, select the Windows icon.
- Click on the Settings icon.
- Select Cortana on the Settings page that appears.
- Select your language settings, and you’re all set to use Cortana.
Your third option is:
- Right-click on your taskbar.
- Select the Show Cortana option.
- Now that was easy!
3. Set Up Cortana
After you enable Cortana, the icon will appear on the taskbar. Now, set up Cortana by following these simple steps.
- Turn your internal or external microphone on and make sure it’s accessible.
- If your microphone is not on, go to Settings.
- Click on Privacy > Enable Microphone.
- After that, click on Voice Activation and select Allow Apps to use Voice Activation.
- After this, you can select the Cortana button on your taskbar.
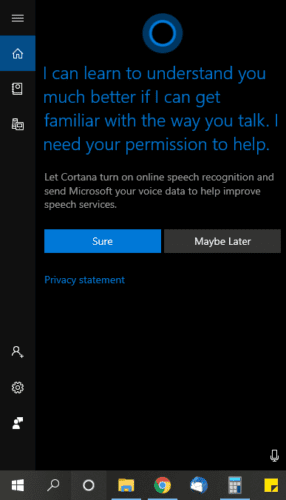
- Allow Cortana to access online speech permissions. This step will help her recognize your voice and speech patterns. All you need to do is click on Sure.
- A screen will prompt you to speak a sentence into the microphone to check if it is working correctly.
- If you still have not signed in, Cortana will prompt you to sign in to your Microsoft account.
After signing into your Microsoft account, you can start testing out Cortana by asking her to search for anything.
- Click the Settings icon on Cortana.
- Go to Permissions.
- Personalize your permission settings and privacy settings.
- You can also link Cortana to a variety of other accounts like your Outlook and Gmail accounts, Skype, LinkedIn, and more using the NoteBook function.
Why Use Cortana?

Outside of being an efficient digital voice assistant that’s easy to set up, there are other reasons why you would want to use Cortana.
- Cortana can dictate your work in Office 365, which is particularly helpful for Microsoft Word. This will help you get your job done faster if you aren’t the fastest typer.
- Cortana is excellent for online searches. From basic trivia questions to complex research topics, Cortana will help you search the web for whatever you need.
- Cortana will read text out loud to you. If you are far from your laptop or personal computer, you can ask Cortana to have her read what’s on the screen. This works well when you’re multitasking.
- Cortana can be linked to Spotify and play music for you on command.
- Cortana can schedule your calendars on Outlook and Gmail and also remind you of upcoming events.
- Cortana seamlessly integrates all Microsoft functions she has permission to access.
- You can always deny Cortana permissions or turn her off without worrying about speech privacy.
So why not try Cortana out today? She is the assistant you will love to have. Remember to personalize Cortana using permissions so you can get the best out of this new Windows 10 feature.