
As any user of Windows 11 will tell you, the operating system can tend to feel sluggish at times. Thankfully, there are a few things that you, as a user, can do to speed things up. In this article, we’re going to be looking at Windows processor scheduling and how you can prioritize different tasks.
Improving Speed Through Selectivity
Windows has been making strides in recent months to improve the responsiveness of the operating system, particularly File Explorer. Microsoft has introduced a range of performance optimization features, including reducing interface latency and speeding up common interactions like opening menus and windows, as part of its ongoing efforts to improve the Windows 11 user experience.
This is good news, but Windows 11 processor scheduling can also be a useful, not to mention customizable way to improve your own machine’s speed.
Windows Processor Scheduling – How It Works
Your computer needs processor cores to compute the various tasks and programs running on your machine. There are the apps you run, and the various background tasks and services that keep things operating smoothly. Windows 11 automatically allocates these tasks to the different processor cores. A single core can run quite a bit.
With processor scheduling, Windows 11 follows your lead in deciding the priority and allocation of these tasks. If you want a resource-intensive photo editing app to receive more processing power than the update service, you can tell your machine to prioritize this.
How to Use Processor Scheduling
There are two different ways to schedule your CPU cores, through Advanced System Settings and through the Registry. Let’s get started:
Scheduling via Advanced Options
The easiest method for allocating CPU resources is through Advanced System Settings. This will allow you to give priority either to foreground or background tasks. Here’s what you need to do:
Step 1. Open “Settings” (Win + I) and click “System” in the sidebar.
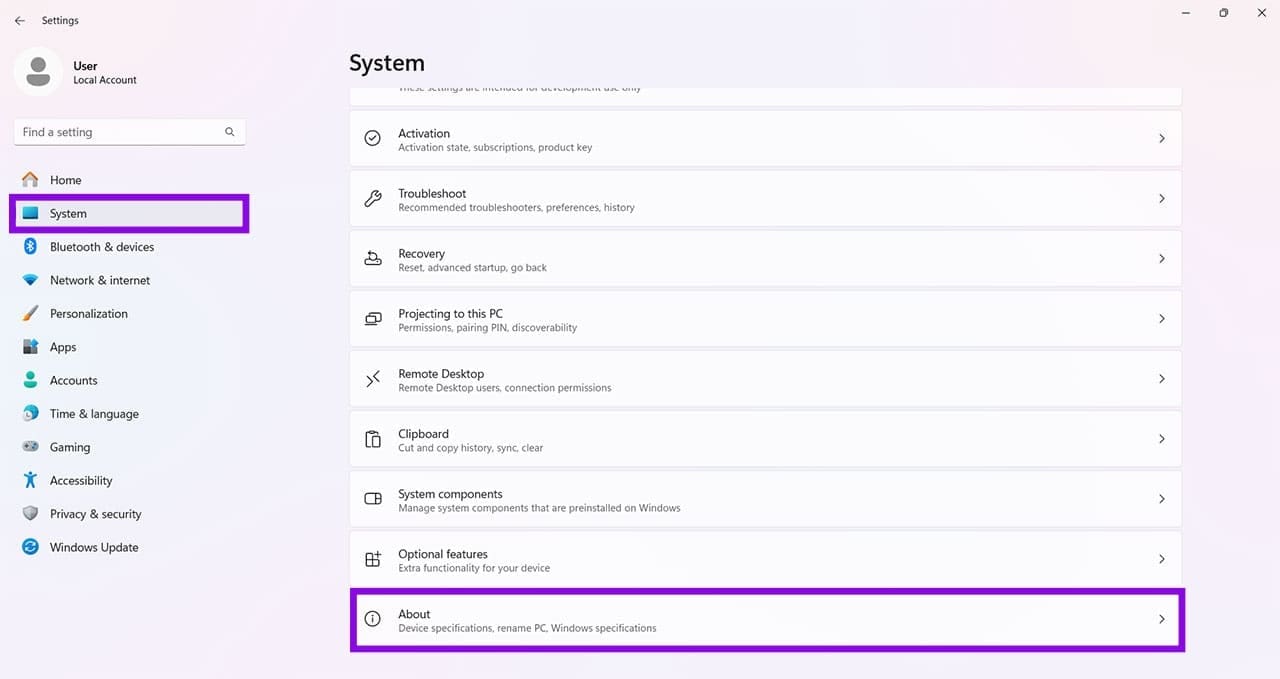
Step 2. In the main window, scroll all the way down and click “About.”
Step 3. Under “Device specifications,” click the blue “Advanced system settings.”
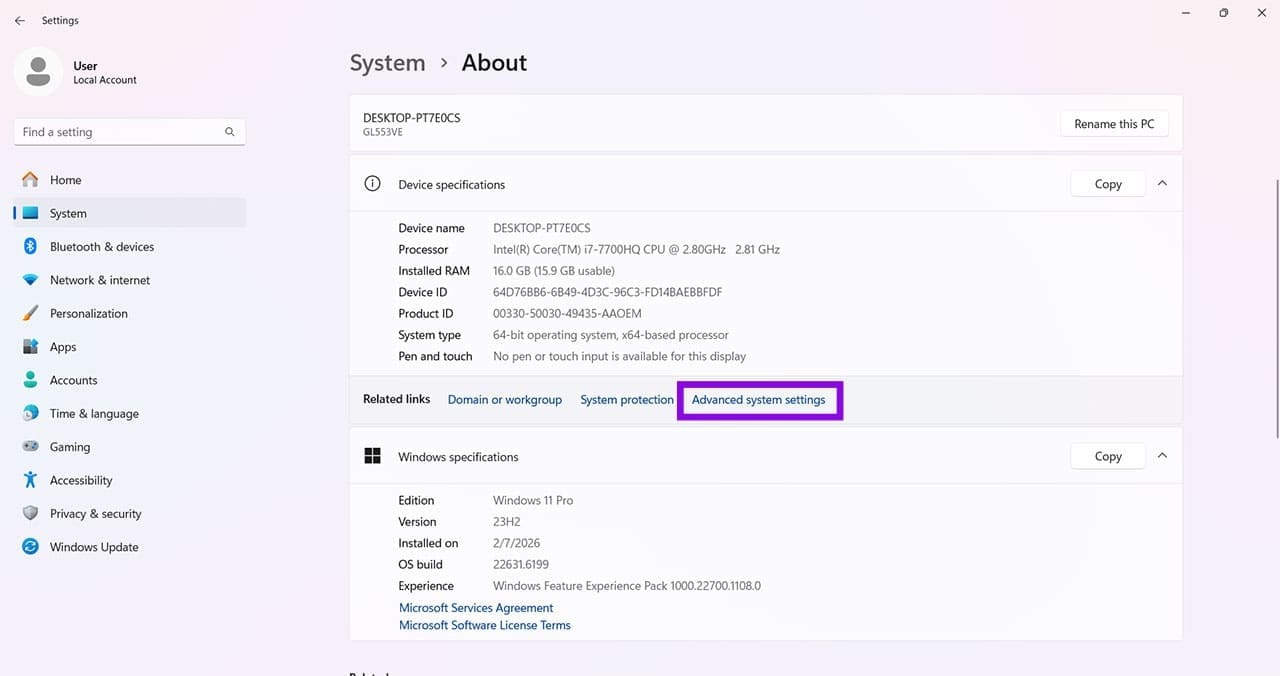
Step 4. In the “Performance” section of the window that pops up, click the “Settings” button.
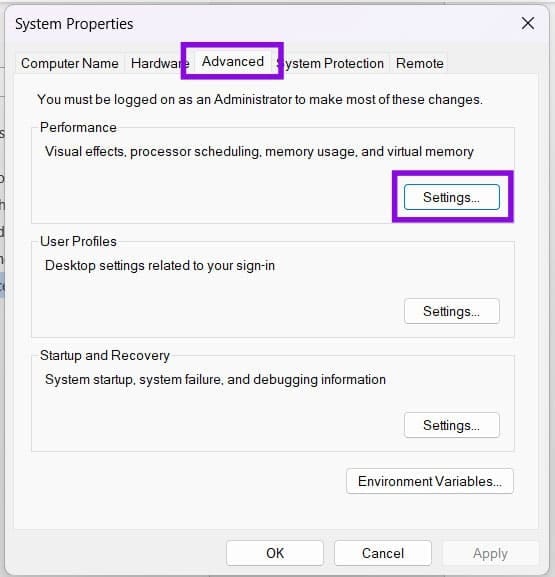
Step 5. A new window (Performance options) will appear. Click the “Advanced” tab.
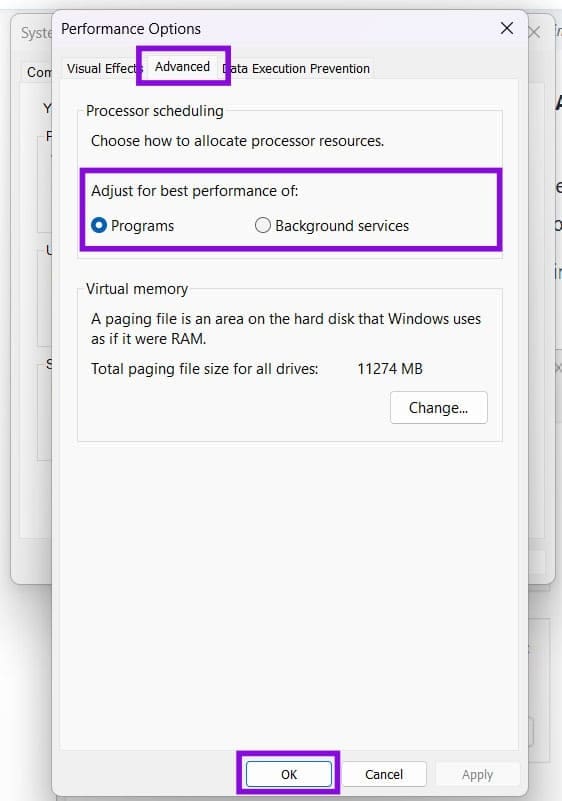
Step 6. Choose either “Programs” for foreground apps and tasks or “Background services” for all processes running behind the scenes.
Step 7. Click “OK” to finalize.
Scheduling via the Registry
As with most things involving the Registry, this path is a bit trickier, and also runs the risk of causing problems for your PC if you don’t know what you’re changing. Stick to this guide to be safe:
Step 1. Open the Run dialog (Win + R) and type “regedit” into the box before clicking (Ctrl + Shift + Enter) to run as Admin.
Step 2. In the Registry, enter the following path into the Address Bar at the top: “Computer\HKEY_LOCAL_MACHINE\SYSTEM\CurrentControlSet\Control\PriorityControl” and hit Enter.
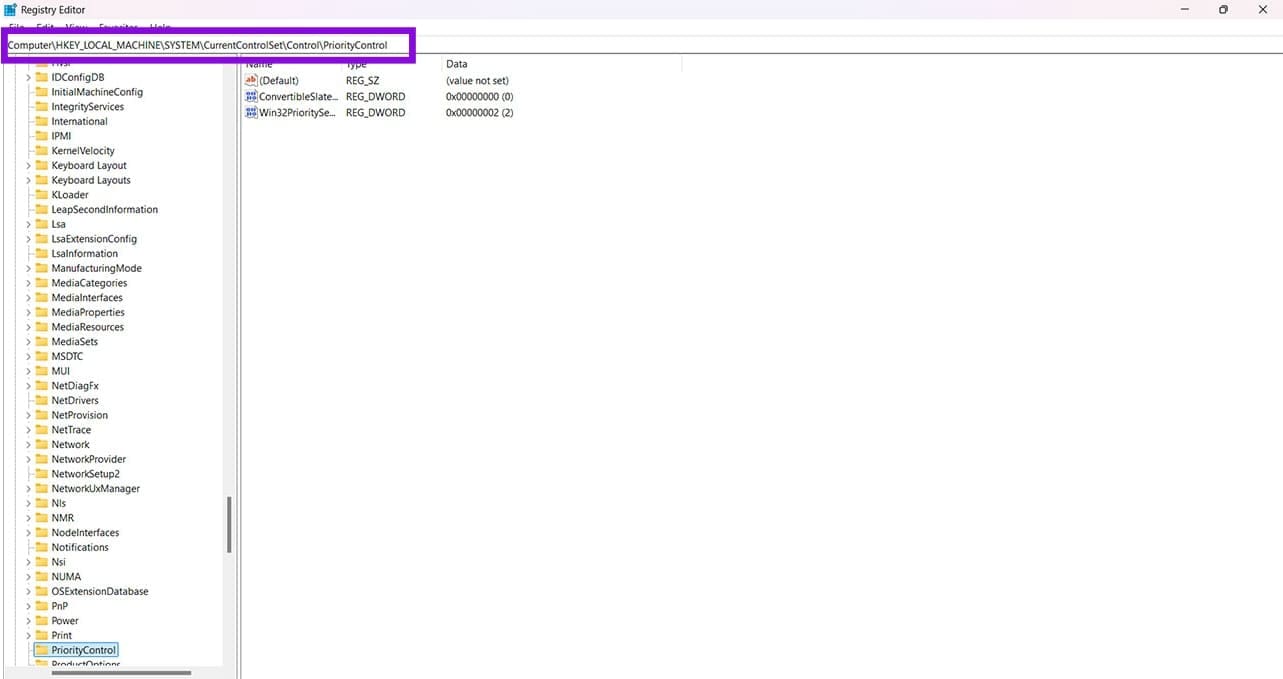
Step 3. Right-click in the main window, hover over “New,” and click “D-Word (32-bit) Value.”
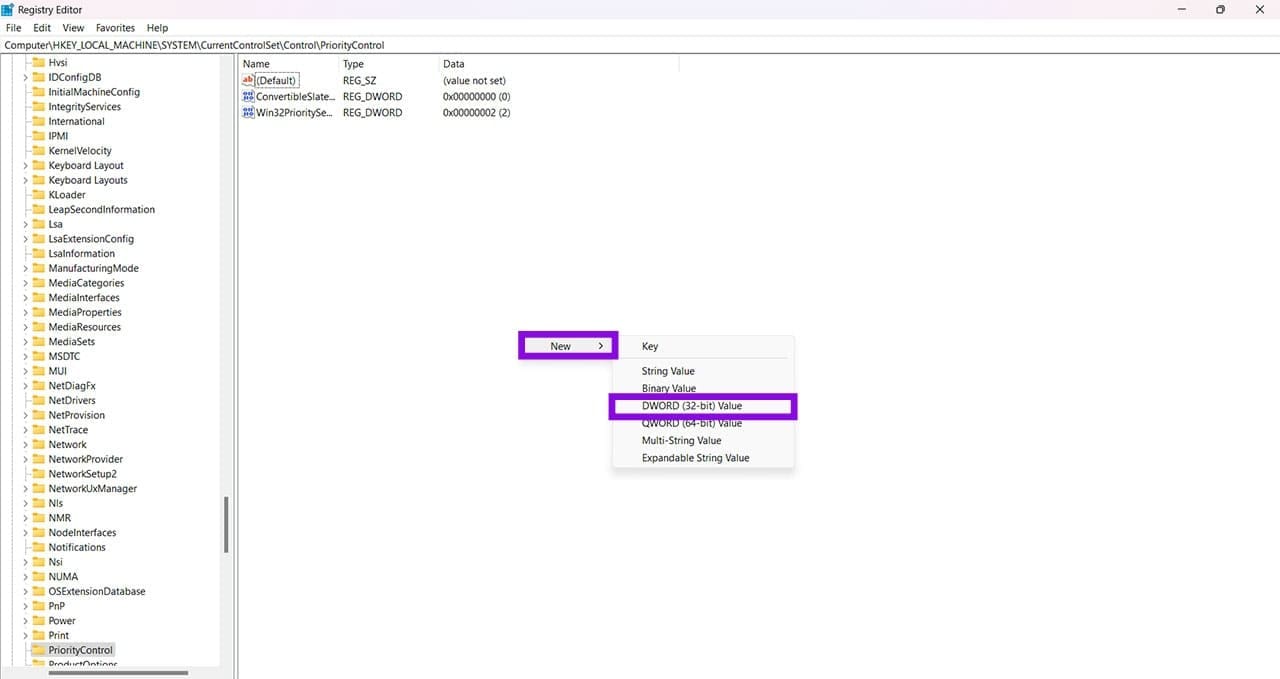
Step 4. Name the value “Win32PrioritySeparation” and click to finalize.
Step 5. Set the value to 26 (decimal) to favor foreground programs or 18 (decimal) to favor background services. Note that many systems already use one of these values by default.
Step 6. Click “OK” to finalize and restart your PC.