If your USB exFAT drive not showing up on Windows 11 is a problem for you, the cause is almost always something Windows can fix on its own. Typically, the resolution depends on just adding the proper drive letter or status. Here’s what’s likely going on and how to get the drive working again.
Fix 1 – Basic Troubleshoot if exFAT Drive Not Showing Up
Before you try modifying settings, go through these three options to check if the issue isn’t with the particular USB port.
- Unplug the drive and plug it into a different USB port, ideally one on the back of a desktop rather than a front-panel port or hub.
- Test the drive on another computer to rule out a hardware failure. If it doesn’t show up there either, the drive itself is likely the problem.
- Safely eject the drive, reinsert it, and restart your PC before trying anything more involved.
Fix 2 – Assign a Drive Letter
If the drive shows up in Disk Management but not File Explorer, it almost certainly just needs a letter.
Step 1. Right-click the “Start” button and select “Disk Management.”
Step 2. Find your exFAT drive in the list – it will typically show its correct size but no drive letter next to it.
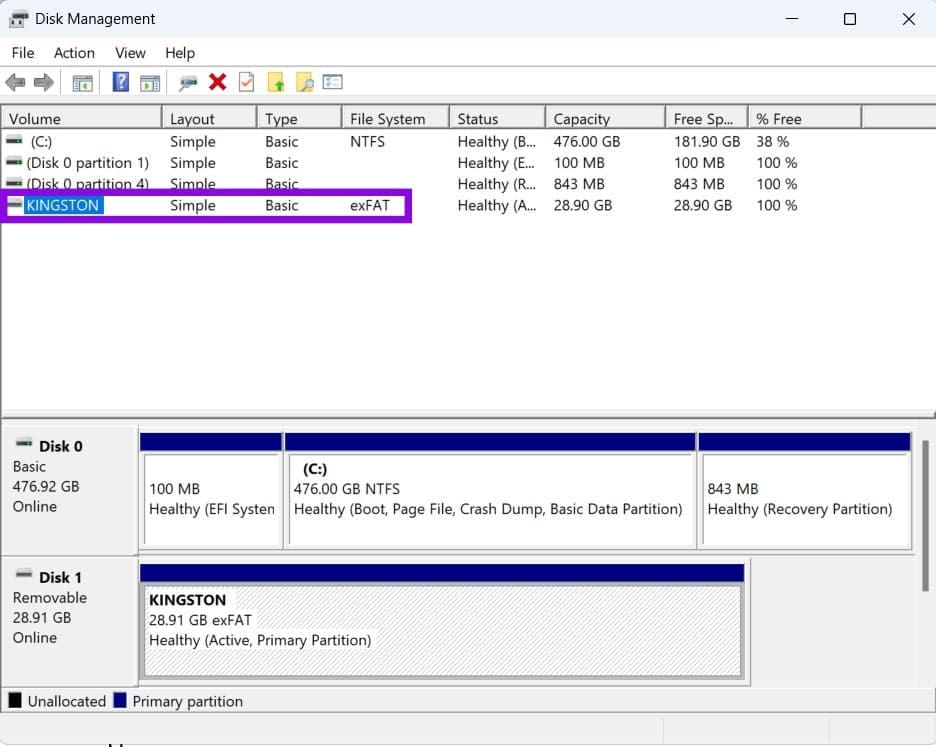
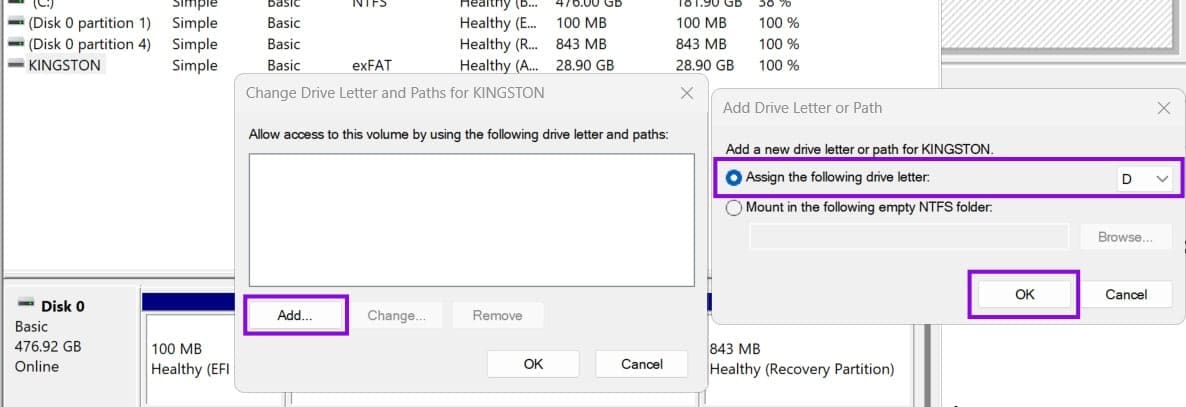
Step 3. Right-click the partition and select “Change Drive Letter and Paths.”
Step 4. Click on “Add,” choose “Assign the following drive letter,” pick a letter, and click “OK.”
Fix 3 – Mark the Partition Active or Bring the Disk Online
If the drive shows as “Offline,” “NotInitialized,” or “Unallocated” in Disk Management, Windows can’t mount any file system on it until that status is corrected.
- In DiskManagement, right-click the partition (on the pane at the bottom) and select “MarkPartitionasActive,” then follow the prompts.
- If the disk itself (not just the partition) shows as Offline, right-click the disk label on the left and select “Online.”
- If it shows as “Not Initialized,” right-click it, select “InitializeDisk,” and choose “GPT” for modern drives over 2TB or “MBR” for older or smaller ones.
- If the disk shows as “Unallocated,” select “New Simple Volume,” then follow the prompts.
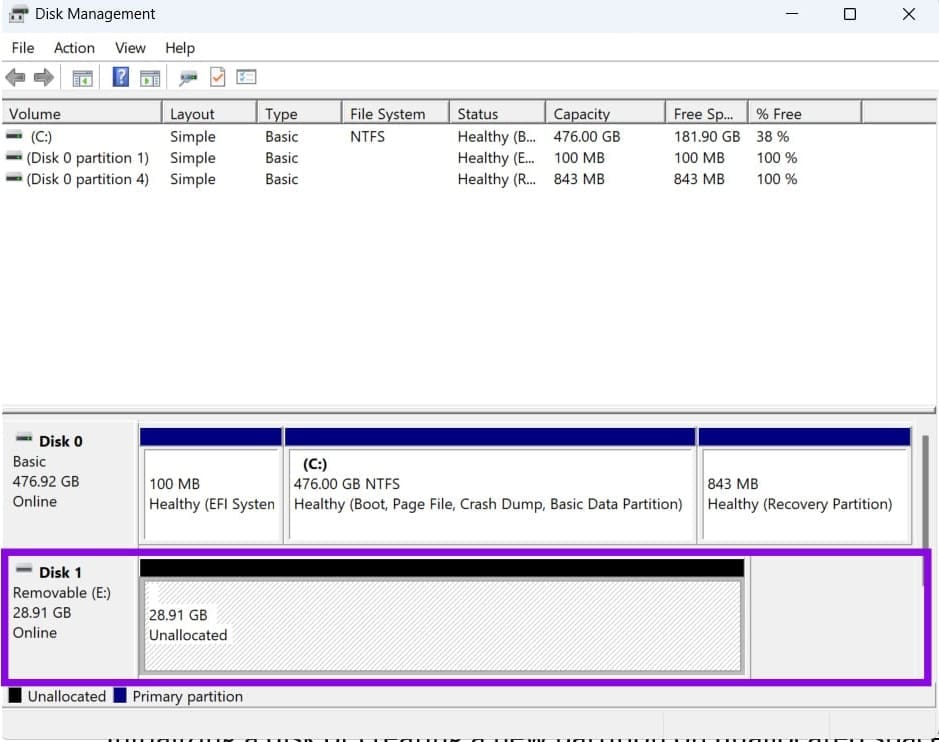
Initializing a disk or creating a new partition on unallocated space will erase any existing data, so only proceed here if the drive is already backed up or the data isn’t critical.
Fix 4 – Update the Disk and USB Drivers
Step 1. Right-click the “Start” button and select “DeviceManager.”
Step 2. Expand Disk drives, right-click on the USB or external drive, and select “Update driver.” Choose “Search automatically for drivers.”
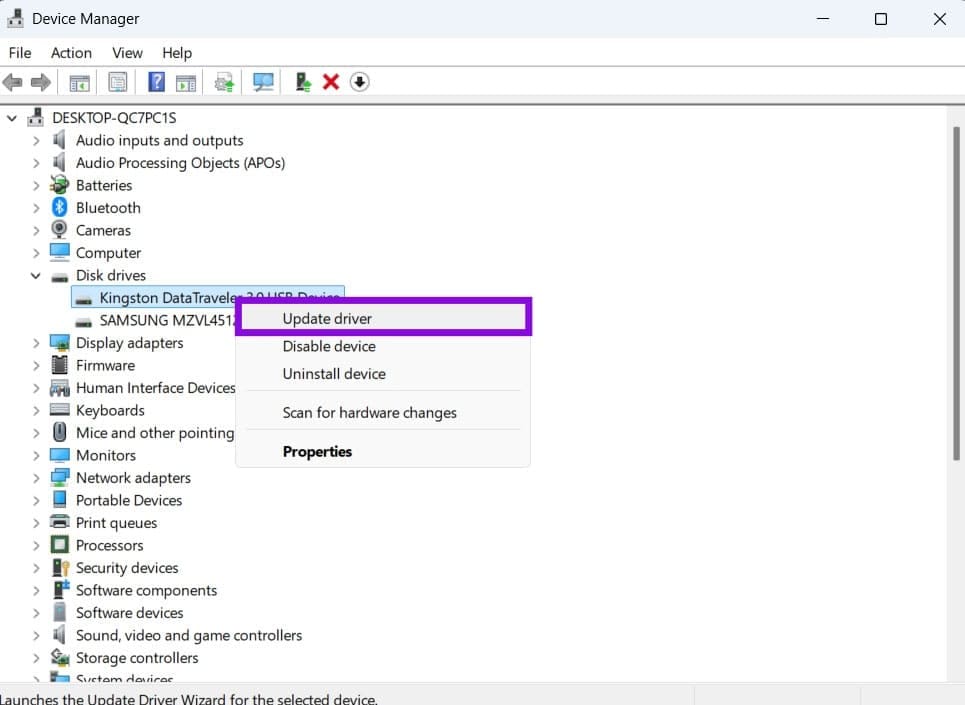
Step 3. Do the same for any entries under “Universal Serial Bus controllers” if the driver update doesn’t resolve it.
Fix 5 – Run the Hardware Troubleshooter
If the exFAT drive not showing up on Windows 11 persists through driver updates, you might need to troubleshoot it.
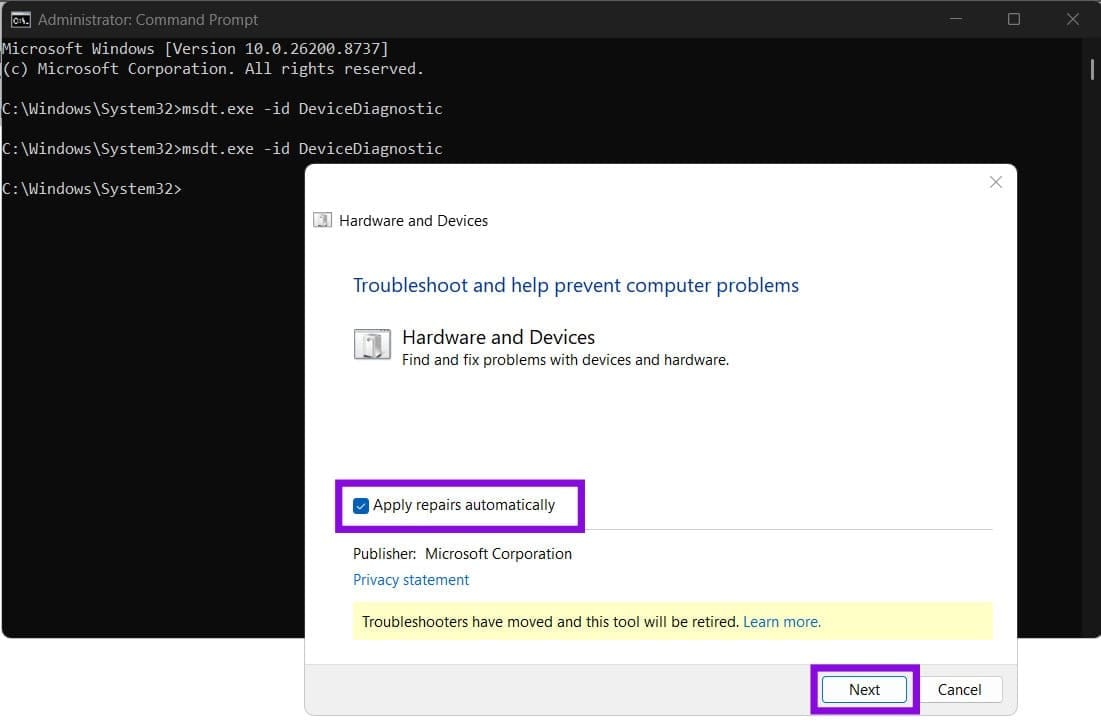
Step 1. Hit “Win + R,” type in “cmd,” and press “Ctrl + Shift + Enter” to open an elevated Command Prompt as an admin.
Step 2. Run the following command:
msdt.exe -id DeviceDiagnostic
Step 3. Choose “Advanced” and check “Apply repairs automatically,” then click “Next” to let the troubleshooter scan for hardware issues.
Fix 6 – Run CHKDSK and SFC
If the drive appears but behaves inconsistently, or if you suspect corrupted system files are interfering with how Windows reads removable drives, use this built-in scan.
Step 1. Open the Command Prompt as an admin.
Step 2. Run “sfc /scannow” and let it complete.
Step 3. Run “chkdsk X: /f” (replacing X with your drive’s letter) to scan for and repair file system errors on the drive itself.
Fix 7 – Reformat the Drive
If nothing above works, reformatting will almost always bring the drive back, but it erases everything on the drive, so back up any recoverable data first if you can.
Step 1. In DiskManagement, right-click the drive and select “Format.”
Step 2. Set “File system” to “exFAT,” and leave all the other options as default.
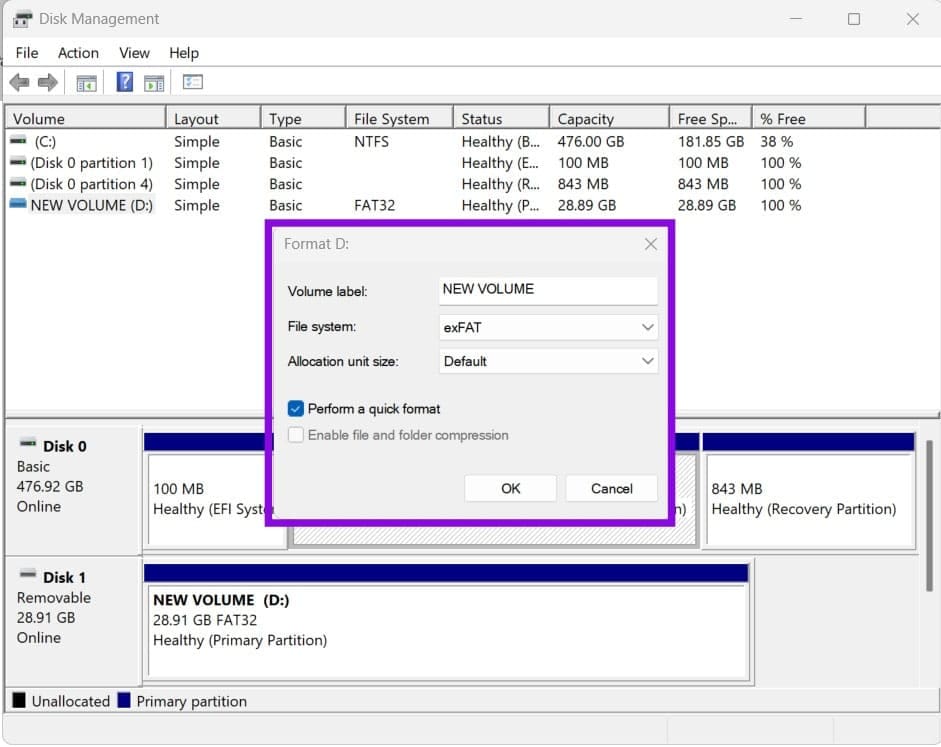
Step 3. Click “OK” and wait for the process to finish.