Nobody likes noise during a call. Worse still is noise during a Microsoft Teams call, when noise suppression is supposed to make things clearer. If you’re facing issues with these unwanted sounds, this article will provide a few troubleshooters for Teams noise suppression.
Contents
Fixing Issues With Teams Noise Suppression
Noise suppression works in tandem with your microphone to filter out certain sounds that might distract other members in a meeting. Microsoft Teams has made a few overhauls to the software behind this technology too, so if you’re having trouble with noise suppression, Teams or its interface with Windows, your mic might be to blame. Let’s take a look at some fixes:
Check Noise Suppression Settings
First things first, ensure that Teams’ noise suppression is actually on. You can do this via the MS Teams noise suppression settings:
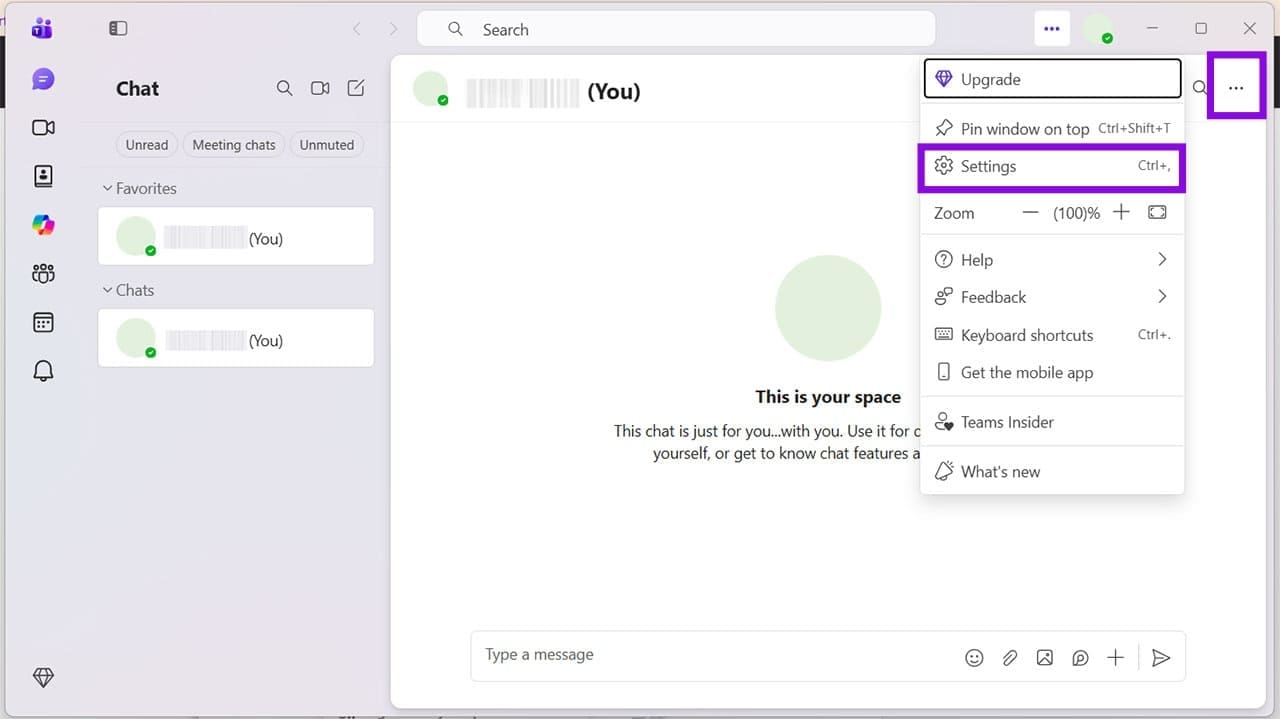
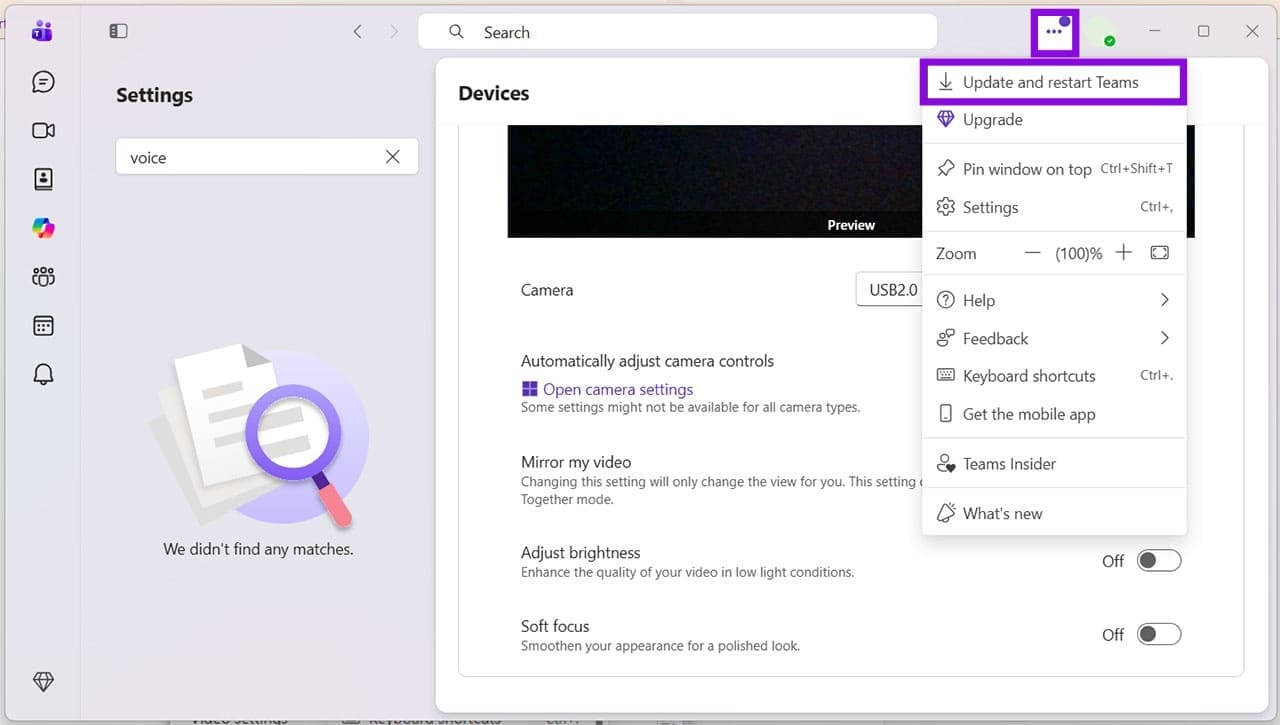
Step 1. Click the ellipses menu (three dots) next to your profile picture and choose “Settings” from the dropdown list.
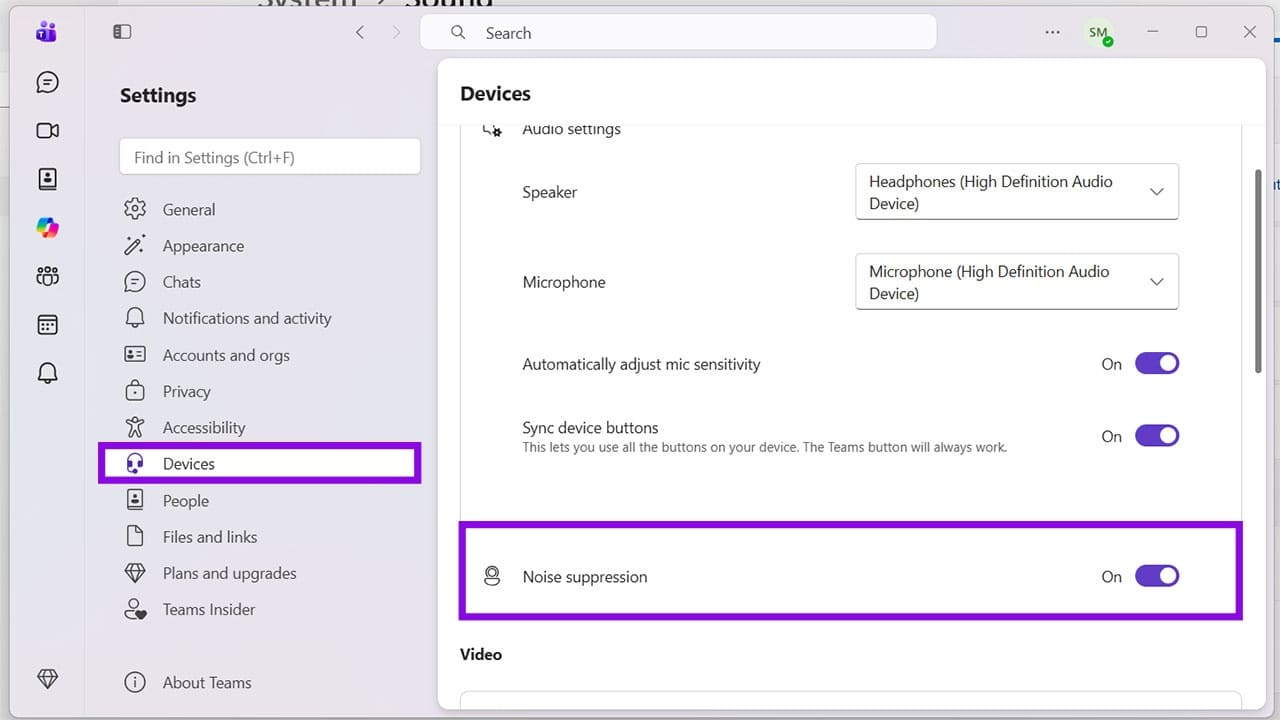
Step 2. Click “Devices” in the side panel, ensure that the microphone listed is the one you’re using, and that “Noise suppression” is toggled to “On.”
Clear the Cache
With the recent Teams overhauls of noise suppression, there are reports that the cache can also be the cause of things not working correctly. Clearing it will allow you to start fresh. Here’s how (depending on the version of Teams you’re using):
Step 1. Open the Run Dialog (Win + R) and type “%localappdata%\Packages\MSTeams_8wekyb3d8bbwe” into the box before hitting “Enter.”
Step 2. You’ll be taken to an Explorer Window. From here, search for the following folders and delete the files inside, and only the files, not the folder. application cache\cache,” “blob_storage,” “Cache,” “Databases,” “GPUcache,” “IndexedDB,” “Local Storage,” “Tmp.”
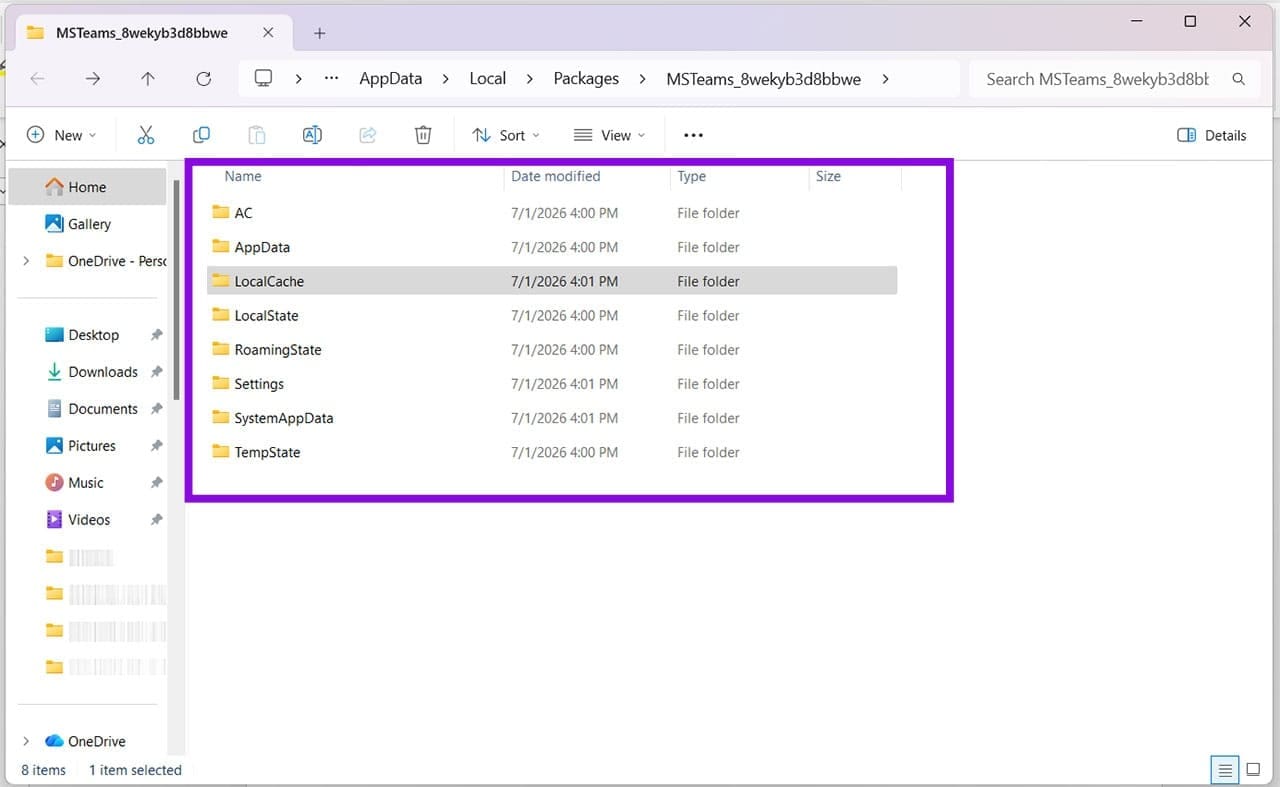
Step 3. Restart your machine, and Windows will rebuild all the deleted files in the cache.
Update Your App
It’s always important – especially with all the tweaks Microsoft’s been making to noise suppression in Teams recently – to keep your software up to date. If you’re still having issues, ensure that you’re properly updated. You can do so by clicking on the ellipses menu and selecting “Update and restart Teams” from the dropdown list.
It also goes without saying that keeping your operating system up to date is just as important.
Switch Mics and Ports
You might be running into issues with your mic, but how do you know it’s just that mic? That’s easy: you swap it out or try a different port. This is a good way to test for hardware trouble with your device or PC. If another port or microphone properly suppresses noise, you’ve found your issue.
Disable Windows Audio Enhancements
From the Windows side, the Audio Enhancements feature is designed to offer better processing and noise suppression quality, but can conflict with that of Teams. Try disabling this setting to see if it resolves the issue. Here’s how:
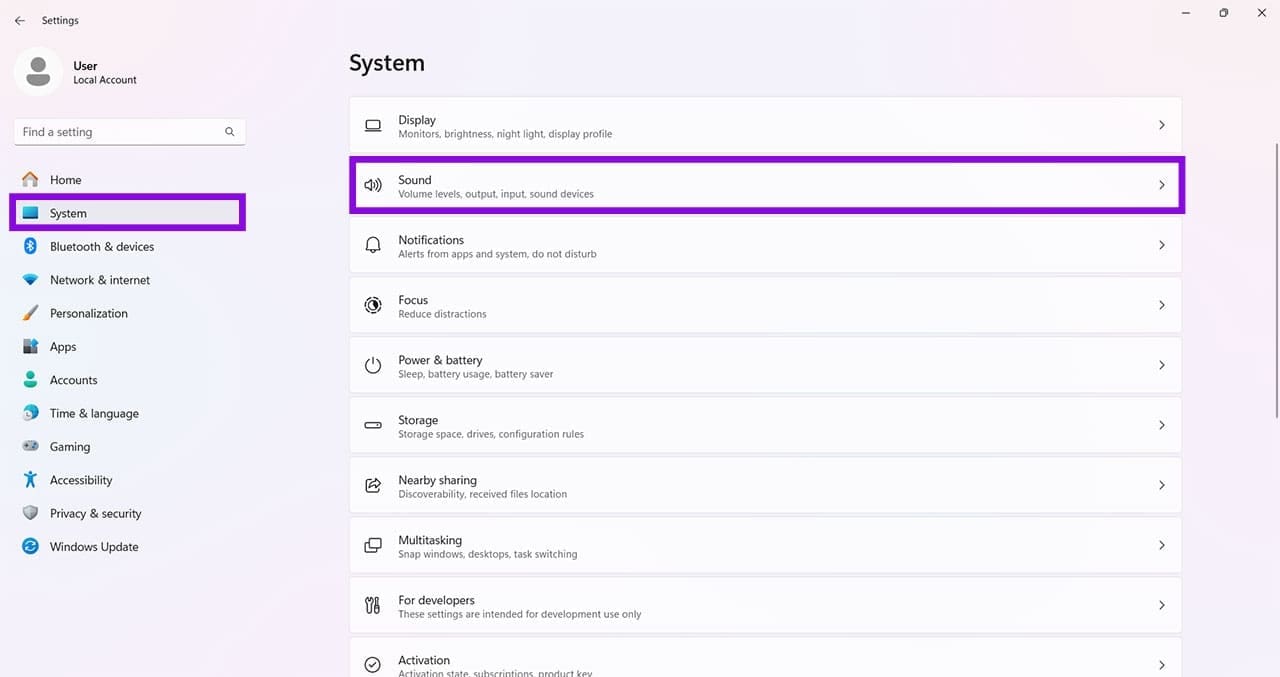
Step 1. Open “Settings” (Win + I) and click “Sound” in the “System” panel.
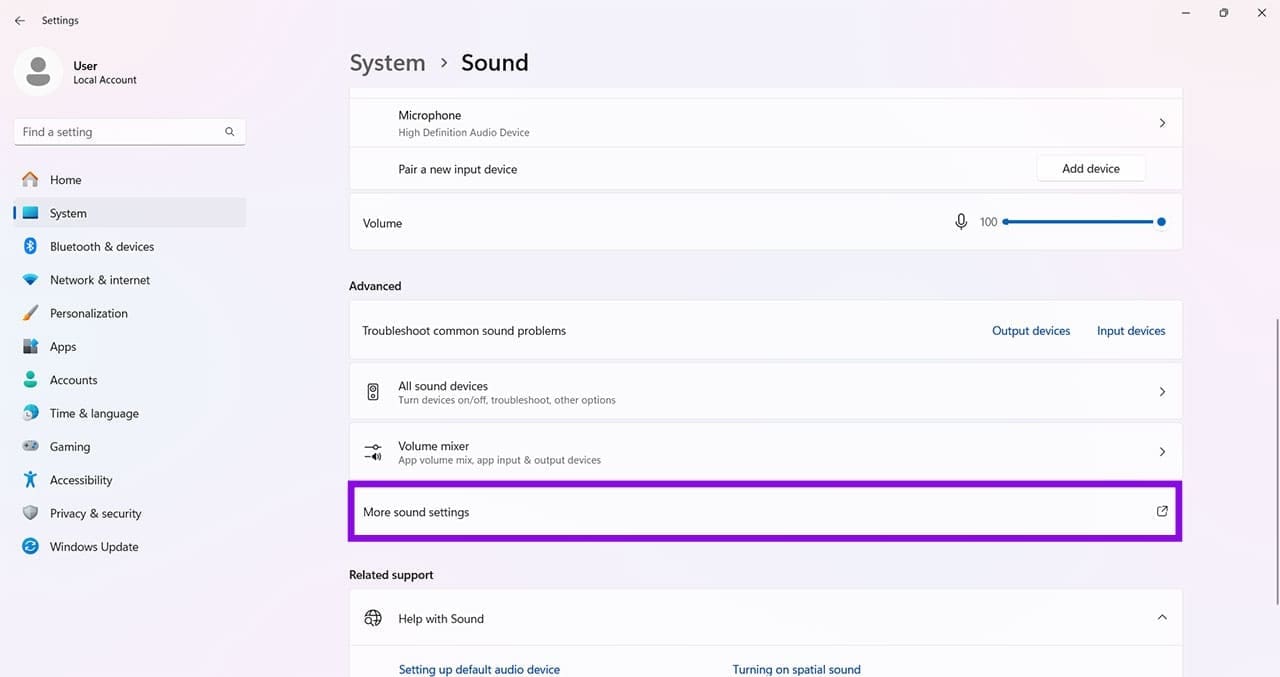
Step 2. Scroll down and click “More sound settings” under “Advanced.”
Step 3. Select your microphone in the “Recording” tab.

Step 4. Ensure that “Enable audio enhancements” is unchecked in the “Advanced” tab.
Step 5. Click “OK” to finish.