
If you see Night Light not working in Windows 11 or is perpetually stuck in one state regardless of what you do, the cause is usually one of a few well-known culprits: a display driver issue, incorrect location or time settings, or a corrupted settings cache. Here’s how to work through them.
Fix 1 – Fix Location and Time Settings
If Night Light doesn’t come on automatically at the scheduled time, you might have a faulty time zone setting.
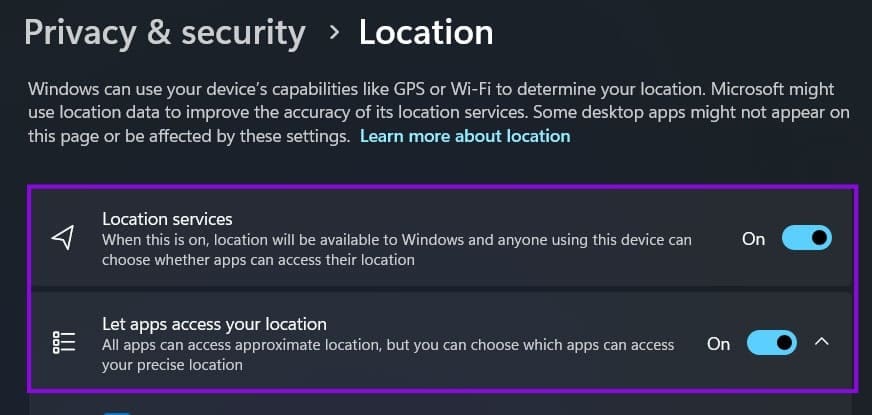
Step 1. Go to “Settings,”then to “Privacy & security.” In “Location,” make sure location services are turned on.
Step 2. Go to “Time & language,” then to “Date & time,” and confirm “Set time zone automatically” is on. If you’re traveling or your PC has picked up the wrong time zone, turn it off and set the correct zone manually.
Step 3. Restart your PC, then go back to “Settings,” then to “System” and “Display.” For “Night Light settings,” you want the schedule to be set to “Sunset to sunrise” or the custom hours you want.

Fix 2 – Update or Reinstall the Graphics Driver
Since Night Light depends on the display driver, an outdated, missing, or generic driver could be at fault.
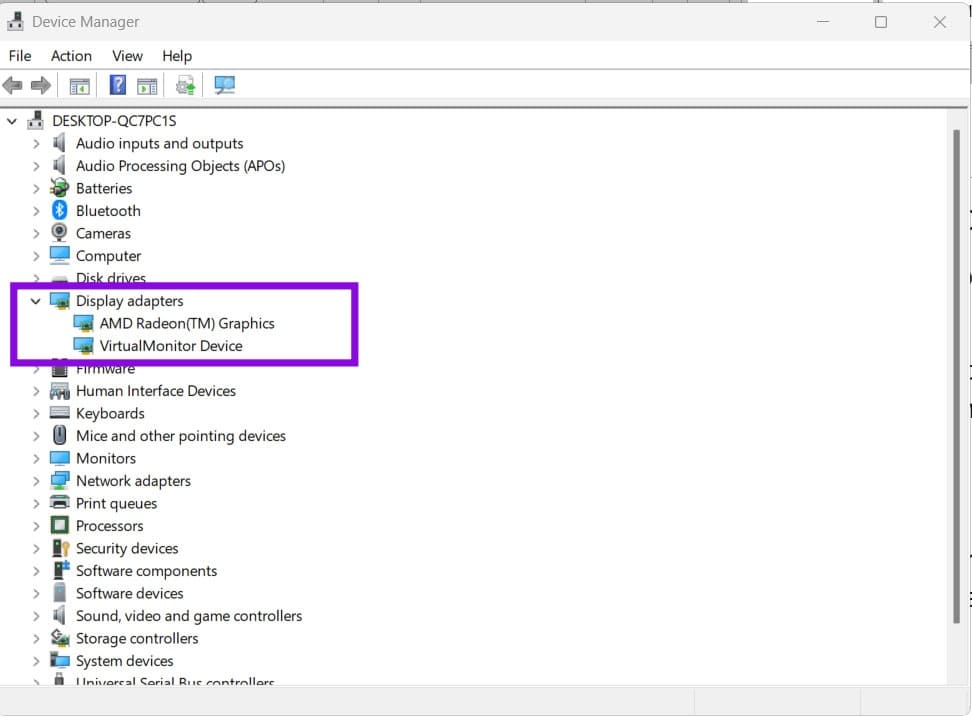
Step 1. Right-click Start and select “Device Manager,” then expand “Display adapters.”
Step 2. If your graphics card is listed as “Microsoft Basic Display Adapter,” no real driver is currently installed, which could cause issues.
Step 3. Visit your PC or graphics card manufacturer’s support site (Intel, NVIDIA, AMD, or your laptop OEM) and download the correct driver for your exact model (Updating the driver automatically might not work).
Step 4. Install it, restart your PC, and check Night Light again.
If your Display adapter section has additional options, go to the active display adapter and update it. Alternatively, you can use your graphics software to re-download updates.
In some cases, uninstalling the current driver in Device Manager (right-click it and select “Uninstall device”) might solve this. If you’re left without a driver, Windows should reinstall it on restart.
Fix 3 – Close Conflicting Third-Party Apps
If you have blue-light or color-adjustment software installed, this can conflict directly with Night Light. Close or uninstall the third-party app, restart your PC, and test Night Light on its own before deciding whether to keep both or pick just one.
Fix 4 – Run the Display Troubleshooter
If you see Night Light not working in Windows 11 with the most recent update, try using the automatic troubleshooter.
Step 1. Open “Settings,” go to “System,” and find “Troubleshoot.”
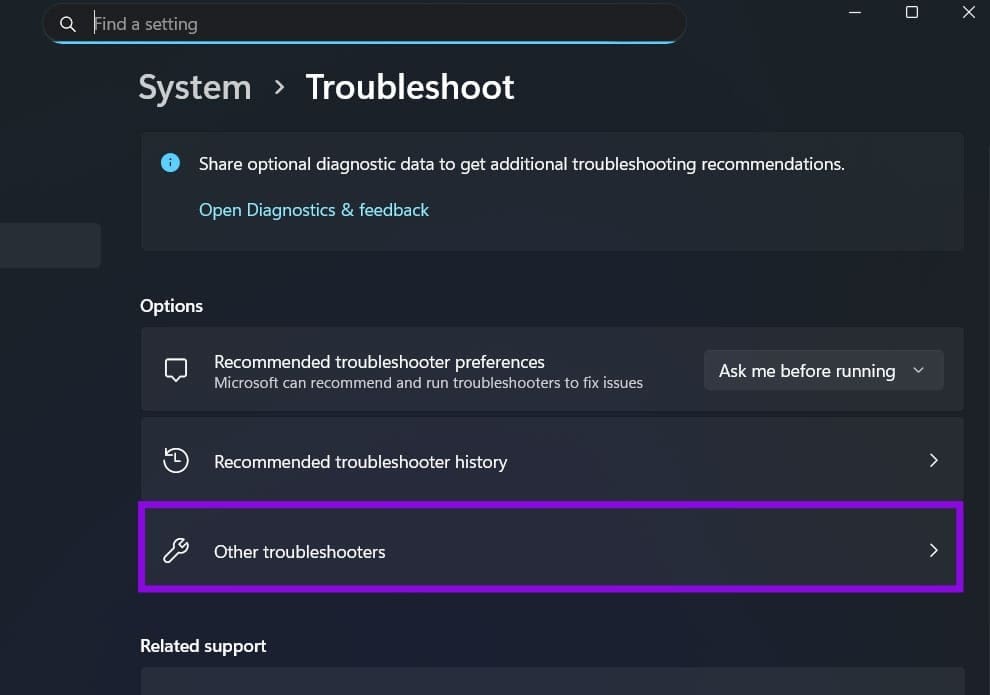
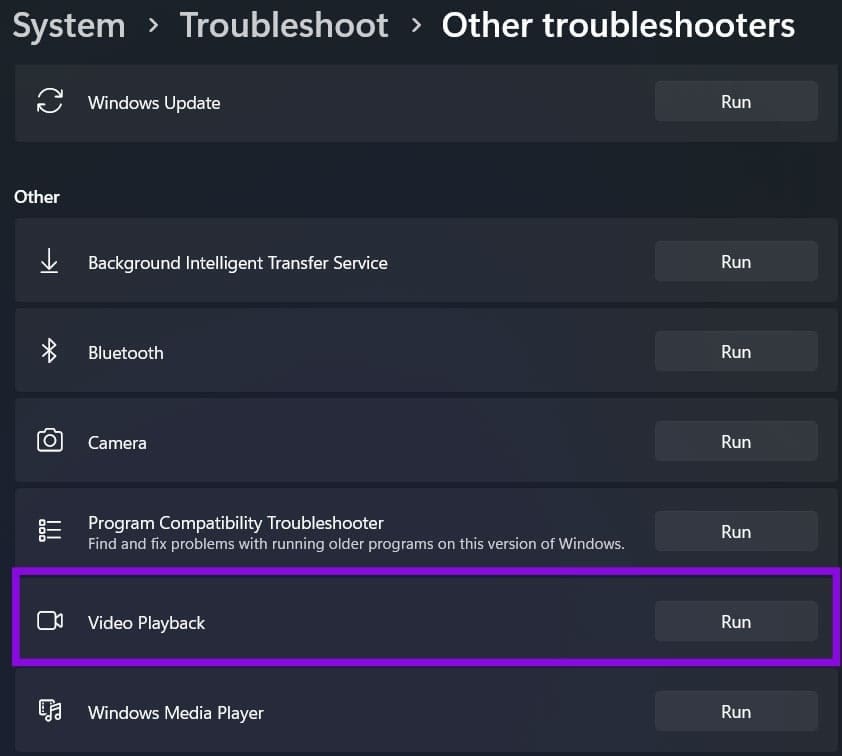
Step 2. Go to “Other troubleshooters” and find “Video Playback” or “Display.”
Step 3. Click on “Run” for that troubleshooter.
Step 4. Follow the on-screen prompts and apply any fixes it suggests.
Fix 5 – Reset Night Light via Registry (For a Grayed-Out Toggle)
If the Night Light toggle itself is grayed out and unresponsive rather than just stuck on or off, this targeted fix clears the corrupted settings cache behind it.
Step 1. Press “Win + R,” type in “regedit,” and hit “Enter.”
Step 2. Navigate to:
HKEY_CURRENT_USER\Software\Microsoft\Windows\CurrentVersion\CloudStore\Store\Cache\DefaultAccount
Step 3. Inside “DefaultAccount,” find and delete the two subfolders beginning with “$$windows.data.bluelightreduction.bluelightreductionstate” and “$$windows.data.bluelightreduction.settings.”
Step 4. Close Registry Editor and restart your PC.
This resets Night Light’s stored state entirely, which should return it to factory settings.