When switching to a new operating system, patience is key. You may not know how to properly set up your computer or perform basic actions such as splitting the screen or taking a screenshot. But as time goes by, you’ll quickly get the hang of the new OS. In this quick guide, we’ll show you how to take different screenshot types on ChromeOS.
Contents
How Do You Take a Screenshot on a Chromebook?
How to Take a Full-Screen Screenshot
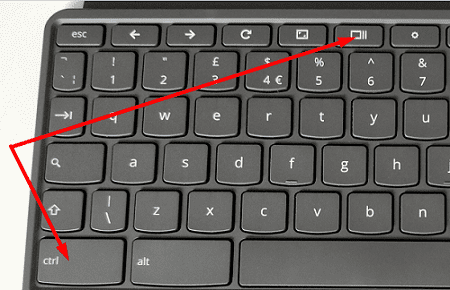
- Press the Ctrl and Show windows keys simultaneously.
- Note: The “Show windows” key is the sixth key from the left and has a rectangle icon with two lines.

- Note: The “Show windows” key is the sixth key from the left and has a rectangle icon with two lines.
- Your screenshot will pop up in the lower right-hand corner of the screen.
- Click on the image to further edit it.
How to Take a Partial Screenshot
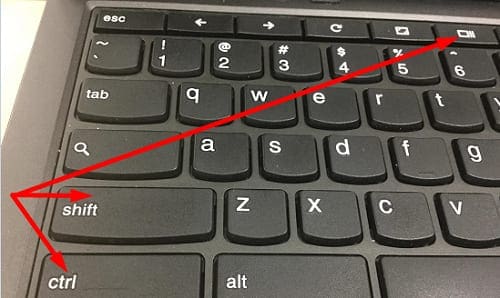
- Press the Shift, Ctrl, and Show windows keys at the same time.

- Your mouse cursor will turn into a crosshair icon. Use it to click and drag the screen area you want to capture.
- Let go of your mouse button to capture the screenshot.
You use three screenshot options on ChromeOS: full-screen, partial, or you can simply take a screenshot of the active window.
Alternatively, you can also take a screenshot using the menu located at the bottom right. Simply select the time, and then select Screen capture.
How to Find Saved Screenshots on Chromebook
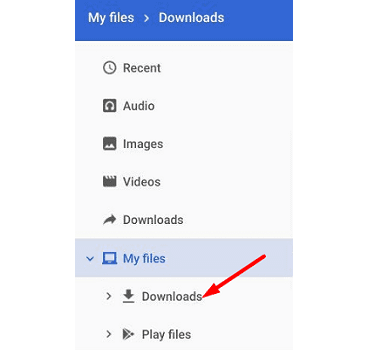
Your Chromebook stores all of your screenshots in the Downloads folder under the Files app. If you don’t want to keep your screenshots on your Chromebook’s drive, you can save them in the cloud using Google Drive.
- Go to Files, and select the Downloads folder.

- Select the screenshots you want to upload to Google Drive.
- Hit the Share option and then click on Save to Drive.
How to Take a Screenshot on ChromeOS Tablets
If you own a ChromeOS tablet, and you want to take a full-screen screenshot, press the Power and Volume down buttons simultaneously.
On the other hand, if you want to access additional screenshot options, hold the Power button, and select Screen capture.
Conclusion
To take a full-screen screenshot on your Chromebook, press the Ctrl and Show windows keys simultaneously. If you want to capture a partial screenshot, press the Shift, Ctrl, and Show windows keys. Your Chromebook automatically saves new screenshots in the Downloads folder. Which screenshot method do you prefer to use? Let us know in the comments below.