The old Start Menus of Windows 95, XP, and 7 might seem like a distant memory, but (thanks to Windows 8) Microsoft knows that users are very attached to the menu that springs from the icon at the bottom-left of the screen. The Windows 11 Start Menu takes many shapes and forms, including grouping apps into categories.
If you want to disable Category Start Menu in Windows 11, then this article is for you.
Disable Category Start Menu in Windows 11 – Different Methods
The Category Start Menu is (at the time of writing) a new feature, so much so that not all regions and users have it enabled yet. As with any cosmetic change, there are bound to be those who want to go back to the old layout. If you’re one of them and you want the “Pinned” or “List” view back in focus, try the changes below.
Using the Group Policy Editor
Changing the Category Start Menu isn’t straightforward as other changes, but definitely possible. First, let’s look at turning it off in the Group Policy Editor:
Step 1. Open the Run dialog (Win + R) and type “gpedit.msc” and hit “Enter.”
Step 2. In the Group Policy Editor, click “Computer Configuration” in the sidebar.
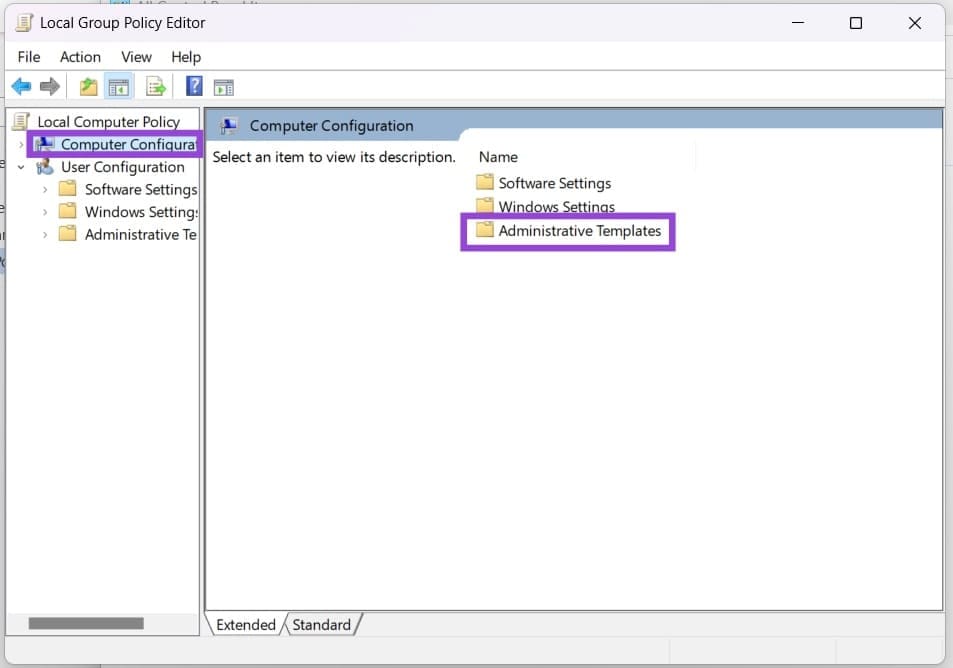
Step 3. In the main window, click “Administrative Templates,” then “Start Menu and Taskbar.”

Step 4. Find and double-click “Hide Category view in the Start Menu.”
Step 5. In the window that pops up, click the “Enabled” option to hide the view.
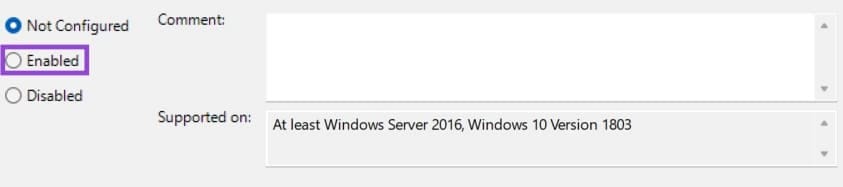
Step 6. Click “OK” to finalize. If you want it back, just change the toggle to “Disabled.”
Via the Registry
Another way to hide the Category Start Menu is through the Registry, where many aspects of your PCs functionality can be tweaked and adjusted. Just be careful when making changes, because you can make your PC unstable if you don’t know what you’re doing. You should be fine following these steps:
Step 1. Open the Run Dialog (Win + R) and type “regedit” before hitting (Ctrl + Shift + Enter) to run as Admin.
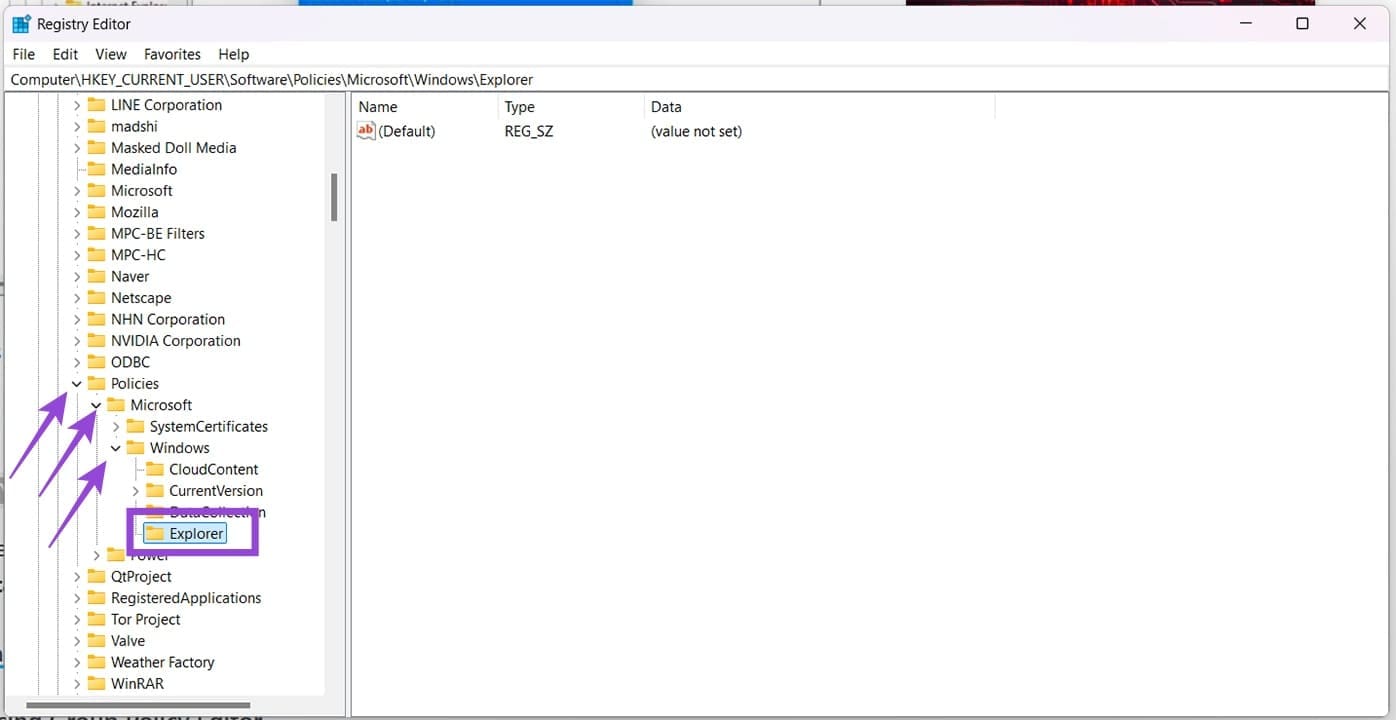
Step 2. In the Registry navigate to the following section. You can enter this destination into the Address Bar at the top of the window: “HKEY_CURRENT_USER\Software\Policies\Microsoft\Windows\Explorer”
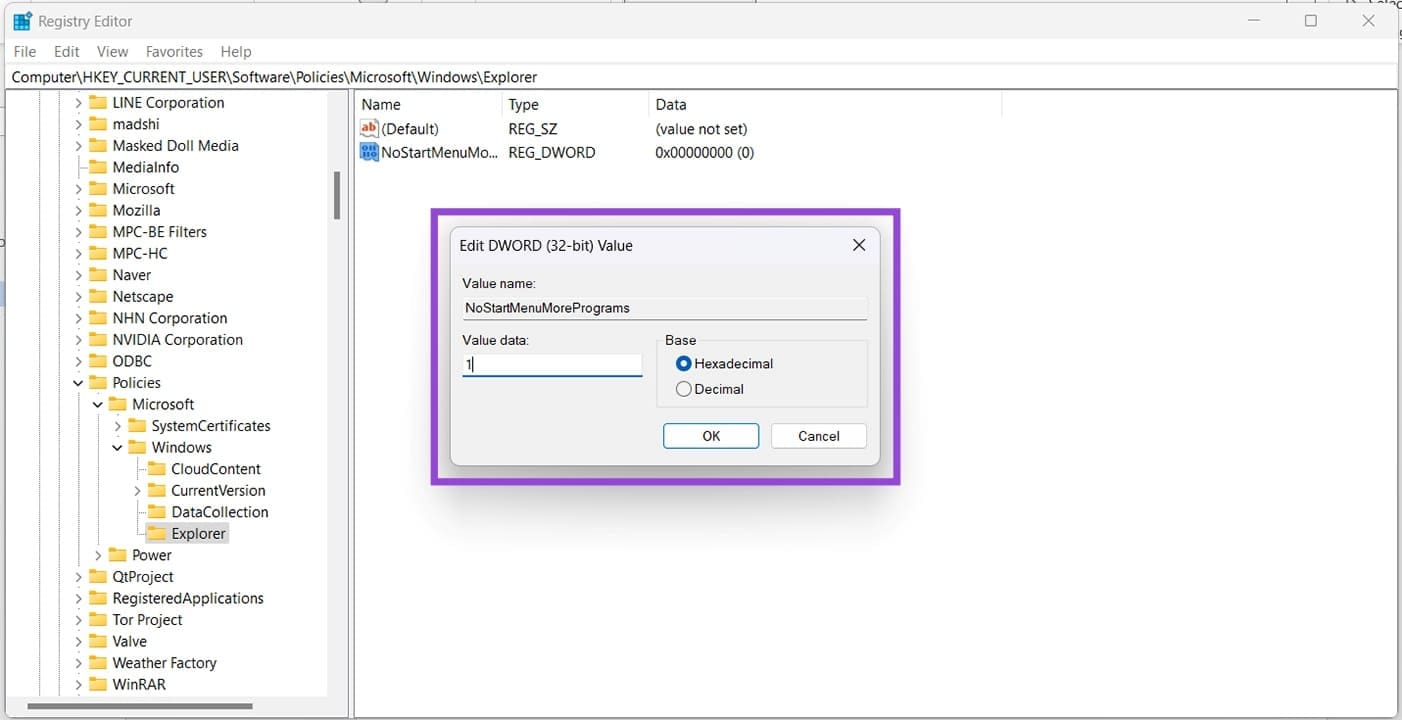
Step 3. Right-click the main window and choose “New” and “DWord (32-bit) Value” from the context menu.
Step 4. Name the value “NoStartMenuMorePrograms” and set the “Value” to 1.
Step 5. Reopen you Start Menu and see if the issue is resolved. If not, restart your PC to make sure.
Using Command Prompt
If clicking through too many menus isn’t your style, then you can edit the Registry by trying Command Prompt instead. Here’s what to do:
Step 1. Open the Run Dialog (Win + R) and type “cmd” in before hitting (Ctrl + Shift + Enter) to run as Admin.
Step 2. In the Command Prompt window, type: “reg add “HKCU\Software\Microsoft\Windows\CurrentVersion\Policies\Explorer” /v NoStartMenuMorePrograms /t REG_DWORD /d 1 /f && taskkill /f /im explorer.exe && start explorer.exe” and hit “Enter.”
Step 3. This should adjust the Registry and hide the Category menu from view.