Absolutes are scary, and when you see the message “Your device ran into a problem and couldn’t be repaired” against a black background on your PC, that frustration only gets worse. Thankfully, despite the severe message, it is a problem that can still be addressed, and this article will show you a few ways to do so.
Read on to find out how to fix “Your device ran into a problem and couldn’t be repaired.”
Contents
What Causes This Error
“Your device ran into a problem” error code is quite severe and indicates a major problem that’s keeping your machine from booting properly. Startup repair or Windows recovery may have failed on the first fix attempt. This can be either hardware or software related, and causes include:
- A problem encountered when updating Windows or drivers
- Corrupted system and especially boot files
- Failure of a particular hardware component, like RAM or the hard drive
- Corruption of files, folders, or partitions on your hard drive
How to Fix “Your Device Ran Into a Problem”
Though the error is severe, there are some steps you can take to fix and recover:
Run Startup Repair
First, try to make use of Windows’ built-in repair tool twice if necessary. Here’s what to do:
Step 1. To enter recovery mode, interrupt the startup process three times. Start the PC, then force shut down. After that, the Advanced Startup menu should appear.
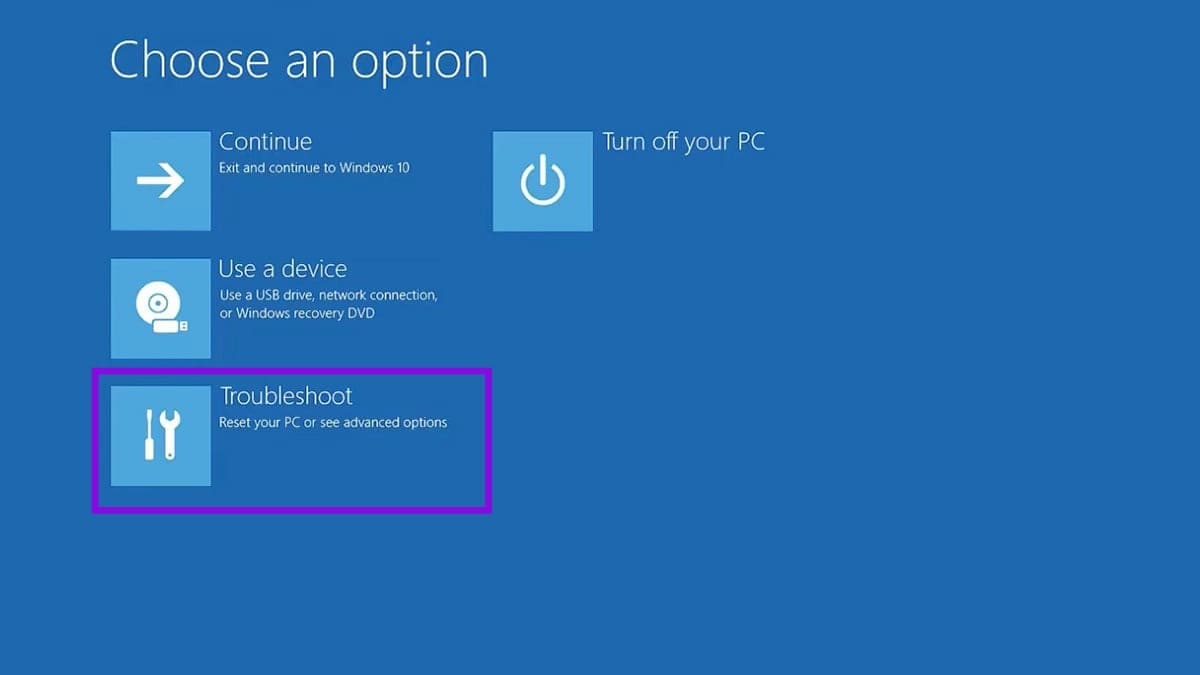
Step 2. Click the “Troubleshoot” option and then choose “Advanced options” in the next screen.
Step 3. In this menu, click the “Startup Repair” option.
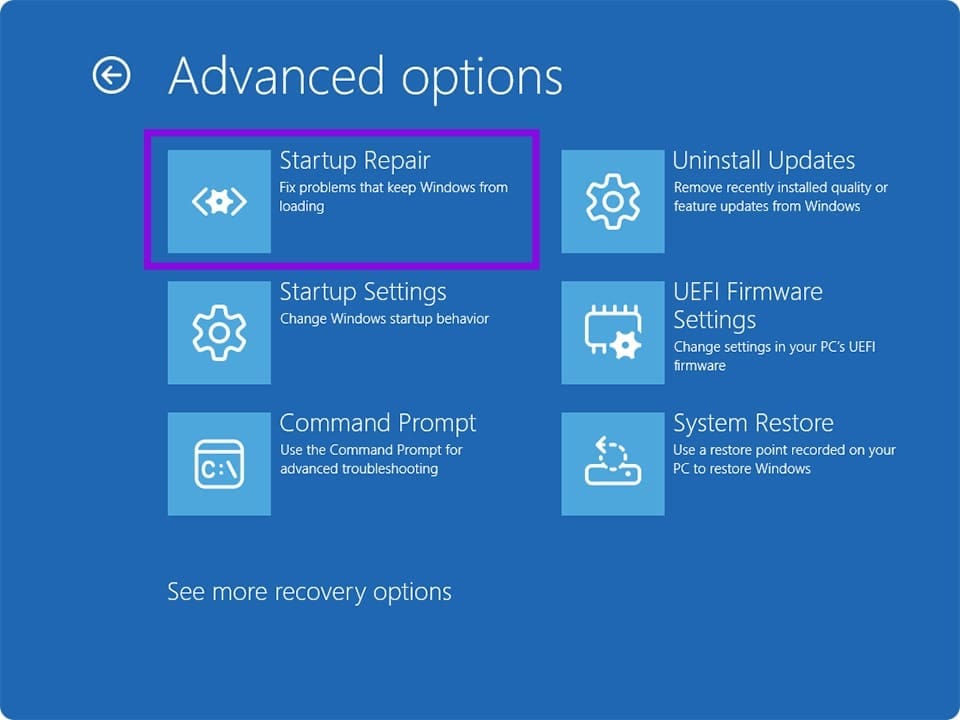
Step 4. Allow the process to run, then reboot your machine and see.
Check Your Disk
Running the Disk Check utility can help you search for and repair drive corruption. To do this:
Step 1. Enter the Advanced Startup by performing three force shutdowns of your PC.
Step 2. Click “Advanced options” and choose “Command Prompt.”
Step 3. In Command Prompt, type “chkdsk [Drive letter]: /f /r” and click “Enter.” “f” fixes logical file system errors, and “r” does the same but locates and recovers bad sectors too. The latter is slower but more thorough.
Step 4. Restart your machine after completion.
Run SFC
Another utility you can run in Command Prompt is the System File Checker (SFC) to check for file corruption. To do this:
Step 1. Start recovery mode, and follow the options above to open Command Prompt.
Step 2. In Command Prompt, type “sfc /scannow” and select “Enter. “
Step 3. Let the process run and restart afterwards.
Repair the BCD and MBR
For Boot Configuration problems, like BCD and MBR, you try the Command Prompt to repair them. Here’s how:
Step 1. Click “Command Prompt” in “Advanced options.”
Step 2. Type the following, pressing “Enter” after each one: “bootrec/fixmbr” then “bootrec/fixboot” then “bootrec/rebuildbcd.”
Step 3. Restart your machine once done.
Uninstall Updates
If you suspect a recent Windows update is the cause of the malfunction, then you can uninstall the latest update. Here’s how:
Step 1. Enter the Advanced Startup via three shutdowns and select “Advanced options.”
Step 2. Click “Uninstall Updates.”
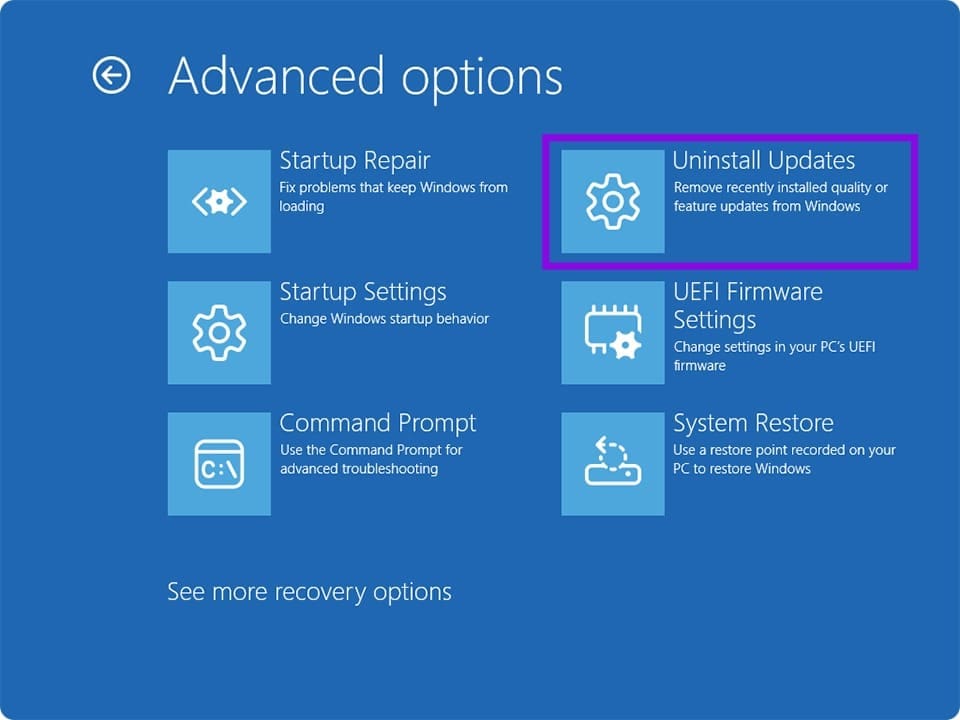
Step 3. Choose the latest update and uninstall it via the prompts on-screen. Restart once done.
Use System Restore
If you have created restore points in Windows before this error, you can use the “System Restore” option in “Advanced options” to revert to a previous point. Simply click the option and choose the point to which you’d like to roll back to.