
When you’re working on something lengthy, you can quickly accumulate duplicates. Since it’s impossible to remember if something was added by simply trying to remember, there’s a good chance you’ll repeat it. But, thanks to a feature in Google Sheets, finding duplicates and erasing them can be easy.
How to Find Duplicates in Google Sheets
Please remember that when you’re ready to erase the duplicates, Google Sheets won’t show them to you in a preview. You won’t know what duplicates you’re erasing. If you want to see what duplicates you’re going to erase, you can have Google Sheets highlight them. We can look at that in the last section.
Once the Google Sheets file is open, select the area where you want Google Sheets to check for duplicates. Click on the Data tab at the top and place the cursor on Data cleanup. A side menu will appear will additional options. Click on the Remove duplicates option.
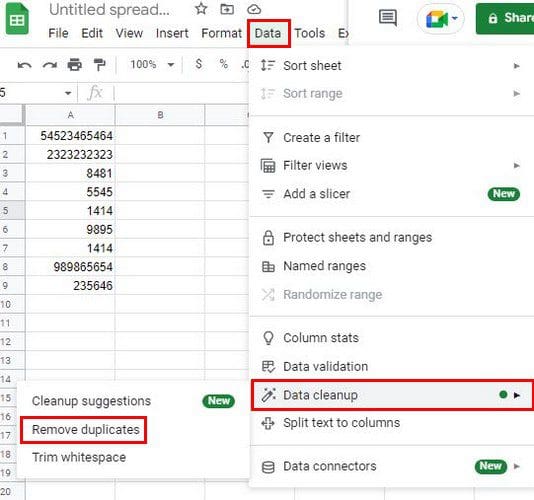
In the next window, you can mark if your data has headers or not. You’ll also see the columns you’ve chosen. If you think you’ve missed one, you can always go back and change it. When you’re good to continue, click on the green Remove duplicates button, and on the next window, you’ll see how many were removed.
Using Add-Ons
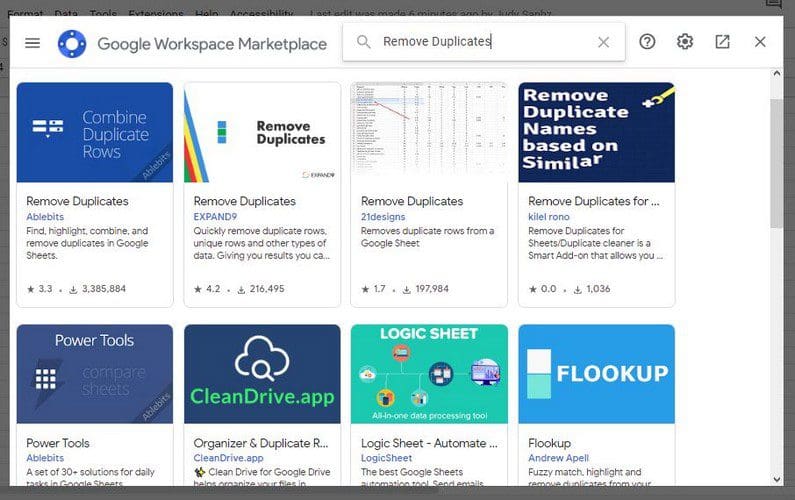
You can also remove the duplicates by using add-ons. If you don’t have any or are ready to use another one, you can install it by clicking on the Extensions tab at the top and clicking on Add-ons > Get add-ons. Make sure to type remove duplicates in the search bar to get the right results.
Once you’ve chosen which add-on you want to use, you’ll need to decide which Google account to which you want to associate the add-on. You’ll also see a list of what you’re giving the add-one permission to; if you’re ok with all of them, click on the blue Allow button at the bottom right.
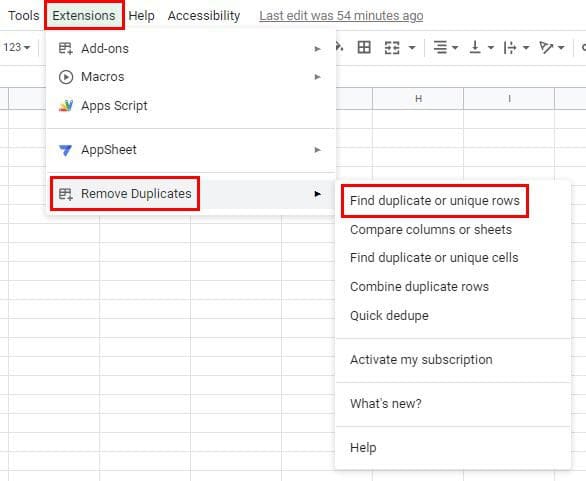
Now that the add-on is installed, go back to your Google Sheets document and click on the Extensions tab, followed by the Remove Duplicates option. Make sure to click on the Find duplicate or unique rows.
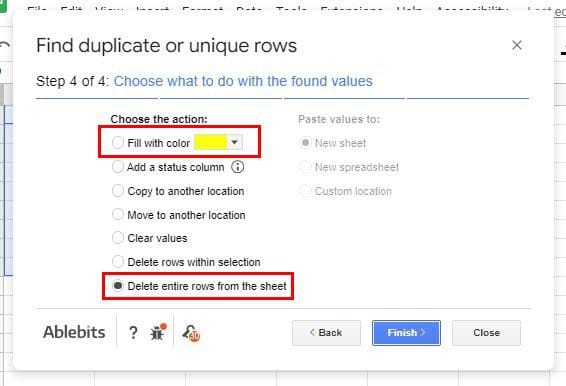
On the next page, make sure that the right range is selected and click on the blue Next button. In step two, choose what you want the add-on to do. Make sure you’ve chosen the Duplicates option. It’ll be the first one on the list. In step three, you’ll also need to indicate if your file has headers or not. In the final step, you can have the add-on only highlight the duplicates if you’re not ready to erase them just yet.
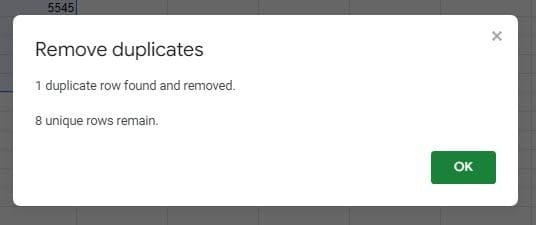
The last message you’ll see is the one telling you how many duplicates were found and deleted. Once you get to that point, you can start over if you want to look for something else, or you can click the Close button to finish up.
Using Formulas
You can also remove the duplicates by using a unique formula. Don’t worry if you’re not too familiar with them. It’s easy to use since there is not much information to enter. On a different cell with no data, enter the equal sign =, followed by an open parenthesis. So your formula should look like this: =(. Here it does look like a sad face. start typing the word unique and click the option when it appears in the results.
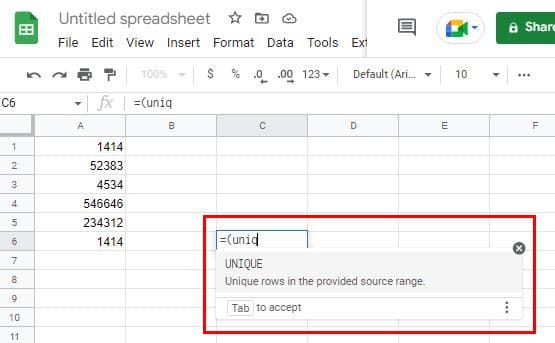
Once the formula is there, select the area where you want the duplicates removed. You can enter them manually, but you can also drag your mouse to select the area. The cell and column numbers will be added automatically. Press Enter or click anywhere else to see how a second table will appear but without the duplicates.
Conclusion
Removing duplicates doesn’t have to be that hard. You can use an add-on, or you can use the built-in feature. If one fails to work, you can always use the other. That way, you’ll never turn in a file with any duplicates. Which method do your think you’re going to try first? Share your thoughts in the comments below, and don’t forget to share the article with others on social media.