Notepad might no longer be the simple text editing tool it was on earlier versions of Windows, but since it now includes Copilot, multiple tabs, and text formatting, it’s become a more powerful tool. But if these advanced settings, or any other settings, are in need of a reset, then we’re here to show you what to do. This article will look how to reset Notepad to factory settings.
Reset Notepad to Factory Settings
Like most things on Windows, there are a few ways to reset your Notepad settings, ranging from simple to advanced. Just to be sure, we’re going to cover them all below:
Reset via Settings
Perhaps the easiest way to start Notepad with factory settings is to reset everything via Settings. Here’s what you need to do:
Step 1. Open Settings (Win + I) and click “Apps” in the sidebar.
Step 2. Click “Installed apps” in the main window.
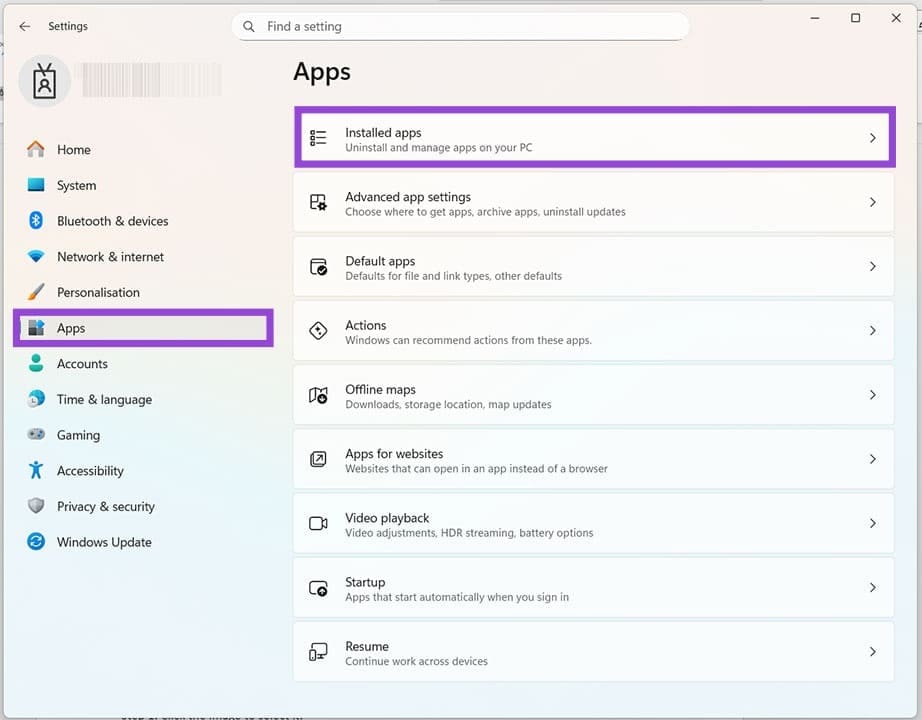
Step 3. Scroll down the list of apps until you reach Notepad.
Step 4. Click the three dots next to it, and choose “Advanced options” from the dropdown menu.
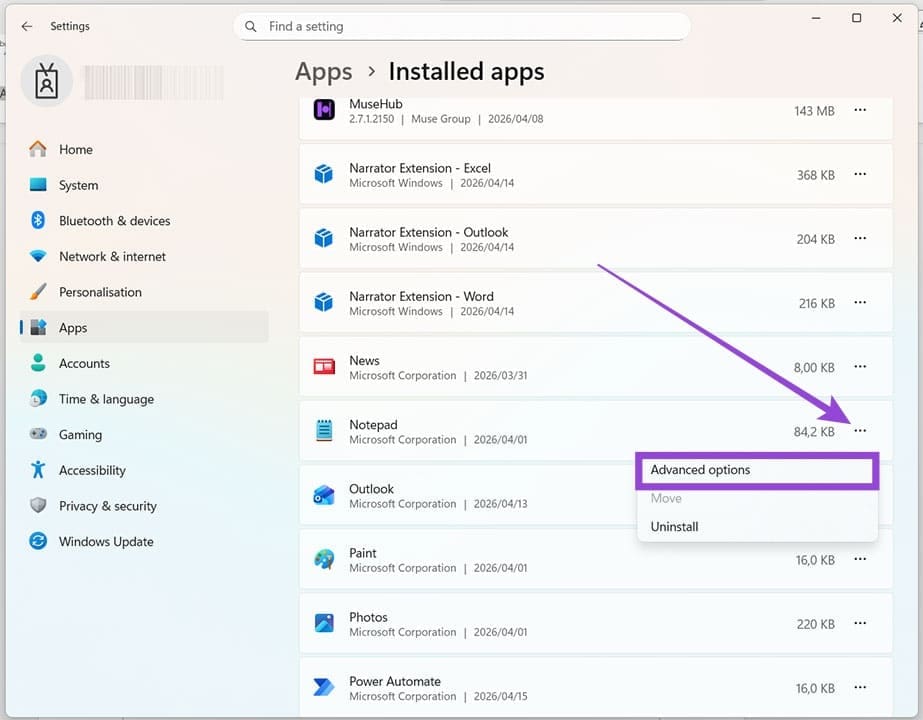
Step 5. In the next menu, scroll down to the “Reset” subsection and click the “Reset” button. Confirm your choice, and Notepad will be reset to default settings.

Reset With File Explorer
The method above deletes Notepad’s app data. If you’re feeling up to the task, you can delete the app data yourself by navigating Explorer. Here’s how:
Step 1. Open a new Explorer window (Win + E).
Step 2. Navigate to “Users” on your main disk, and then choose your username profile.
Step 3. Head to the folder named “Settings,” then “Local,” “Packages,” and then to “Microsoft.WindowsNotepad_8wekyb3d8bbwe”.
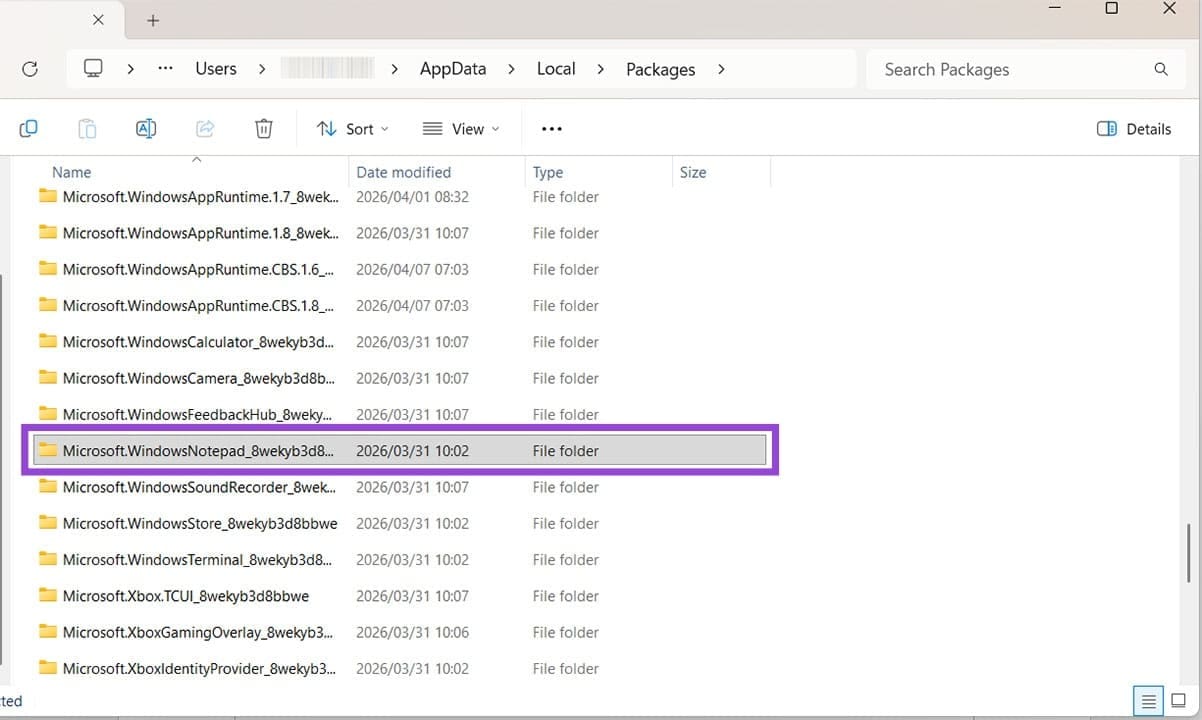
Step 4. Open the “App Data” folder and delete any configuration files you see. This will reset the app.
If you aren’t seeing the folders or files mentioned above, first try making hidden files and folders visible. You can do this by clicking “View” in the Explorer toolbar and selecting “Show” and “Hidden items” from the drop-down menus.

Reset via the Registry
This method is the most advanced, though you should still be able to perform it. Just keep in mind that adjusting anything in the Registry you aren’t sure of runs the risk of destabilizing your PC. Be sure you know what you’re doing and follow the guide below:
Step 1. Open the Run Dialog (Win + R) and type “regedit” before hitting (Ctrl + Shift + Enter) to run as Admin.
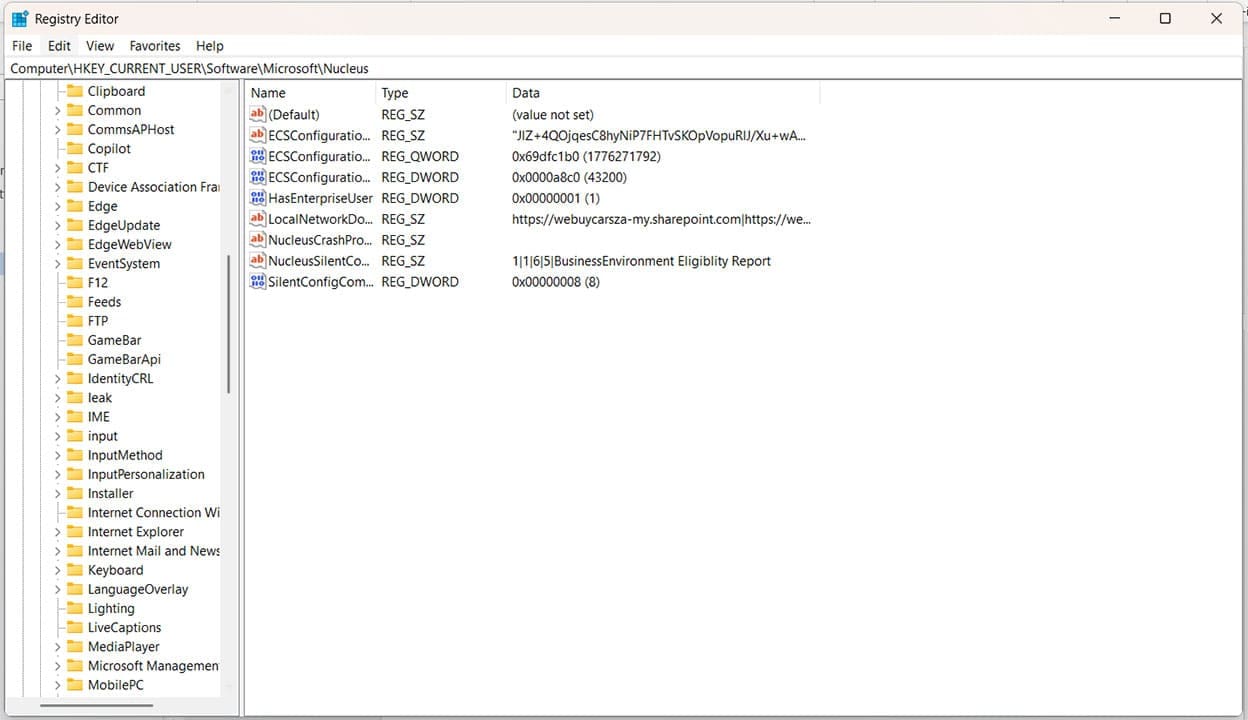
Step 2. Once in the Registry, navigate to the following path in the Address Bar: “HKEY_CURRENT_USER\Software\Microsoft\Notepad”
Step 3. Right-click “Notepad” in the sidebar, and select “Delete” from the dropdown menu. Confirm your choice, and the settings for Notepad will be deleted, and the factory ones restored.
Reset via Command Prompt
If the Registry is intimidating you, then you can access and delete the same folder you did above through Command Prompt instead. Here’s what to do:
Step 1. Open the Run Dialog (Win + R) and type “cmd” and hit (Ctrl + Shift + Enter) to run as Admin.
Step 2. In Command Prompt, type: “reg delete HKCU\Software\Microsoft\Notepad /f” and hit “Enter.” Step 3. The Registry will delete the settings. Restart Notepad, and your PC to be sure, then reopen Notepad to see if the settings are reset.