You may have files that aren’t that important. If someone were to see them, that wouldn’t worry you much. But, some files are only meant for you to see. Unless no one else uses your computer, you will need to protect those files with a password. You never know, you might let someone use your computer for some reason, and they might stumble across this important file.
Contents
How to Quickly Add a Password to Any Excel File
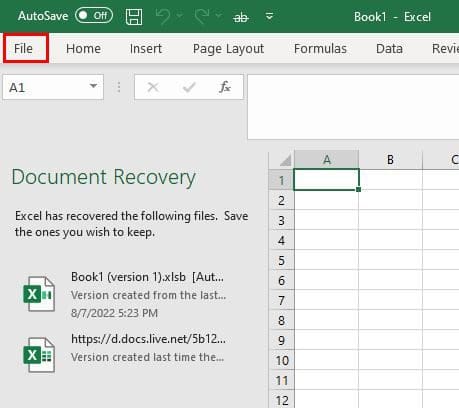
The good news is that adding a password to your Excel file is quick and easy. Even if you’re not too familiar with Excel, you won’t have difficulty finding the options you’ll need. Once your Excel file is open, click on the File tab at the top left.
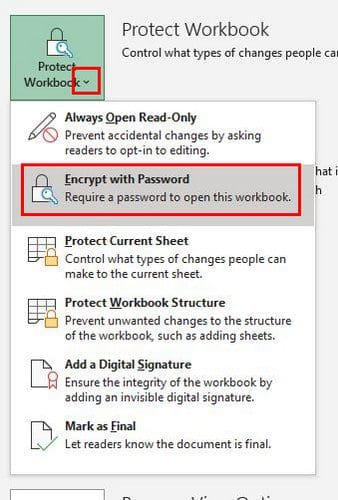
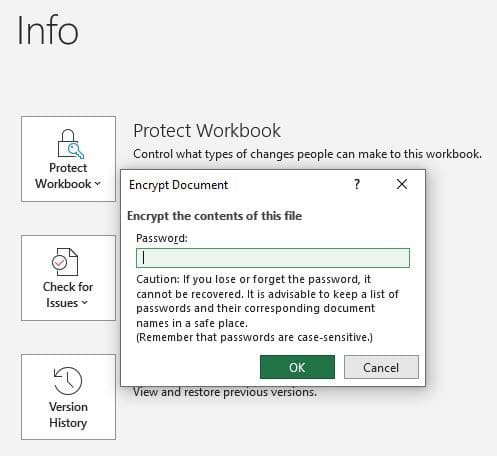
Click on Info and then on the Protect Workbook option.

When you click the Protect Workbook option, you’ll see a dropdown menu with different options. Make sure to click on the Encrypt with Password option.
When you click on this option, you’ll be asked to enter and re-enter a password. Once you’ve done that, the file will be marked so that it can only be opened with a password.
The file will be marked in Yellow so the password-protected files will be easier to identify.
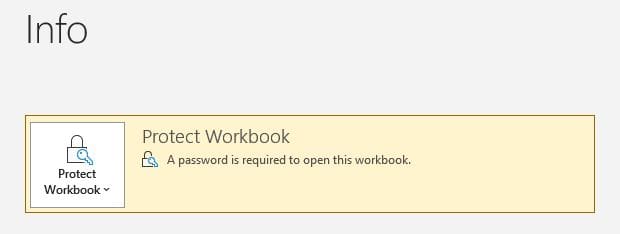
Make sure that you have a way of remembering the password. If you forget, you won’t have access to the file anymore. The next time you try to open the file, a small window will appear, asking you to enter the password. Only then will the file open.
If you’re adding a password because you don’t want anyone to make any changes to the file, there is another option you can try. You can always make the file a read-only file. If that’s what you want to do, follow the steps.
How to Make an Excel File Read-Only
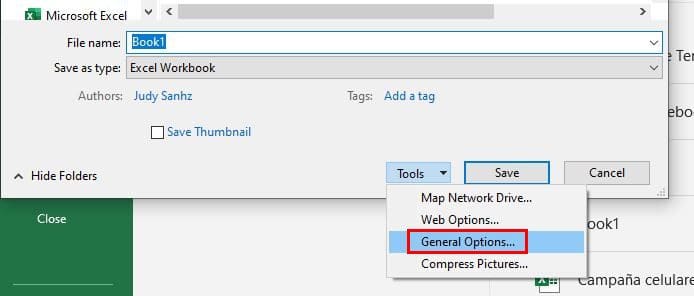
Go to File > Save As > More options when saving the file.

When you click on More Options, the Save As window will appear. Towards the bottom, click on the dropdown menu for the Tools option. You’ll see four options, one of which will be the General Options.
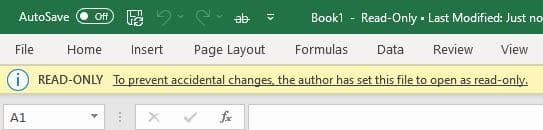
On the next window, check the box for the options that will make the file a read-only file. Once you apply this, there will be a message at the top left letting the user know the changes you’ve made.
How to Ass a Password to a Specific Sheets in Excel
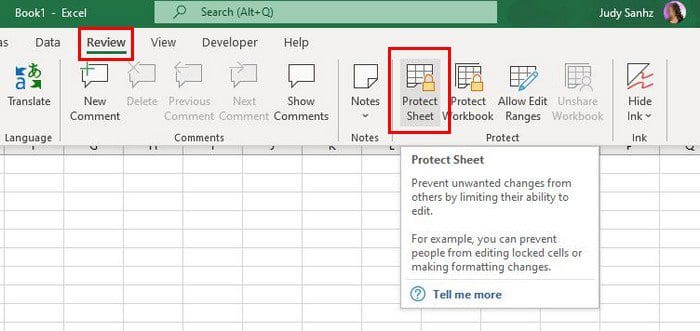
Once the Excel file is open, click on the sheet you want to prevent from editing anything. Click on the Review tab at the top. Followed by the Protect Sheet option to your left.
When you click on the Protect Sheet option, its window will appear, asking you to enter a password. You need to add your new password twice.
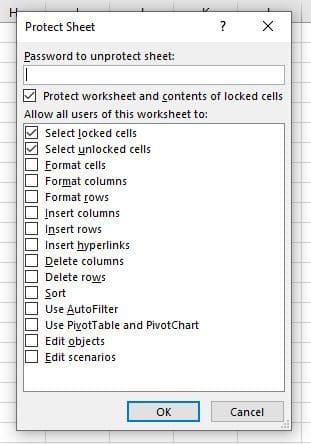
Enter your password and click OK. That’s all there is to it. You can keep your data safe by adding a password to the entire file or a specific sheet.
Conclusion
The benefit of adding a password to your Excel file is that you don’t have to worry about anyone making any changes you’re not OK with. You only need to be careful not to forget the password, or else you won’t be able to access your computer. How many files do you need to add a password to? Share your thoughts in the comments below, and don’t forget to share the article with others on social media.