• Skip to main content
  • Skip to primary sidebar

Technipages

Tutorials and fixes for smartphone, gadget, and computer problems

  • Topics
    • Android
    • Browsers
    • Gaming
    • Hardware
    • Internet
    • iPhone
    • Linux
    • macOS
    • Office
    • Reviews
    • Software
    • Windows
    • Definitions
  • Product Reviews
  • Downloads
  • About
Bitwarden: How To Generate a Password

Bitwarden: How To Generate a Password

April 2, 2021 by Mel Hawthorne Leave a Comment

As a password manager, Bitwarden’s primary purpose is to securely store the passwords you use. It doesn’t matter how good your password manger’s security settings are if you use weak passwords. Unfortunately, statistics from data breaches show that many people use known weak passwords and that most people use passwords that can be easily guessed with the right tools.

You could use a random password generator to make stronger passwords, however, this has a couple of downsides and risks normally. If you’re using a trustworthy password manager, such as Bitwarden, however, all of these risks and downsides are mitigated. You don’t need to worry about forgetting random passwords because your password manager will save it for you. You don’t even need to worry about if the password generator is trustworthy because Bitwarden has one built-in.

How to generate a password with the Bitwarden browser extension

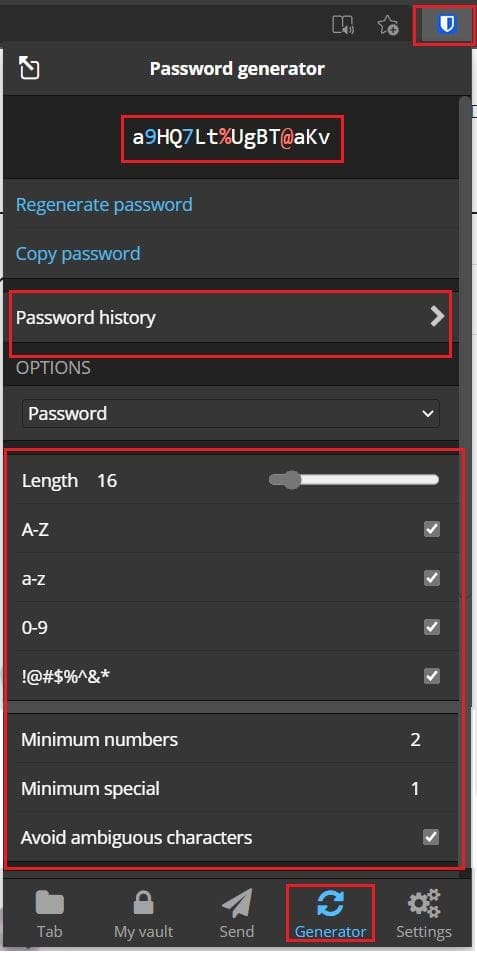
You can generate a new random password in the browser extension. To do so, open the extension panel, by clicking on the Bitwarden icon, then switch to the “Generator” tab. Here you can see a generated password at the top, then under “Options” you can choose what length the generated password will be along with the characters that can or need to be in it.

Tip: The “Avoid ambiguous characters” option avoids using characters that look the same such as “O” and “0” to make it easier to type.

If you use a generated password and forget to save it, you can look it up with the “Password history” option too. Each time you change a setting, a new password will be generated.

Open the extension pane, switch to the “Generator” tab, then configure the options you want. Click “Copy password” to copy it to your clipboard.

How to generate a password with the Bitwarden website

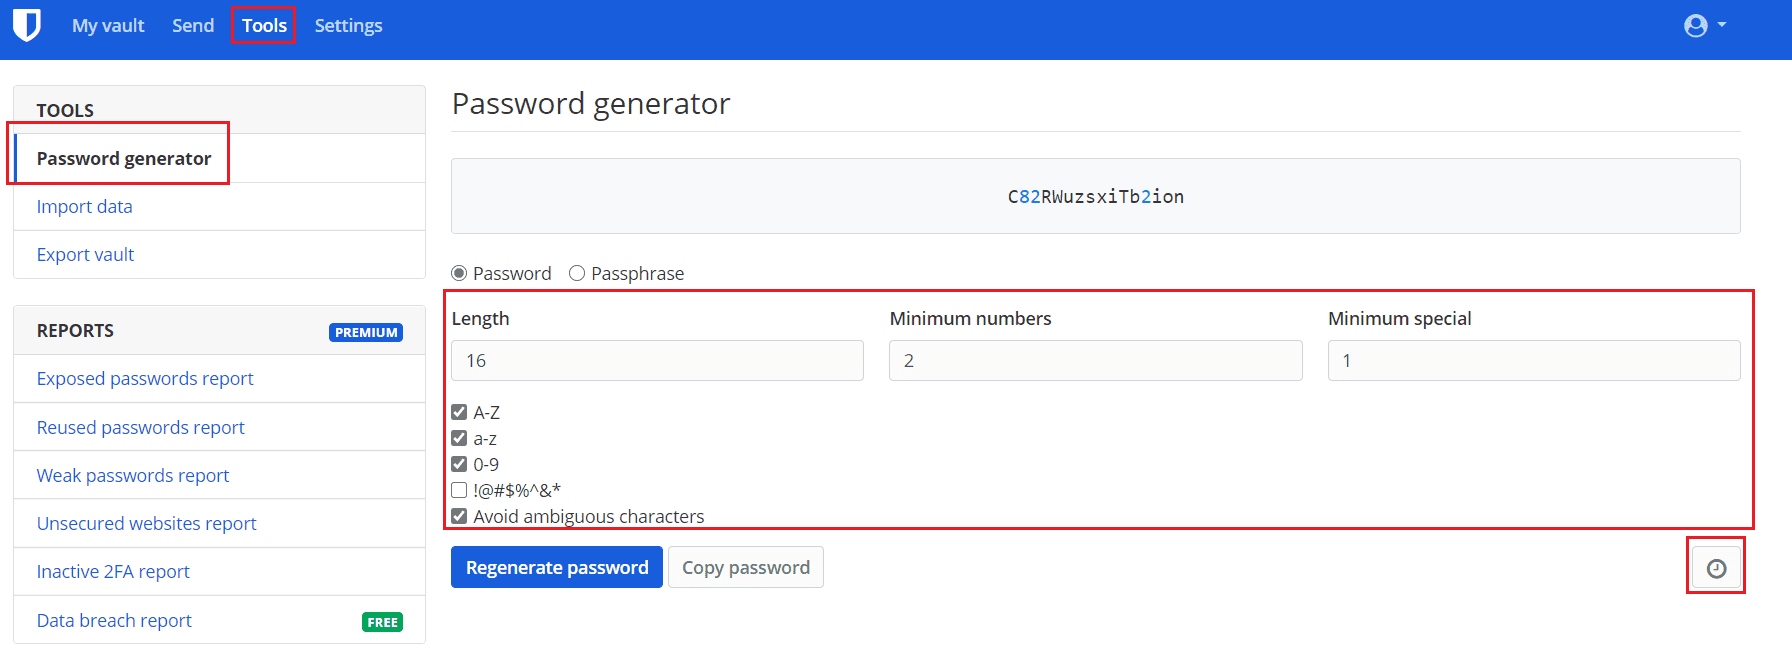
In the Bitwarden website, you need to browse to the “Tools” tab and then the default “Password generator” tool. Here you have the same options for password generation.

Tip: Your previously configured password generation options are saved but are unique to each platform. You’ll need to configure them in both the extension and website.

To view your password history, click the clock icon in the bottom right labelled “Password history”.

Open the password generator in the “Tools” tab, then configure your preferred password settings.

Tip: If you’re adding a new entry or editing an existing one, you can click the circling arrow icon, labelled “Generate password” to open the password generator. In the browser extension this can be found at the right-end of the “Password” field. In the Bitwarden website, it can be found just above the right-end of the “Password” field.

Generate a password in the add new entry form.

By following the steps in this guide, you can generate random passwords with Bitwarden.

You Might Also Like

  • Bitwarden: How To Generate a Passphrase
    Bitwarden: How To Generate a Passphrase
  • Fix: LastPass Generate Secure Password Not Working
    Fix: LastPass Generate Secure Password Not Working
  • Fix: Bitwarden Not Asking to save Password
    Fix: Bitwarden Not Asking to save Password
  • Bitwarden: How to Change Your Master Password
    Bitwarden: How to Change Your Master Password
  • Bitwarden: How to Copy the Username and Password of an Entry
    Bitwarden: How to Copy the Username and Password of an Entry
  • Bitwarden: How to Change Your Master Password Hint
    Bitwarden: How to Change Your Master Password Hint

Filed Under: Hardware

Reader Interactions

Did this help? Let us know!

Your email address will not be published. Required fields are marked *

This site uses Akismet to reduce spam. Learn how your comment data is processed.

Primary Sidebar

Recent Posts

  • 3 Ways to Choose All Files in a Folder – Windows 11
  • Apple TV+: How to Erase a Show From the Up Next List
  • How to Change the Profile Picture on Disney+
  • Local Security Policy: What Is It and How to Open It in Windows 11
  • How to Create and Erase an Alarm in Windows 11
  • 10 Best NAS Storage Device for Home and Professional Use
  • PS5 NVMe Requirements You Must Fulfill to Expand PS5 Storage
  • Steam Deck Won’t Turn On: 8 Possible Fixes You Can Try

Who’s Behind Technipages?

Baby and Daddy My name is Mitch Bartlett. I've been working in technology for over 20 years in a wide range of tech jobs from Tech Support to Software Testing. I started this site as a technical guide for myself and it has grown into what I hope is a useful reference for all.

You May Also Like

  • One-Time Password

© Copyright 2023 Guiding Tech Media · All Rights Reserved · Privacy