If you have small children and want to keep them away from music with explicit lyrics, or just aren’t too fond of it yourself, then Apple Music gives you the ability to keep this content from playing on your PC. It’s very easy to do and in this article, we’ll be showing you how to restrict explicit music – Apple Music.
Contents
Keeping It Clean
In Apple Music, music with explicit lyrics and content is required to be indicated as such with an “Explicit” tag. This handy tag categorizes these songs and enables users to address them as a whole category rather than one by one.
How to Restrict Explicit Music – Apple Music
How you restrict Apple Music Content is quite straightforward. Once enabled, Apple Music will restrict access to explicit music (as well as music videos). This goes for playback, sharing, downloading, streaming, and purchasing of any content labelled as explicit. Restricting access can be done in the following way:
Step 1. Open Apple Music on your PC.
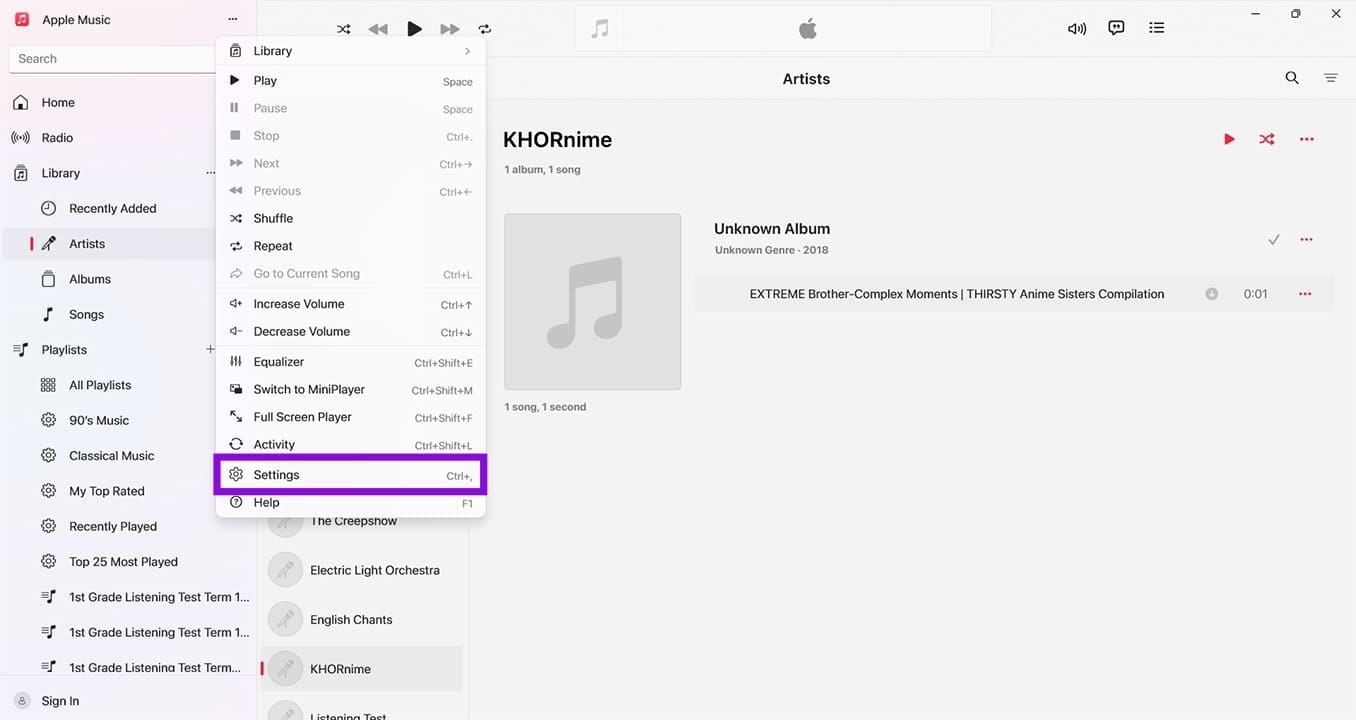
Step 2. Select the Ellipses Menu (three dots) in the top part of the side panel.

Step 3. From the dropdown list that appears, choose “Settings.” You can also go straight to Settings via the shortcut (Ctrl + ,).
Step 4. In the Settings menu in the main window, choose “Restrictions.”

Step 5. In the next menu, uncheck both “Allow Explicit Music” and “Allow Music Videos” if you like.

Step 6. If you are worried about your changes being circumvented, then you can enable “Prevent Changes.” Simply click the Lock icon next to it and confirm with your PC Admin account via a UAC pop-up. If the user is not an admin, they won’t be able to undo your changes.
Step 7. Exit the Settings and go back to Apple Music. There’s no need to restart the app.
Restricting Explicit Content in iTunes
Apple Music may have replaced iTunes as the go-to media player for the company, but iTunes is still very active and used by millions. If you have iTunes installed on your device, too, then you can also restrict access to explicit content on it. Here’s what to do:
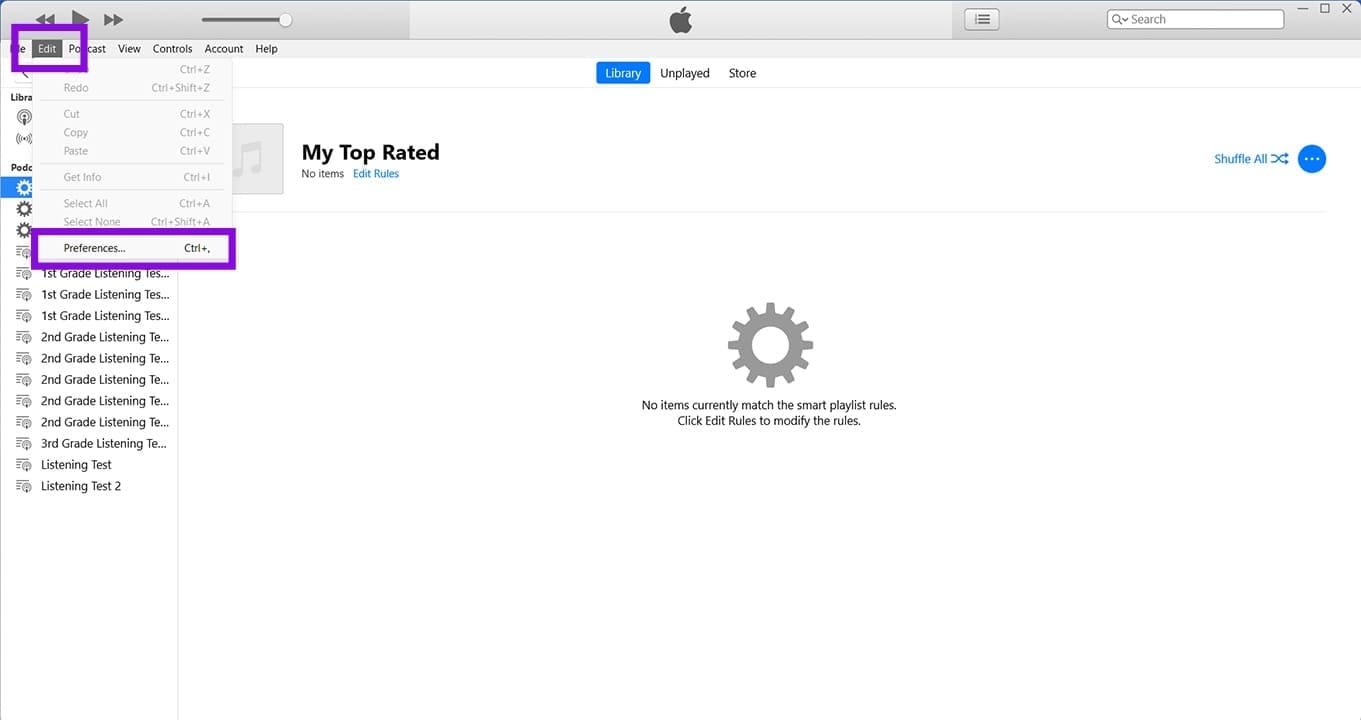
Step 1. Open iTunes.
Step 2. In the Top Menu, click “Edit” and select “Preferences” from the dropdown menu.
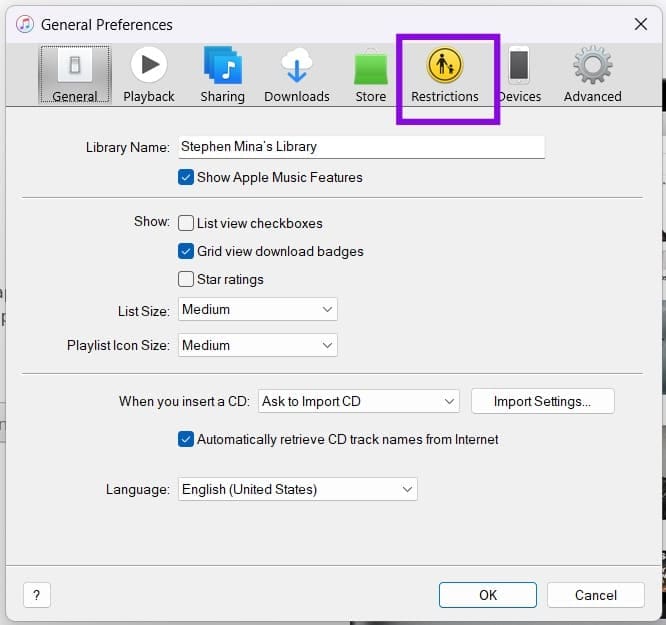
Step 3. The General Preferences window will pop up. Click “Restrictions” in the top menu.
Step 4. You’ll see several checkboxes, a wider selection than on Apple Music. In the “Restrict” subsection, check “Music with explicit content” and “Music Videos.” While you’re at it, you can also set an age limit for movies and disable access to books with explicit content.
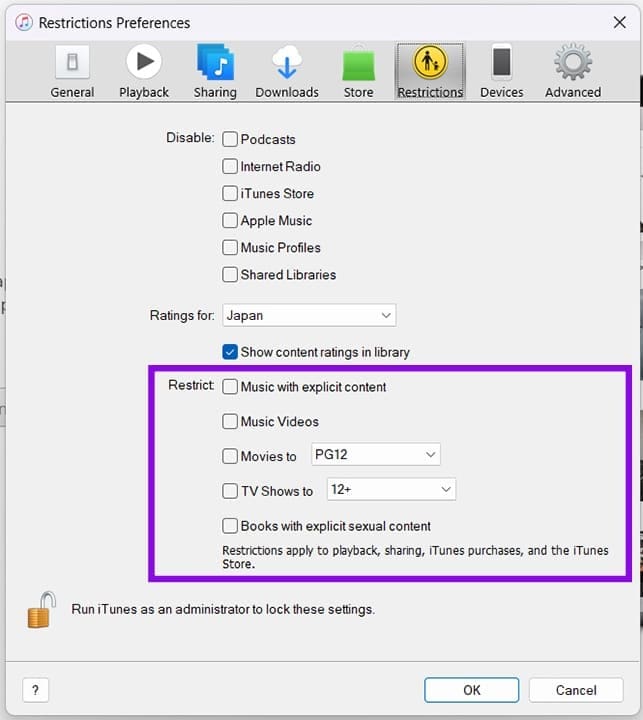
Step 5. If you don’t want your changes to be undone by another user, you can link your decision to your PC’s Admin account. All you have to do is run iTunes as an administrator to lock in the settings.
Step 6. Once you’re happy, click “OK,” and your restrictions should now apply. To undo them at any time, simply go back to the same menu and uncheck them.