
Every so often, it’s a good idea to take stock of the security situation of your accounts. The level you want to go to with each account should vary upon the importance of the account. For example, your online banking account should be one of the most secure things you have. Any account that has sensitive data should be pretty secure too.
Contents
Related Reading:
- How to Fix Dropbox Not Opening in Browser
- Dropbox Tips That Every User Should Know About
- Dropbox: How to View Which Browsers and Devices Are Signed Into Your Account
- Dropbox: How to Request Help
- How to Create, Delete, and Manage Folders in Dropbox
Securing your cloud storage services are important, as they can hold a large number of potentially very sensitive documents and files. To help make it easier to ensure that your account is secure, Dropbox offers a security check process. The check consists of four stages, checking your email, reviewing your logged-in devices and browsers, reviewing third-party apps that are linked to your Dropbox account, and increasing your password strength.
How to Run a Security Check of Your Dropbox Account
To perform the Dropbox security review, you need to go into your security settings. To get there sign in to the Dropbox website. Once you’re signed in, you need to click on your profile icon in the top-right corner and then click Settings. Switch to the Security settings tab and click on the top option named Start check-up.

1. Checking Your Email
In the new tab, the first task that you need to complete as part of the security check is to verify that the email address associated with your account is correct and up to date. You can use your email address to recover your account if you forget your password. If your email address is wrong, click Update and add the new email address and confirm it. If your current email address is correct, click Yes. You won’t have to click a link in a confirmation email or anything.

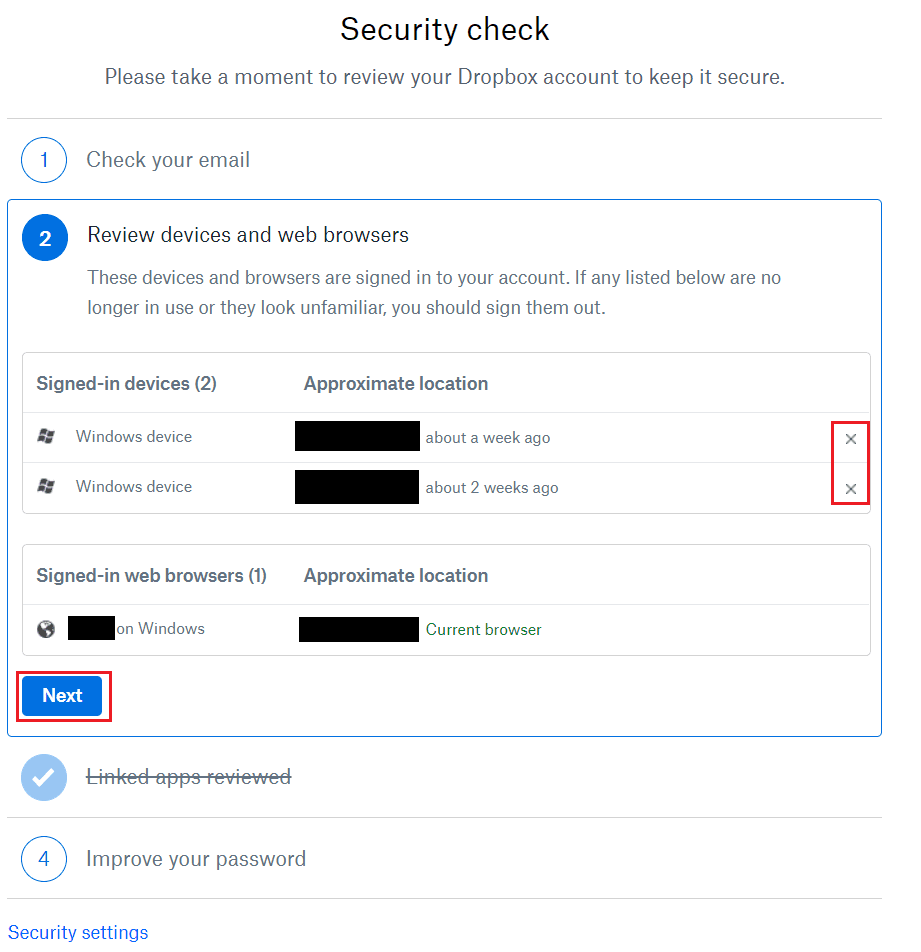
2. Signed-In Devices and Sessions
In the next section, you can review your currently signed-in sessions. The list of Signed-in devices are your sessions in official Dropbox apps, while Signed-in web browsers specifically refers to your sessions on the Dropbox website. If any of the locations or times look suspicious, you can terminate the session by clicking the relevant x icon on the right-hand side. If you’re happy with the way everything stands, click Next to continue.
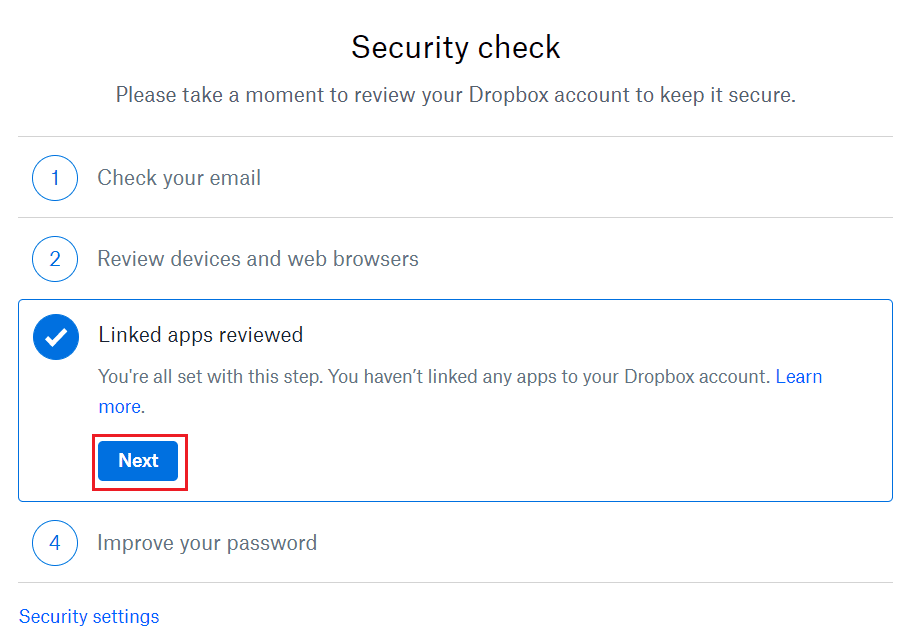
3. Reviewing Third-Party Apps
You can review third-party apps that are linked to your Dropbox account in the Linked apps section. This could be something like Microsoft Office. If you see any suspicious or unexpected apps here, click the relevant x icon to unlink the app. You will, as a result, deny it future access — and if you want to use the app with Dropbox again, you’ll need to re-pair it. Once you’re happy, click Next to continue.
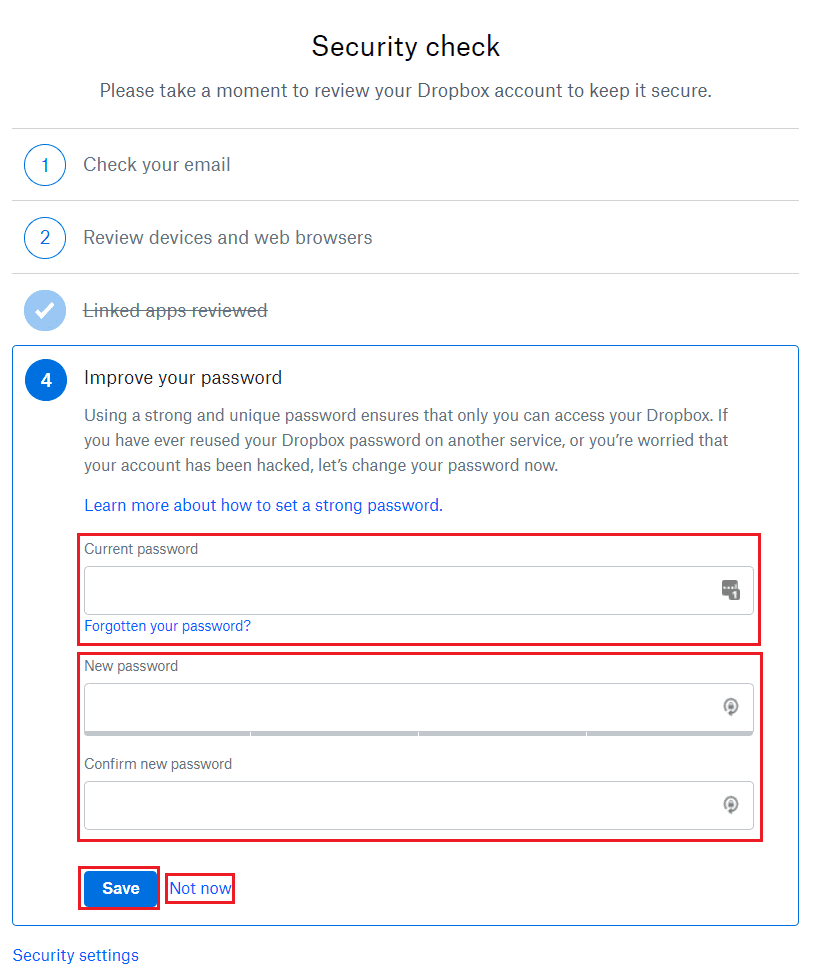
4. Reviewing Your Password
The Improve your password section offers some password creation advice and then gives you the opportunity to change your password to make it stronger. To do so, enter your current password, then enter and confirm the new password you want to use. Once you’ve entered your new password, click Save to change your password. Alternatively, click Not now if you don’t want to change your password.
Another Dropbox Security Setting You Can Adjust: Two-Factor Authentication
Two-factor authentication, also known as 2FA, is one of the best security measures you can implement on your accounts and devices. While picking a strong password is crucial, it’s always important to remember that none of them are completely foolproof.
Enabling 2FA will ensure that people with malicious intentions have to go through another layer of security, and the only way they can do that is if they have access to the device or account you use to confirm two-factor authentication.
When using Dropbox, you can switch two-factor authentication on for your account. And the good news is that the process is relatively simple. Here are the instructions you should follow:
- Click on your profile picture or initials in the circular icon, which you’ll find in the top right-hand corner.

- Select Settings.
- Click on the Security tab.

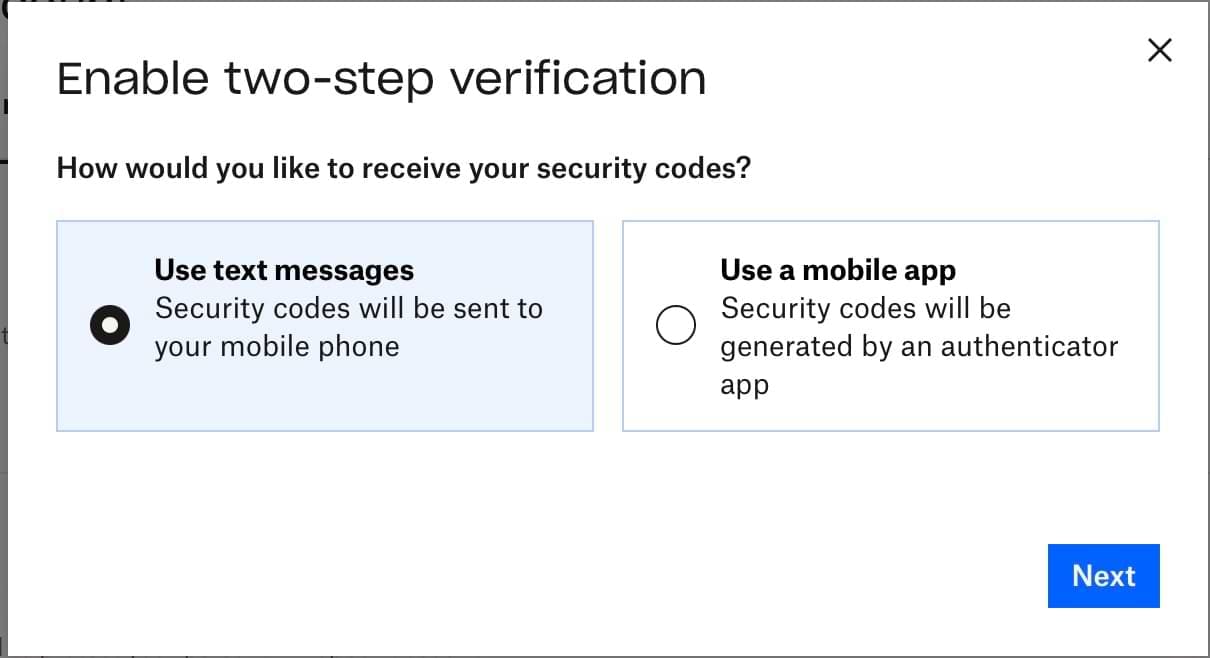
- Scroll down to Two-step verification and switch the toggle on.

- A pop-up window will appear; select Get started when it does.

- Enter your account password. If you haven’t yet got one, such as if you set your sign-up to be with your Google account, you’ll need to create one beforehand. Tap Next when you’ve entered your password.
- Choose the type of two-factor authentication you want to enable, before completing the respective steps for that method.


Improve Your Dropbox Security Settings With These Tips
Regularly reviewing your security settings in Dropbox is a good idea, and doing so can help keep your account safe from possible external threats. This is especially important if you’ve got important files and folders that should not be in the hands of anyone else.
You can perform a security check on Dropbox to remove devices you no longer use, along with changing your password to something more secure. Away from that, you can also enable two-factor authentication to ensure that you’ve got an extra layer of security on your accounts.