Notifications are meant to be helpful. For example, birthday notifications help you never forget. But, when they get too much, you might be tempted to snooze those notifications. But, if you want to disable them, then there are some methods you can try to keep them under control.
How to Turn off Notification for Windows 11
The following methods will show you how to turn off notifications for Windows 11 for specific things. Unfortunately, you’re not going to find one option to toggle off that will make all the notifications disappear. Here are some tips you can try.
Settings
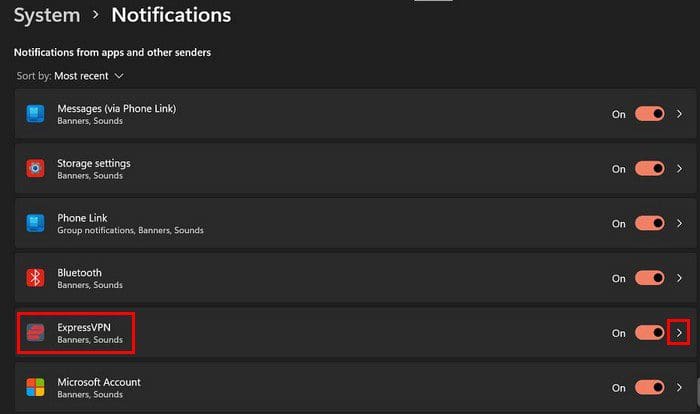
Open the Settings app by clicking on the Windows Start menu. Go to System, followed by notifications.

Make sure to toggle off the Notification option to the right. But, if you only want to stop getting notifications for specific apps, you can also manage those. For example, Let’s say you want to control or stop getting notifications within a particular area. Click on the right arrow for more options.
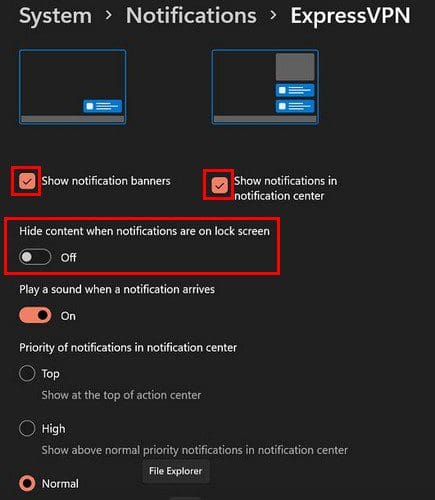
You’ll see options to make the notification banners disappear from the bottom left-hand corner of your screen. There’s also an option to show or not notifications in the notification center. Another change you can make is hiding the content of the notifications on the lock screen. This option is helpful if you simply wanted to keep your info safe and thought turning off the notifications was your only option.
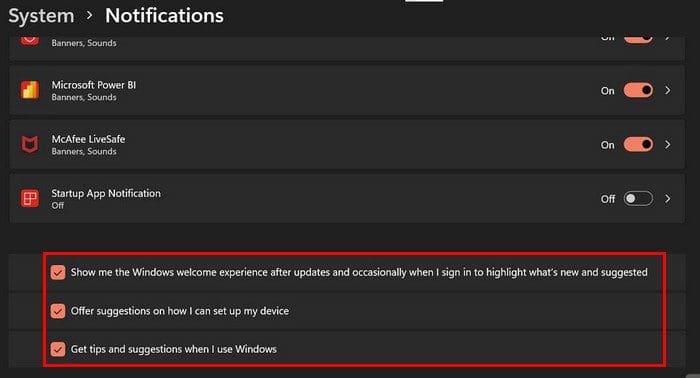
If you scroll down, you’ll see options you can uncheck that will reduce the number of notifications you get. For example, you can stop getting Windows welcome experience, suggestions on how to set up a device, and get tips and suggestions when I use Windows.
File Explorer
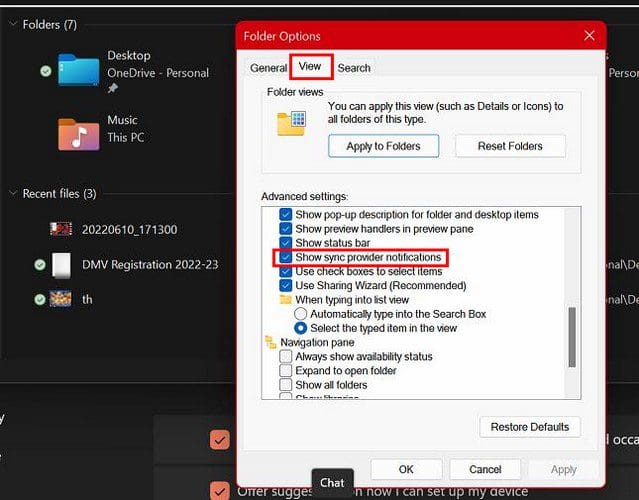
Getting ads in the File Explorer can be annoying. Good thing there is something you can do about that too. Open the File Explorer, click on the three dots at the top, and click on Settings.

When the new window appears, click on the View tab. Scroll down and uncheck the box for the option that says Show sync provider notifications. Don’t forget to click OK to save your changes. That’s all there is to it.
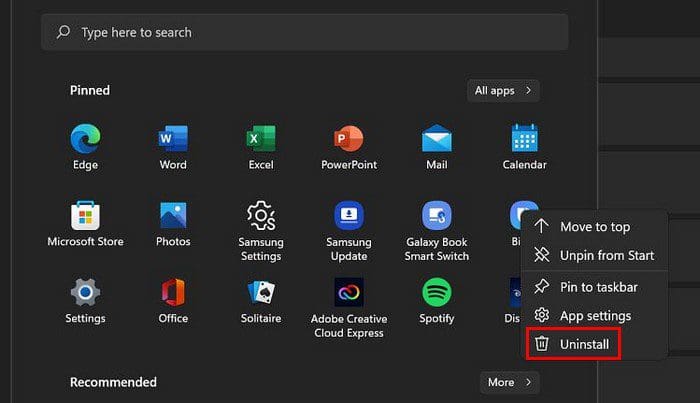
Uninstall Unnecessary Apps
Take a look at the apps you have on your computer. Do you see any that you can uninstall? If you ever need them in the future, you can always reinstall them. But, for now, they can go, right? If so, click on the Windows Start menu, and you should see the app you have installed. For example, let’s say you want to get rid of Bixby. Right-click on the app and choose the uninstall button.
Privacy and Security
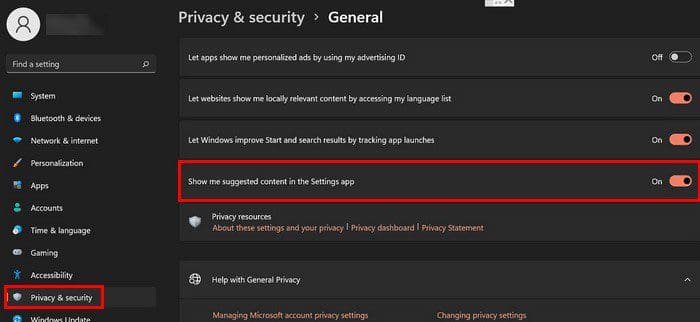
You can remove unwanted ads by going to Privacy and Security in the Settings app. The steps to follow are Settings > General > Untoggle Show me suggested content in the Settings app. You can also toggle off the first option, which says Let apps show me personalized ads by using my advertising ID.
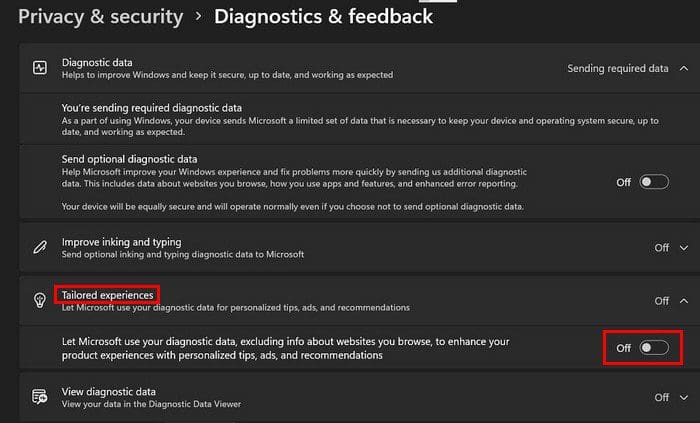
As long as you’re in Privacy and Security, you can also disable the Diagnostics & feedback option. At the top, click on Privacy and Security to go back to that section. Click on Diagnostics and feedback. Click on the arrow pointing down to the right of the Tailored experiences option.
The only option you’ll see is the one that says Let Microsoft use your data, excluding information about websites you browse, to enhance your product experiences with personalized tips, ads, and recommendations. Toggle this one off.
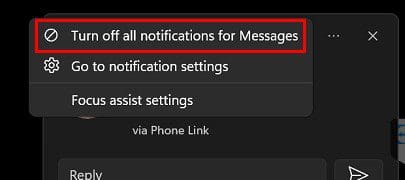
Turn off the Notification Directly from the Notification Window
When someone messages you and you see the notification on your screen, you can disable the notifications directly from there. Click on the dots in the upper right-hand corner and choose the Turn off all notifications for messages.
Conclusion
Notifications and ads can get a little out of hand. When that happens, the only thing you want to do is get them under control. You might consider turning them in in the worst-case scenario, but you could miss out on essential things. Whatever you decide to do, you know how you can disable a few notifications for specific apps and information Microsoft wants to send you. How many notifications or ads will you be disabling? Let me know in the comments below, and don’t forget to share the article with others on social media.