Shortcuts never stop being useful. They help you open things or get things executed quickly. You might be familiar with actions like (Ctrl + C) for Copy or (Win + E) to open an Explorer window, but did you know that you don’t have to stick only with the shortcuts provided? In this article, we’ll be looking at creating keyboard shortcuts (Windows 11).
Contents
Pins and Shortcuts
The good news is that Windows has a built-in support system for creating your own keyboard shortcuts, which means you won’t have to be fighting the operating system to create your shortcuts. That said, the two main ways to create these shortcuts do require you to either pin your app – or create a shortcut to a folder – and add it to the taskbar.
This is quite straightforward. To pin an app or folder to the Taskbar, do the following:
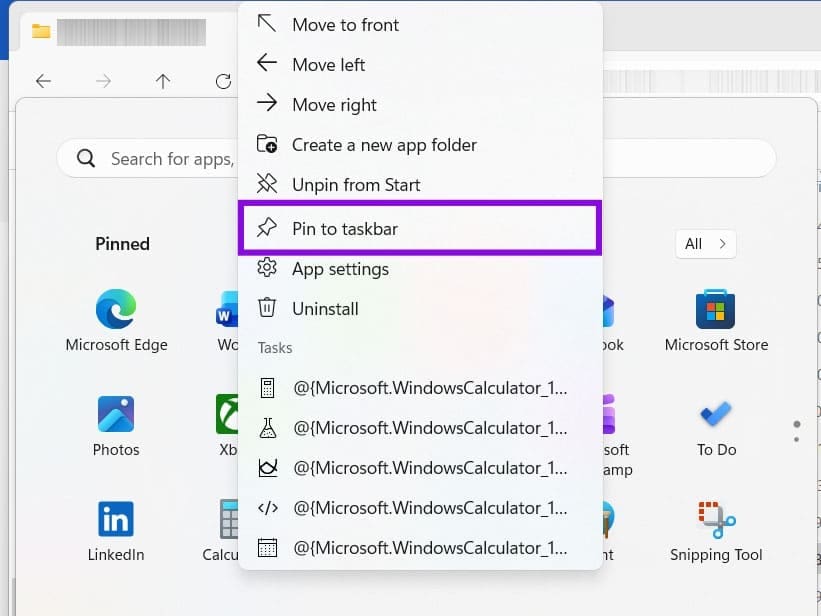
Step 1. Find the app or folder you want to pin in the Start Menu, Search Menu, or Windows Explorer, and right-click it.
Step 2. From the context menu that appears, choose “Pin to taskbar,” and the app or folder will appear in the Taskbar.
To add a file, folder, or app as a shortcut to your Desktop, here’s what to do:
Step 1. Find the desired file in Windows Explorer and right-click it.
Step 2. From the context menu, choose “Show more options.”
Step 3. The larger context menu will appear. Hover over “Sent to” and then select “Desktop (create shortcut).”
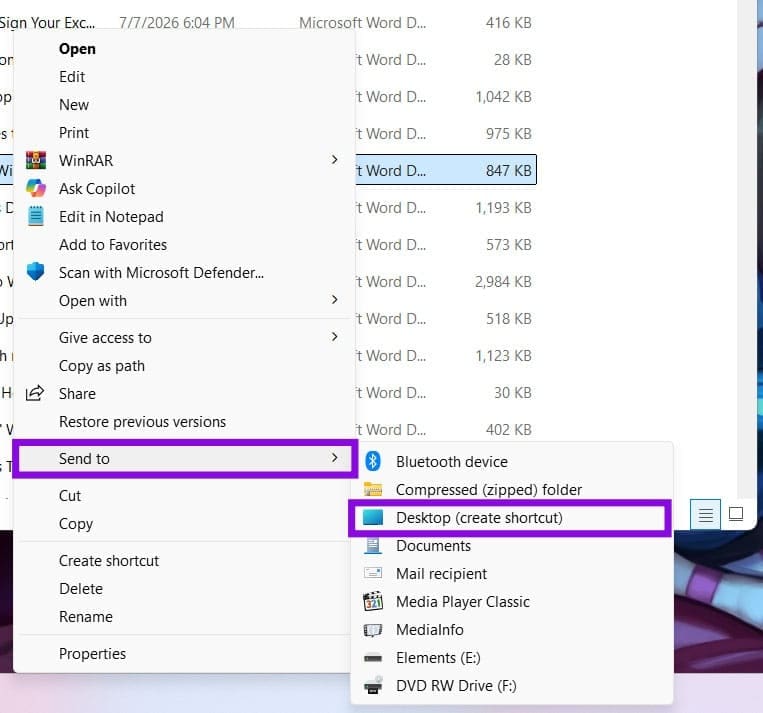
Step 4. Your file should then appear on the Desktop.
For certain apps, you can also drag the file to the Desktop while holding the Alt key, or right-drag and choose “Create shortcuts here.”
Creating Keyboard Shortcuts (Windows 11)
With your file, app, or folder pinned to the Taskbar or added to the Desktop, you’re now ready to create a custom shortcut to access it. Let’s see how:
Creating a Shortcut for a Pinned App or Folder
For those apps and folders pinned to your Taskbar, here’s how to create a shortcut:
Step 1. Right-click the pin and wait for the context menu to pop up.
Step 2. Right-click on the name of the app or the folder, which should be just above “Unpin from taskbar.”
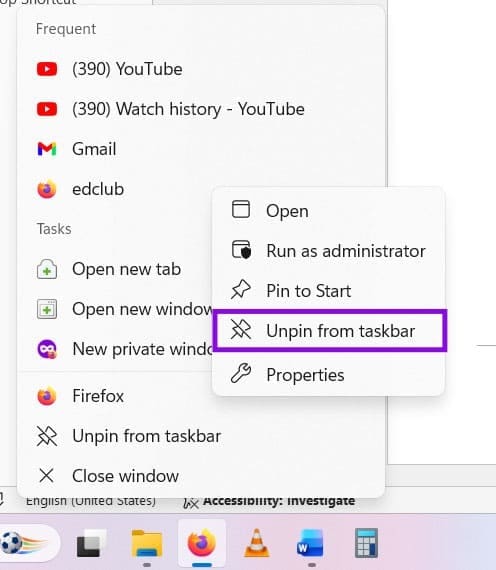
Step 3. Select “Properties” from the second menu that pops up.
Step 4. In the window that opens up, you’ll see the Shortcut tab for the app or folder. Click the box that says “Shortcut key.”
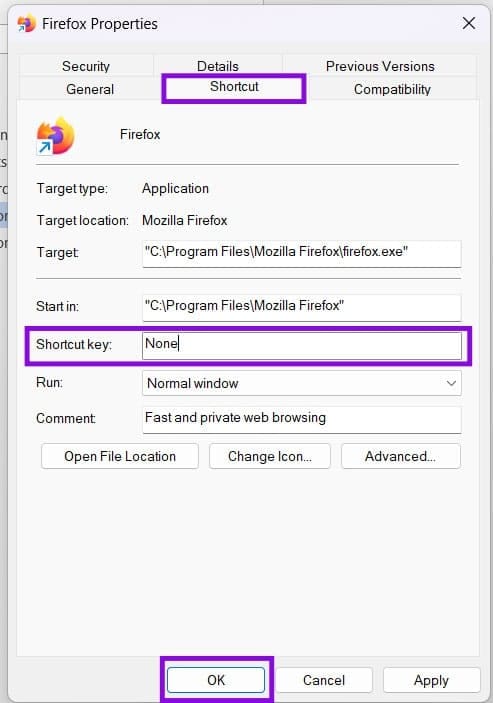
Step 5. Instead of typing the shortcut, press the key combo that you’d like to use to open the app or folder.
Step 6. Click “Apply” to save changes and “OK” to confirm. Test your new keyboard shortcut out.
Creating a Shortcut for a Desktop Shortcut
Creating a keyboard shortcut for your shortcut is quite similar to the process above – the steps vary only slightly. This is what to do:
Step 1. Right-click on the desktop shortcut.
Step 2. Select “Properties” from the context menu that pops up. Alternatively, you can also click the shortcut and select (Alt + Enter).
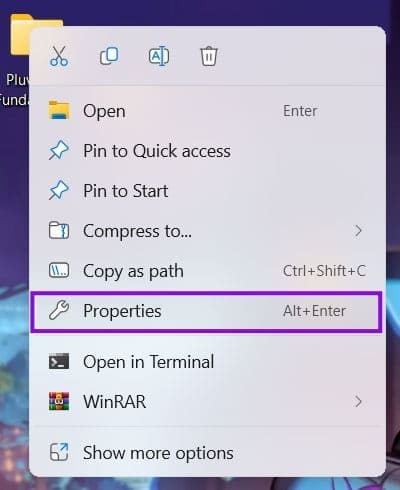
Step 3. Click the “Shortcut key” box and press the shortcut key combo that you want to use to open it.
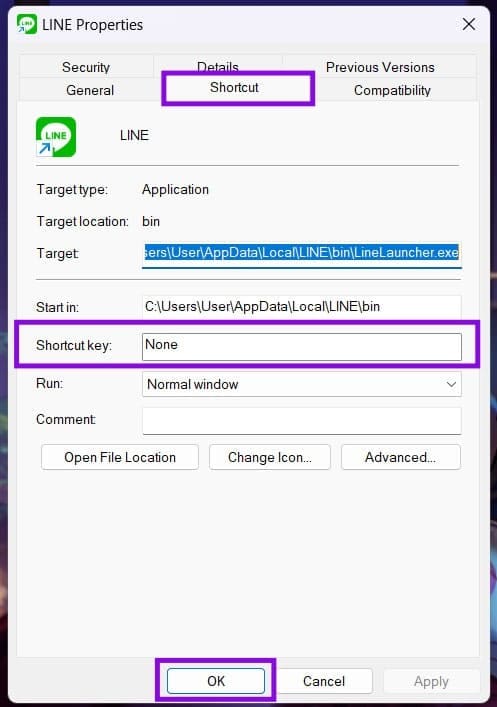
Step 4. Click “Apply,” then “OK” to save changes.