
There are many “Blue Screens of Death” (BSODs) out there to ruin your day, but in this article, we’re looking at one caused when a critical Windows system process unexpectedly terminates and leads to a crash loop and the error message CRITICAL_PROCESS_DIED on your machine. Join us as we provide troubleshooting steps to help with the Windows “Critical Process Died” message.
Contents
What Causes This Error?
The CRITICAL_PROCESS_DIED Windows 11 error is directly caused by the termination of a core kernel process. What leads to this point, however, can vary. Major underlying factors include:
- Software corruption
- Failing hardware, especially hard drives
- Improper Windows Updates or sudden shutdowns
Windows “Critical Process Died” Fixes
Fixing blue screen issues is never pleasant, but we’ve got some guided troubleshooters below to make things easier:
Run Startup Repair
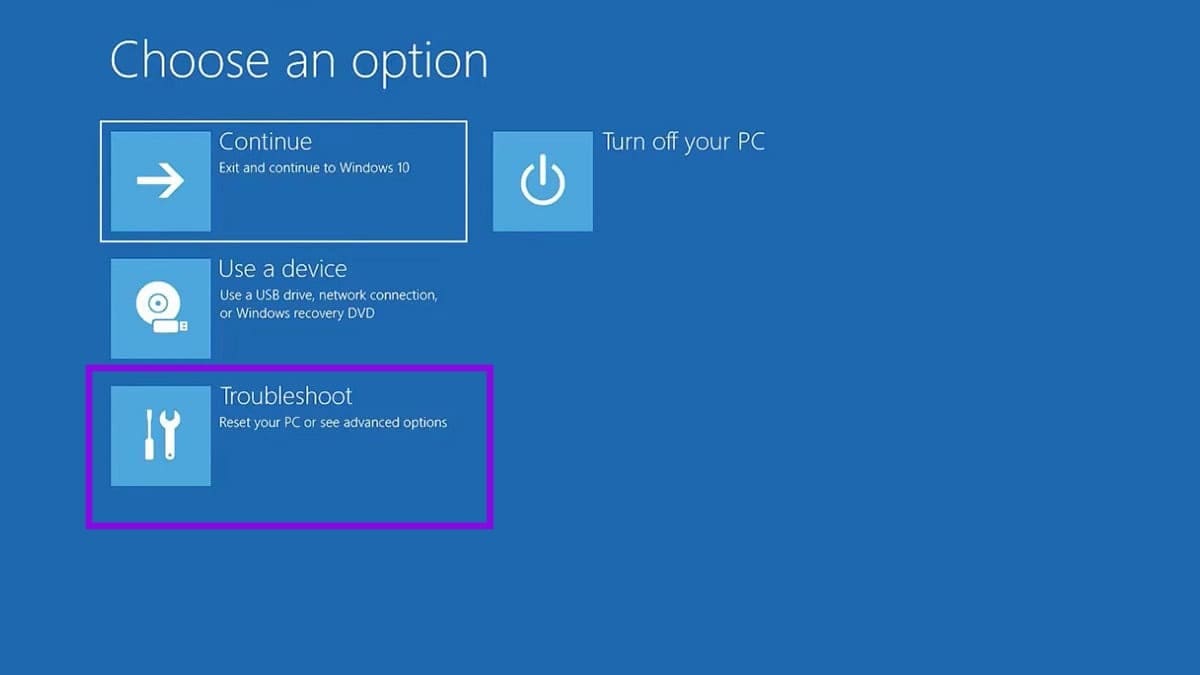
As with a lot of blue screen errors, Windows Recovery (RE) is your go-to tool. To enter Recovery, you’ll need to interrupt the boot process three consecutive times by holding the power button after Windows begins loading. Once this is done, you can run Startup Repair like so:
Step 1. Click the “Troubleshoot” option and then choose “Advanced options” in the next screen.
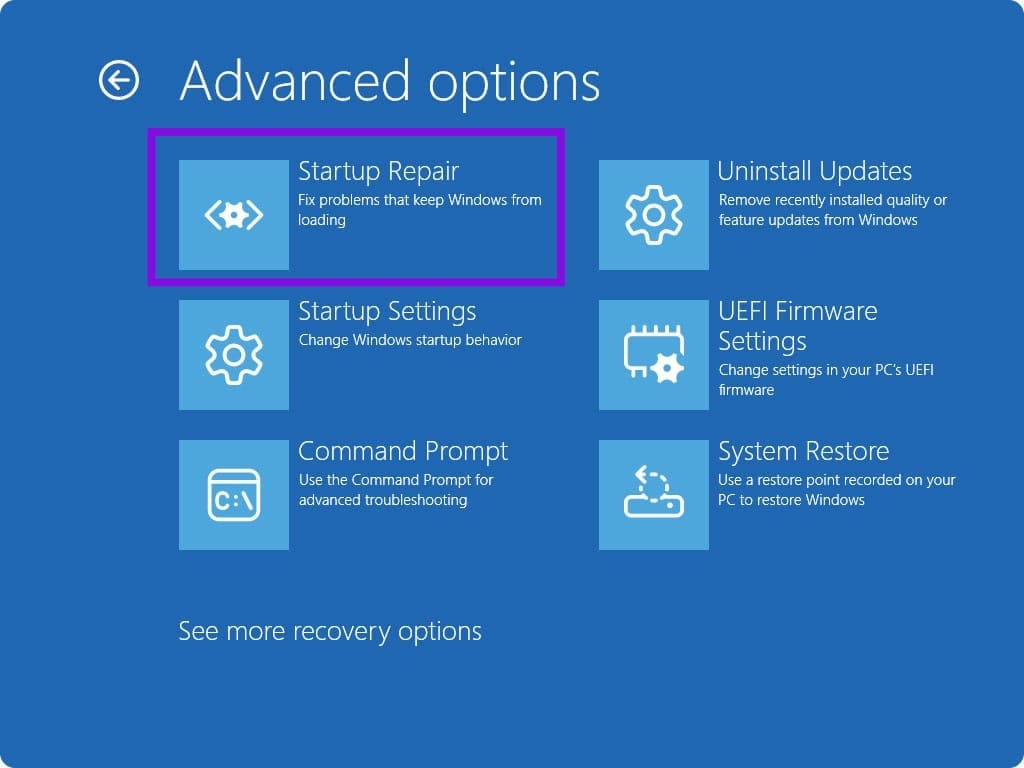
Step 2. In the next menu, choose the “Startup Repair” option.
Step 3. Allow the process to run (it might take some time), then restart your machine and see if the issue is resolved.
Run SFC
If you suspect that system corruption is behind things, then you can run Command Prompt from Recovery and check your system files via System File Checker (SFC). Here’s what to do:
Step 1. Start recovery mode, and follow the options above to open Command Prompt.
Step 2. In Command Prompt, type “sfc /scannow” and hit “Enter.”
Step 3. Let the process run and restart afterwards.
Check Your Disk
While you’re in Command Prompt and if you suspect your hard drive is failing, you can also run the Check Disk command. Here’s how:
Step 1. In Command Prompt, type “chkdsk [Drive letter]: /f /r” and hit “Enter.” “f” fixes logical file system errors, and “r” does the same but also locates and recovers bad sectors. The second will take more time, but for deeper errors, it might be worth it.
Step 2. Restart your machine once you’re done and check if everything’s resolved.
Boot in Safe Mode
If you’ve recently installed any app or third-party extension that you think might have caused the problem, you can uninstall it in Safe Mode. Here’s what to do:
Step 1. Choose “Troubleshoot.”
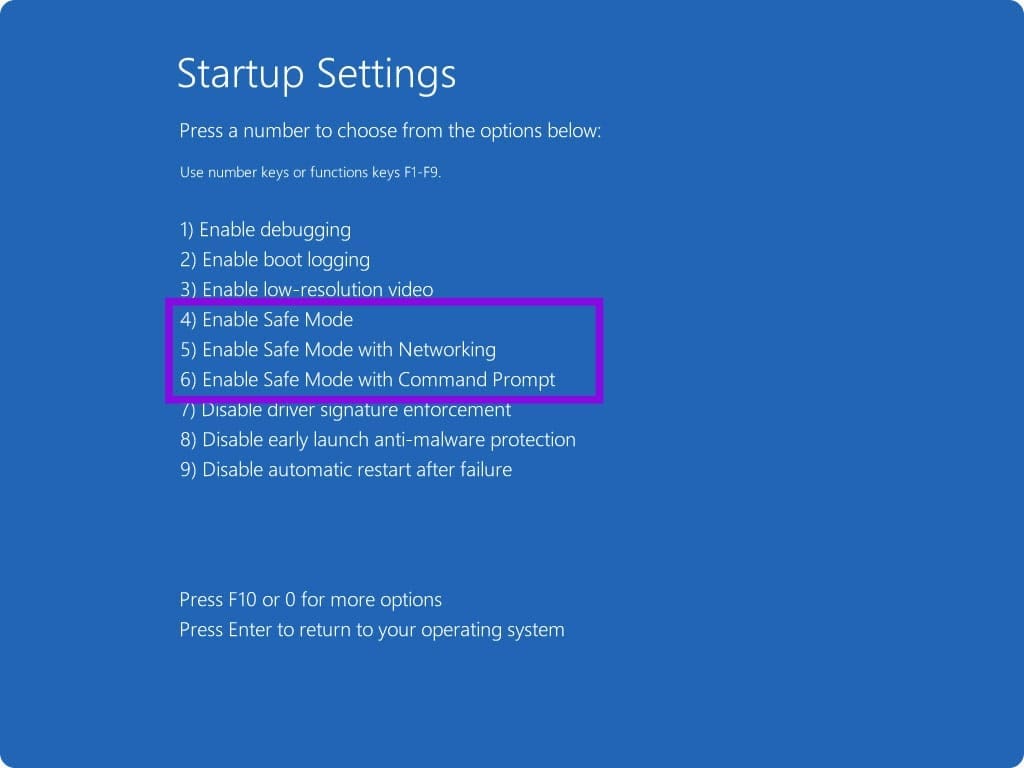
Step 2. In “Advanced Options,” choose “Startup Settings.”
Step 3. Numbers 4 through 6 of the “Startup Settings” will all work for the task, with “4” being the most basic type of Safe Mode. Hit the number you want.
Step 4. Uninstall any recent apps or roll back any recent changes to your machine, and restart once done.
Roll Back Drivers
In Safe Mode, you can also roll back recently installed drivers that might be causing issues. Here’s what to do:
Step 1. Open the Run Dialog (Win + R) and type “devmgmt.msc” into the box before hitting “Enter.”
Step 2. In “Device Manager,” find a recently updated component (that you know of) with a yellow exclamation mark and right-click it.
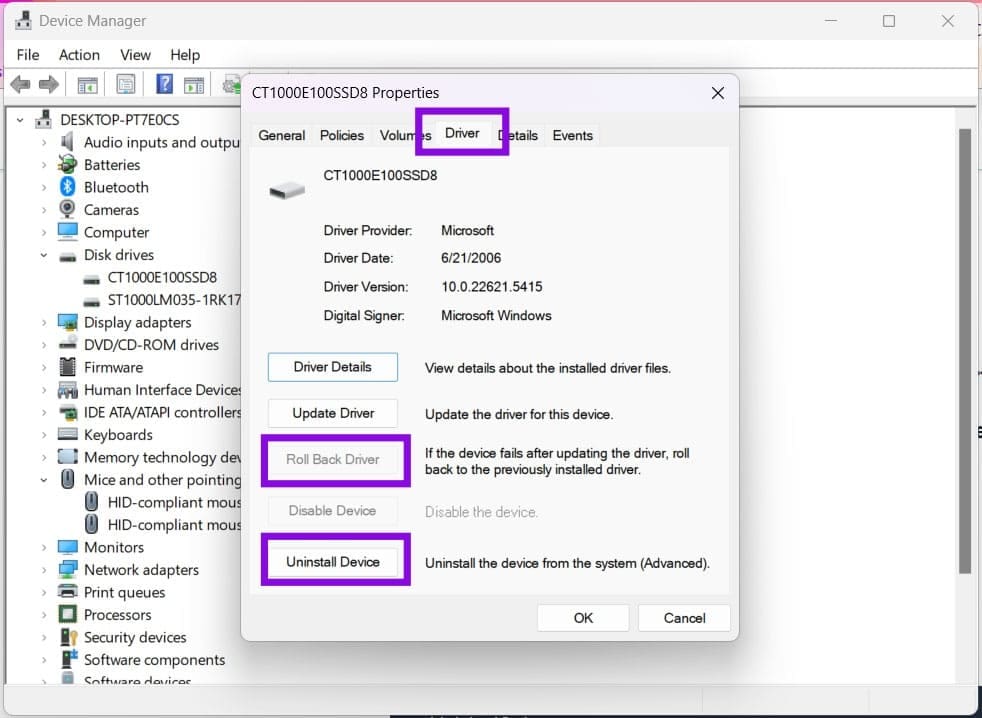
Step 3. In the new window, click the “Driver” tab and click “Roll Back Driver.” If the option is greyed out, you’ll need to click “Uninstall Device” instead.
You can identify drivers that caused crashes through apps like WinDbg, available from the Microsoft Store.