There are a lot of features in Windows 11 that previously needed third-party software but are now natively included. File unzipping is one such feature, and ISO mounting is another. However, this doesn’t necessarily mean it’ll work smoothly and, for some users, it doesn’t.
In this article, we’ll be looking at why File Explorer freezes when mounting ISO and how to fix it.
What Causes This Issue?
You’re trying to mount a virtual disk, Explorer freezes, and after a long while, you get a message that the ISO can’t mount. That’s the issue in a nutshell (with a few variations here and there). What causes this? Well, major offenders include:
- The ISO itself is corrupt or damaged.
- Third-party ISO-mounting software may be interfering.
- ISO files may no longer be linked to Explorer (following corruption or third-party software removal).
- Windows built-in disk image mounting components may be damaged or malfunctioning.
- The ISO has gained the space-saving Sparse Attribute, meaning it can’t be mounted.
- A drive letter conflict between a virtual drive and a physical one.
File Explorer Freezes When Mounting ISO? Here’s What to Do
Below we’ve arranged a few troubleshooting steps that’ll hopefully get that ISO mounted and reading properly:
Disconnect External Devices
To prevent any potential and existing letter drive conflicts, it’s a good idea to remove all unnecessary external devices, particularly USBs and external hard drives. You can always reconnect them later.
Restart Windows Explorer
If it’s been running too long, it’s possible Windows Explorer freezes when mounting ISO. A quick restart can solve a lot of potential problems. Here’s what to do:
Step 1. Open Task Manager (Ctrl + Shift + Esc).
Step 2. Click the “Processes” tab and navigate to “Windows Explorer.”
Step 3. Click the process, then click “Restart task” in the top menu.
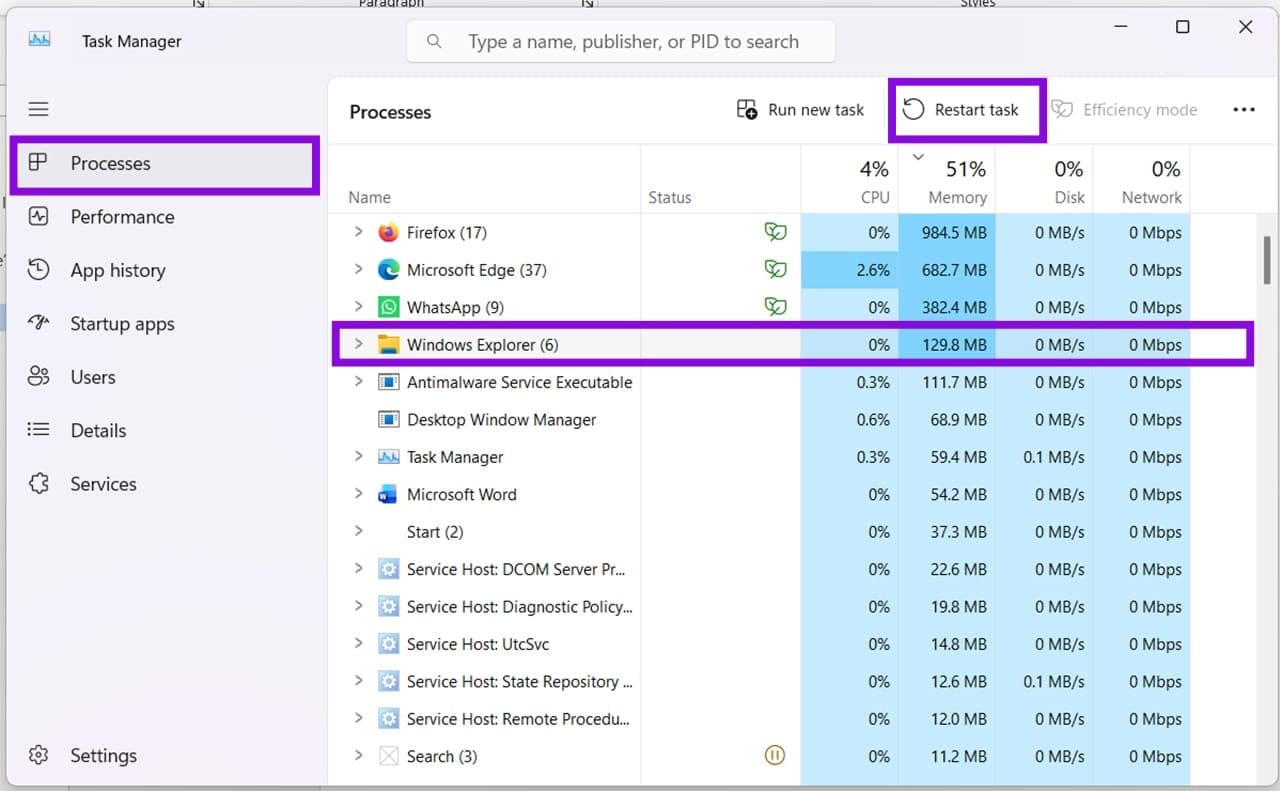
Step 4. Once done, try mounting the ISO again.
Check the ISO File Association
You also need to ensure that ISOs are associated with Explorer by default and, if not, change it. Here’s what to do:
Step 1. Open “Settings” (Win + I) and select “Apps” in the sidebar.
Step 2. Click “Default apps” in the next screen.
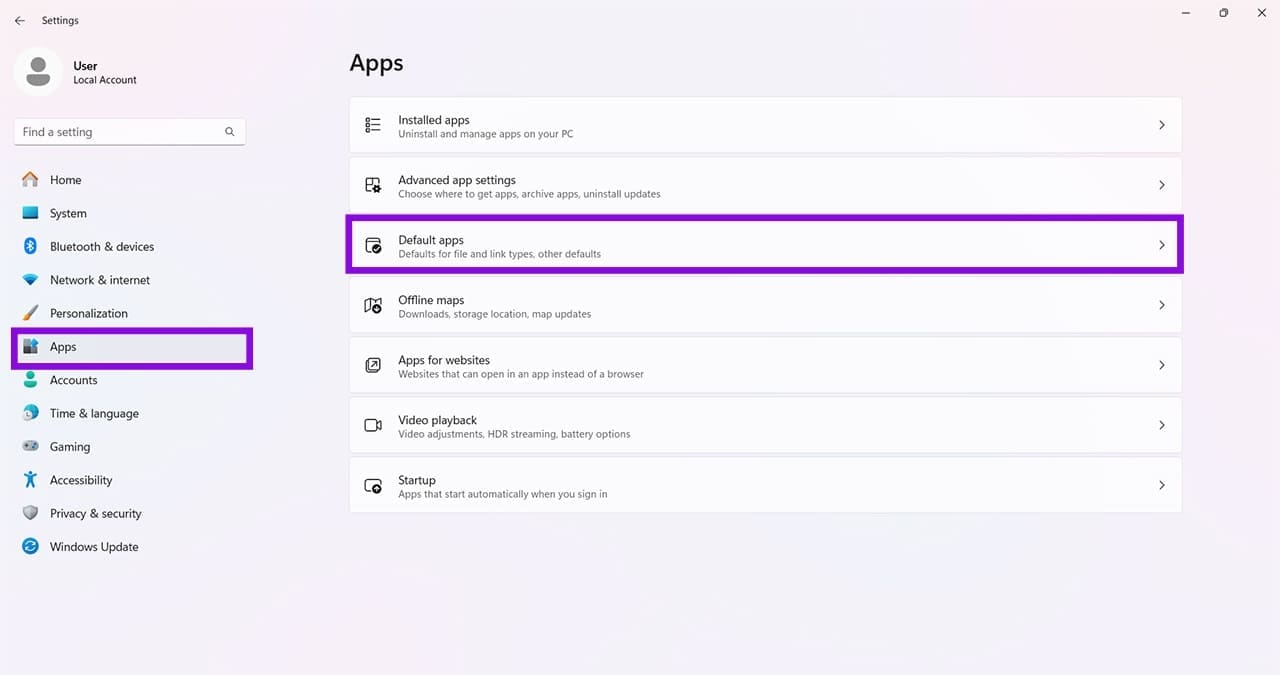
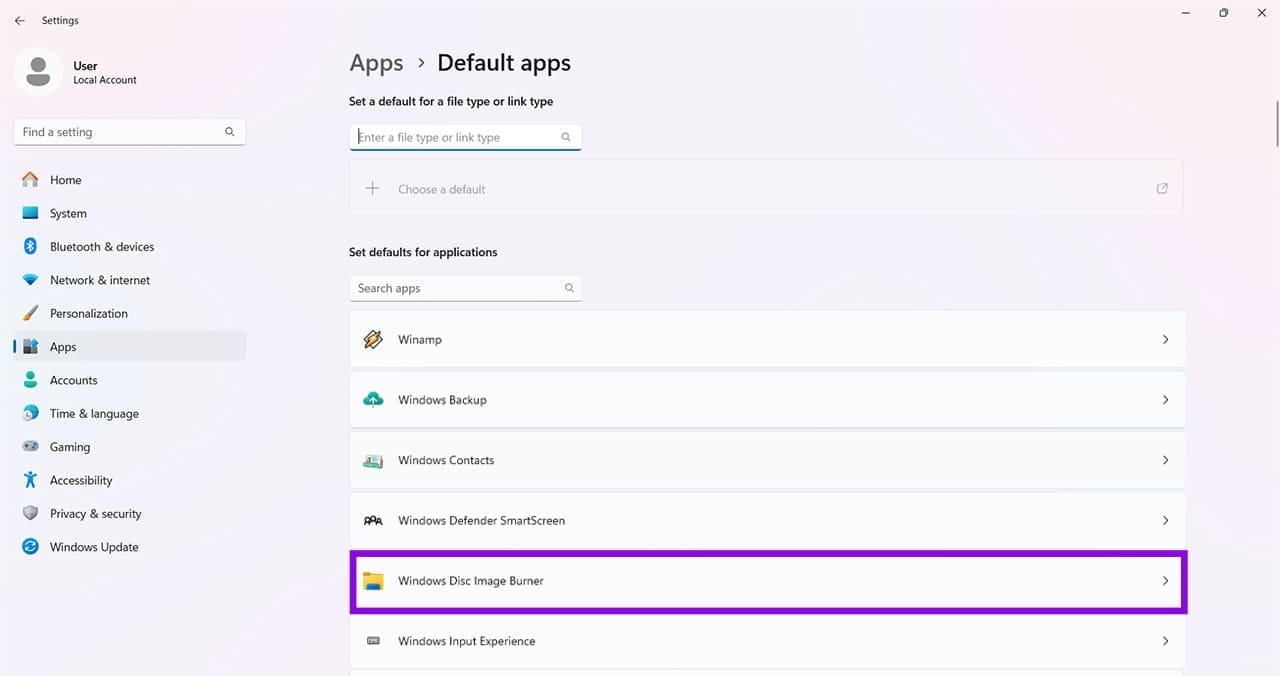
Step 3. You’ll then see a list of default apps. Scroll down to “Windows Disc Image Burner” and select it.
Step 4. Check that the “.iso” is listed as Windows Explorer. If not, click the default program and choose Explorer from the list of possible apps.
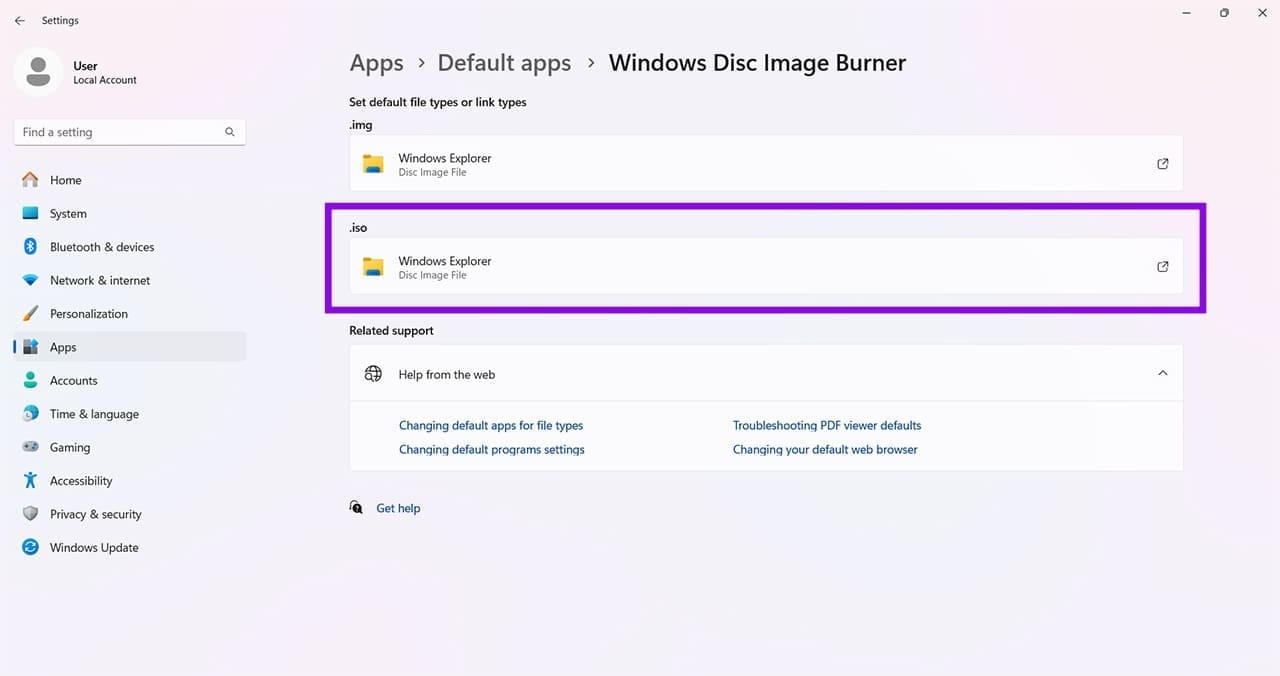
Step 5. Try mounting the image again.
Uninstall Other Software
If you have any other disc mounting software, like Daemon Tools or Alcohol 120, then be sure to remove them, as they may interfere with Explorer’s ability to mount the disk image.
Check for a Sparse Attribute
If your ISO has the Sparse Attribute, it won’t be able to mount. You can fix this through PowerShell. Here’s how:
Step 1. Open the Run Dialog (Win + R) and type “powershell” before clicking (Ctrl + Shift + Enter) to run as Admin.
Step 2. In PowerShell, type “(get-item C:\path\file.iso).attributes” and hit “Enter.”
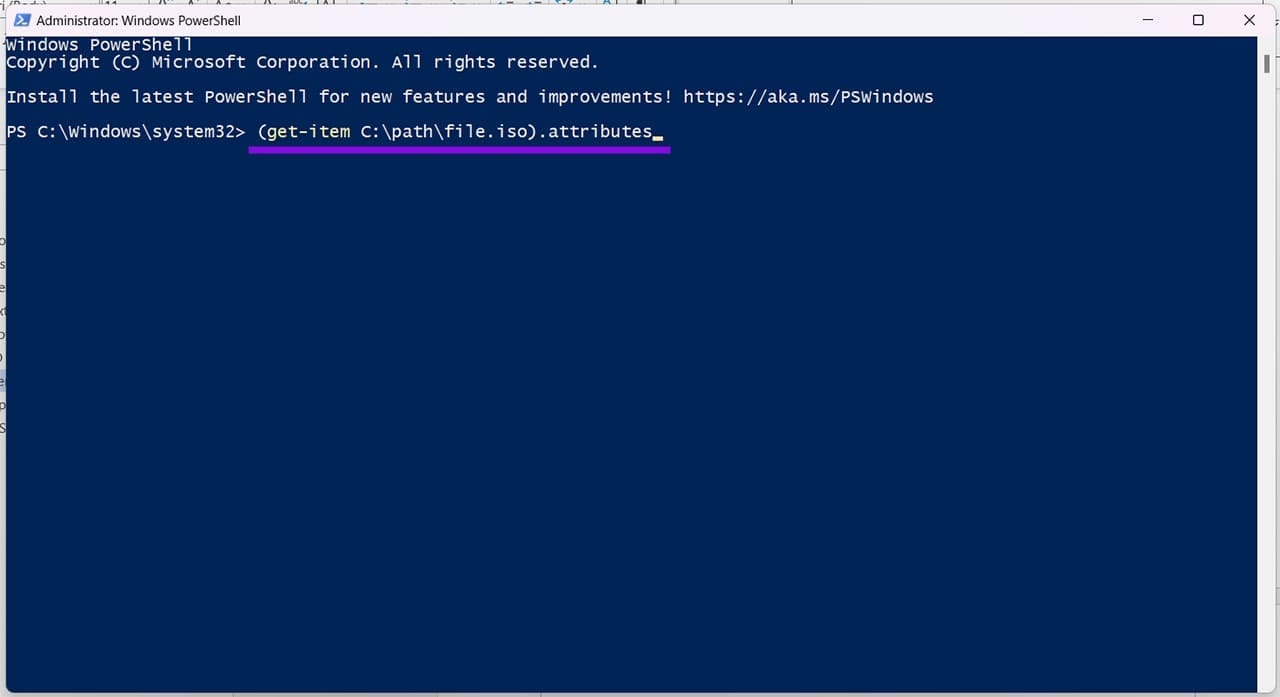
Step 3. If you see “SparseFile” anywhere in the listed attributes, then copy the ISO file to another location or storage drive. This will remove the attribute, and you should be able to mount the image.
Unblock the ISO
Sometimes, the ISO file itself is blocked from being mounted for your protection when it comes from another PC. You can check (and fix) this in Explorer. Here’s what to do:
Step 1. Right-click your ISO and choose “Properties” from the context menu.
Step 2. Under the “General” tab, check the “Unblock” box.
Step 3. Click “OK” and try mounting the image again.