Before you log in to your user profile, before you even see the Windows logo on your screen, the boot manager is hard at work behind the scenes, getting your operating system into gear. It is the first menu you come across, launched either by the BIOS or its more recent iteration, the UEFI. If this boot manager is missing, corrupt, or otherwise not working, you’re going to have problems.
In this article, we’ll be showing you the fixes to try when faced with a missing boot manager in BIOS or UEFI.
What Causes Boot Manager Errors?
If your boot manager is not found, it’s important to know there are multiple potential causes behind it. The major ones include:
- Interference from a USB or DVD causing incorrect boot order
- Corrupted boot configuration data
- Corruption of the master boot record
- A damaged partition or boot sector
These various causes explain the need for multiple fixes, which we’ll get into below.
Fixing a Missing Boot Manager in BIOS and UEFI
Let’s get straight into the troubleshooters. It’s worth trying as many as possible until your problem is resolved:
Remove All External Media
The boot manager is in charge of booting Windows, and not just from your hard drive. When installing a new version of Windows, for example, bootable USBs and DVDs are used instead. If an external device is inserted, your BIOS may try to boot from it first. This mixed-up boot order will then lead to the “missing” error message.
After shutting down your PC, remove all external drives and discs before starting up your machine again.
Check the Boot Order
The incorrect boot order might still persist even after you unplug and remove everything. In this case, you’ll need to head into the BIOS to change things:
Step 1. Restart your machine and press the special key to take you into the BIOS or UEFI. This varies by manufacturer and is usually a “Function,” “Delete,” or “Escape” key.
Step 2. Every BIOS or UEFI screen varies, too. With that in mind, access the “Boot” section, or something similar.
Step 3. Look for the “Boot Order” section. You’ll see a numbered list of devices to boot from. Choose “Windows Boot Manager” (and ensure an external device isn’t listed) and move it to the number one spot.

Step 4. Save your changes and exit. Restart and see if this resolves the problem.
Check Your Hard Drive Connection
It could be that your system’s hard drive isn’t being detected. If that’s the case, check that all connecting cables and the power supply (especially the SATA cable) are properly connected. Try unplugging and plugging them in just to be sure.
Run Startup Repair
For corruption of Boot Configuration Data (BCD) or the Master Boot Record (MBR), you’ll need to enter the Windows Recovery Environment and run Startup Repair. Seeing as you can’t boot into Windows, you’ll have to use a bootable USB. Here’s what to do:
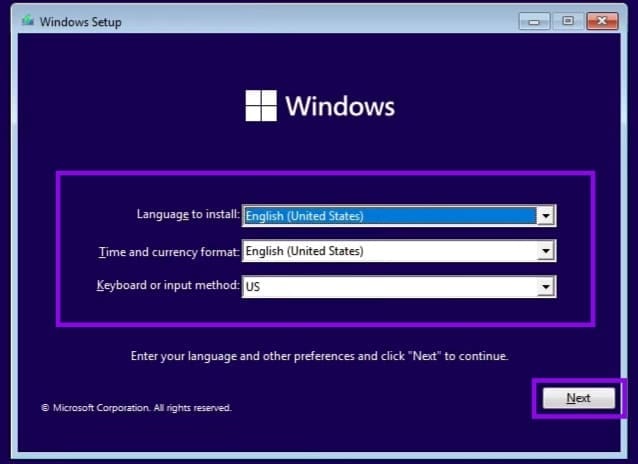
Step 1. Create a bootable drive for your PC with Windows installation media.
Step 2. Boot into your drive, and you’ll be greeted with the Windows installation screen. Choose your preferences and click “Next.”
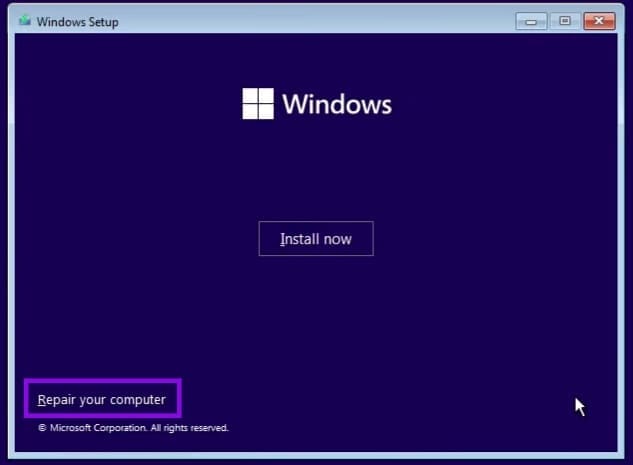
Step 3. In the bottom-left of the next window, click “Repair your computer.”
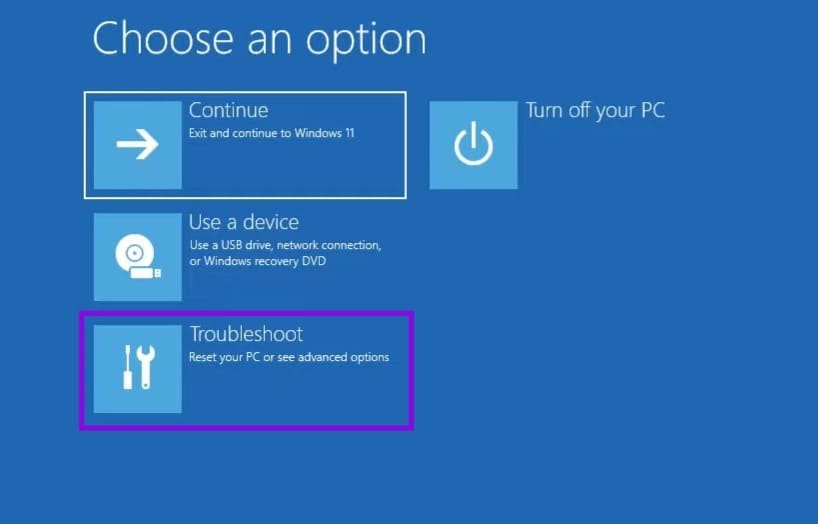
Step 4. Choose “Troubleshoot” from the options.
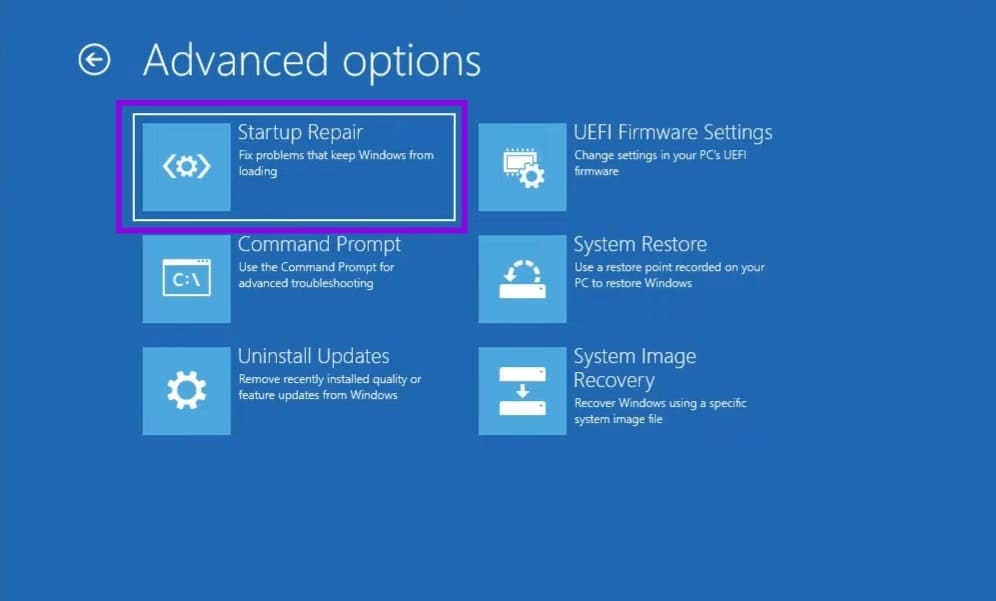
Step 5. Choose “Startup Repair” and choose your operating system.
Step 6. Let the process run. If something is repaired, you’ll be informed. Restart your machine and see if the issue’s resolved.