

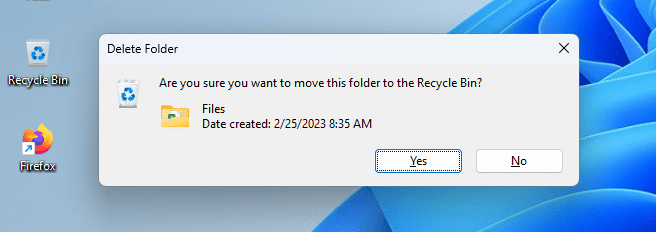
Whenever you delete a file, Microsoft Windows 11 gives you a warning message that asks “Are you sure you want to move this file to the Recycle Bin?”. I’m very confident in what I choose to delete, so I don’t need to be warned about what I’m deleting. Besides, if I ever need to restore a file, it can be done in the Recycle Bin. Save a bit of time and disable the dialog when you delete a file in Windows 11 by changing this setting.
Recycle Bin and a few other components of the Windows File Explorer ensures that you don’t delete content from your local storage accidentally. There are dedicated Recycle Bin ($Recycle.Bin) folders for each partition or drive on your Windows 11 PC. The rule is similar for other dated operating systems like Windows 10, 8, 7, XP, etc. It’s quite simple!
As soon as you create a hard drive partition, the Windows 11 system assigns a default Recycle Bin size depending on the actual volume of the partition. When you press the Delete key by selecting a file or folder on your PC, you get a move to Recycle Bin warning. It informs you where the content is going after deletion.
Sometimes, this confirmation might distract you from what you doing or you just don’t want to know. In such situations, you can follow a couple of methods to disable the Display delete confirmation dialog on Windows 11. There are both basic and advanced methods for different user groups. Keep reading to explore all the methods below.
Contents
Reasons to Disable Display Delete Confirmation Dialog
There could be any reason to disable a warning when deleting items from a desktop or laptop PC. The followings are the most common ones that our readers mentioned:
- The warning is annoying since you know where the file is going once you hit the Delete key
- You’re deleting items from your PC in bulk and don’t want Recycle Bin to bother you when clearing some space
- It could also be likely you’re auditing files and deleting irrelevant ones. There are plenty of files to be deleted and you don’t want extra clicks
A Word of Caution!
If you’ve made up your mind that you’ll get rid of Disable Display Delete Confirmation Dialog box anyway, it’s necessary to remind you that doing so will remove the barrier that prevents accidental deletion. For instance, you share your Windows 11 PC with others and they don’t know you disabled the move to Recycle Bin warning message.
Also, if you accidentally activate the Don’t move files to Recycle Bin, then without the delete confirmation warning, no one is stopping you from deleting files accidentally. Know that deleting files from Windows 11 local storage is an irreversible process. Though there are some data recovery tools like Windows File Recovery and a few others, the tool developers don’t guarantee the outcome.
How to Disable Display Delete Confirmation Dialog
Find below different methods to deactivate the delete confirmation warning pop-up on Windows 11. The steps will work for Windows operating systems up to Windows XP and Windows Server 2003. Give the methods a try depending on your level of technical abilities of Windows PCs:
Option 1 – Recycle Bin Properties
Changing the Recycle Bin Properties is the easiest way to disable the delete confirmation warning box. However, Windows 11 will only enforce the process at the User Account levels. If you switch to another Windows 11 User Account, the move to Recycle Bin warning will start appearing again. Here’s how you can modify Recycle Bin settings:
- Right-click on the Recycle Bin on your Desktop and choose Properties on the context menu that pops up.
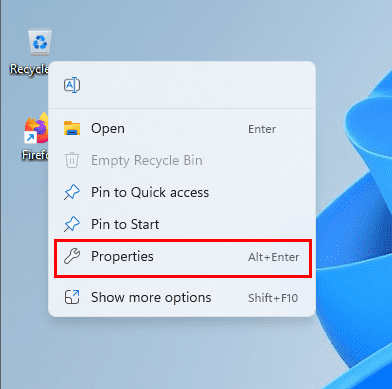
- Alternatively, you can just select the Recycle Bin icon and hit the hotkey Alt + Enter.
- You find yourself now in the Recycle Bin Properties dialog box.
- There, the system automatically keeps the first drive or partition on the list selected which is the C: drive.
- You can change the selection by selecting other drives one at a time.
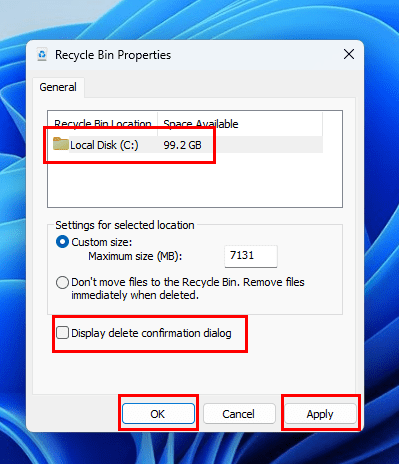
- Let’s keep the Local Disk (C:) as the selected disc volume and then uncheck the box for the Display delete confirmation dialog.
- Hit the Apply button and then select OK.
From now on, when you delete a file, the file will go directly to the Recycle Bin without the move to Recycle Bin message appearing. Here, you may want to note that, the changes will only take effect on the selected disc volume. You must select each volume and apply the modification separately.
Option 2 – Using the Local Group Policy Editor
This method comes with a mid-level complexity badge. You must access system tools like the Local Group Policy Editor app and change certain Windows 11 policies. You must only change the data for the Group Policies mentioned below. If you make any unwanted changes to other Windows 11 local policies, the system might behave abnormally.
- Hold the Windows Key. Then press R to bring up the Run dialog box.
- Type gpedit.msc, and then select OK.
- You now see the Local Group Policy Editor tool.
- Navigate to the following Setting on the tool:
Local Computer Policy > User Configuration > Administrative Templates > Windows Components.
- Windows Components has many Group Policy Settings. You must locate
- You must locate and select the File Explorer Setting on the left-side navigation pane.
- All the options inside this Setting will open up on the right-side panel.
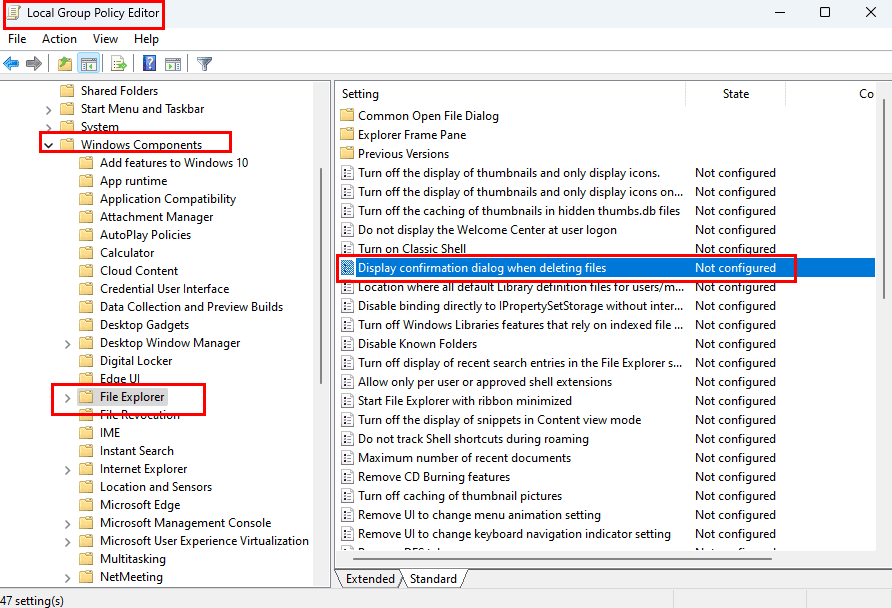
- Open the Display confirmation dialog when deleting files Setting.

- Set the policy to Disabled if you don’t want the dialog to appear.
- Set it to Enabled if you want the warning message to appear again.
- Hit the Apply button and then click OK to save the changes.
- Restart your Windows 11 PC to enforce the changes.
Option 3 – Tweaking the Registry Editor
Let’s say you’re a Windows PC domain administrator and control many PCs remotely for your organization. Or, you’re an expert Windows 11 user and want to explore complex technical tools of the OS. In these cases, you can follow these instructions to apply the change across various User Accounts of the device irrespective of the local settings in Recycle Bin Properties.
Before you make any changes to the Registry Editor, follow these steps to create a backup:
- Simultaneously press the Windows + I keys to open the Run command tool.
- Type Regedit in the box and hit Enter.
- You enter the Registry Editor tool.
- Click File and then select Export.

- For the Export range option, choose All.
- Now, give a file name to the backup and click Save.
- By default, Windows 11 saves the backup in the Documents folder.
- You may change this directory if you like.
- It’ll take up to a minute on NVMe SSD-based systems to create the Registry Editor backup.
Also read: How to Install an NVMe SSD in a Desktop and Laptop
After creating a backup, follow these steps:
- Go to the Explorer key by accessing the following Registry directory:
Computer\HKEY_CURRENT_USER\Software\Microsoft\Windows\CurrentVersion\Policies\Explorer
- Inside the Explorer key, create a new DWORD (32-bit) Value entry.
- Rename it to ConfirmFileDelete.
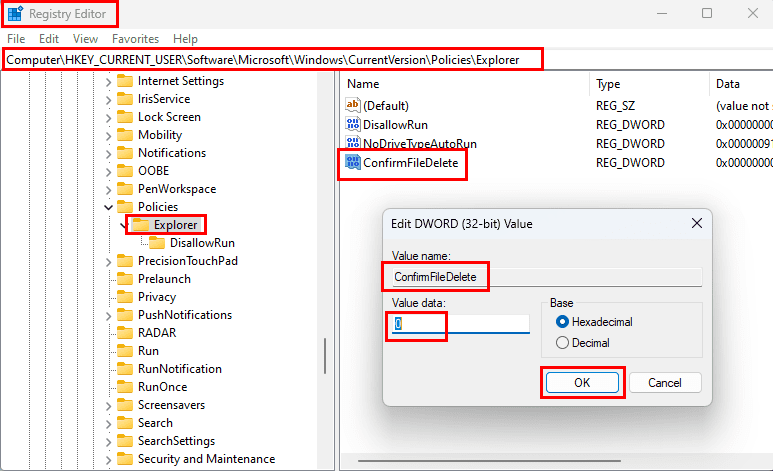
- Double-click the entry and change the value to 0.
- This disables the Display Delete Confirmation Dialog.
- Restart the PC for the changes to take effect.
- To revert the modification, follow the same steps to access the ConfirmFileDelete entry and change its value to 1.
- If you want to enforce the setting for all the User Accounts on the PC, do the above for the following Registry directory:
Computer\HKEY_LOCAL_MACHINE\SOFTWARE\Microsoft\Windows\CurrentVersion\Policies\Explorer
Disable Display Delete Confirmation Dialog: Final Words
Now you know four straightforward methods to disable the awful warning message: “Are you sure you want to move this file to the Recycle Bin”. These methods are applicable to Windows 11 and other dated Windows PCs. Though the methods look tempting, the end result is Windows 11 not prompting you when deleting files.
This could bring serious consequences. Hence, make changes when you’re absolutely sure. For shared desktop or laptop PCs, attach a label somewhere near the workstation that the Display Delete Confirmation Dialog has been disabled intentionally.
If you know other intuitive ways to disable the move to Recycle Bin dialog box, don’t forget to share that in the comment box below. Do share the article with your friends and colleagues who might also want to know these Windows 11 Recycle Bin tricks and tips.
Next up, learn how to fix the “Class Not Registered Error in Explorer.exe” and methods to resolve Explorer.exe doesn’t load at startup issue.


Hello. I went to properties to ensure the Display delete box is unchecked which it was. However when I right click to delete, permanently delete is shown. I also attempted the section option you posed however I couldn’t move past No. 2. I tried to drop a file into the recycle but the dialogue box appeared asking if the file is to be permanently deleted. I’m stumped, whaaaaaaaa :'(
Any advice?
Cheers
Hi Matt,
Thanks, but from 1909 onward, neither method applies.
Thank all.
it help me a lot .
Yes I have Tried with Option 2, whree one thing is required to be find, as mentioned by Kyriakos Theodoulides says
October 17, 2017 at 7:09 am
Under Windows Vomponents -> File Explorer -> “Display confirmation dialog when deleting files” setting to Disabled
Kyriakos Theodoulides solved it. My unending thanks, sir! I shall think of you every time I delete a file.
Under Windows Components -> FIle explorer -> “Display confirmation dialog when deleting files” setting
There IS No “Display confirmation dialog when deleting files” setting.