
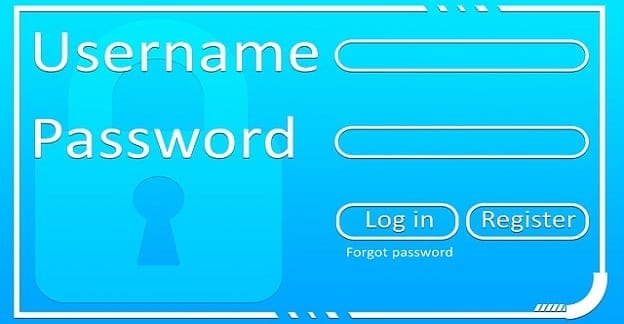
Unfortunately, some people don’t know how to respect your privacy. That’s why adding a password to your folders is necessary. That way, you know no one else will snoop through your files. In the following article, you’ll see how to use your Windows 11 settings to protect those folders with important files you don’t want anyone else to see. If you ever want to remove that protection, the process to do is just as easy. Also, even if you’re in a hurry, you can do it in less than 5 minutes.
Contents
How to Password Protect Your Files for Windows 11 Home and Pro
There are just specific files that are not for others to see. But the good thing is that Windows 11 Home users can create a password-protected folder where they can keep their files safe without needing third-party software. However, if you want to use software, keep reading to see which one you can try.
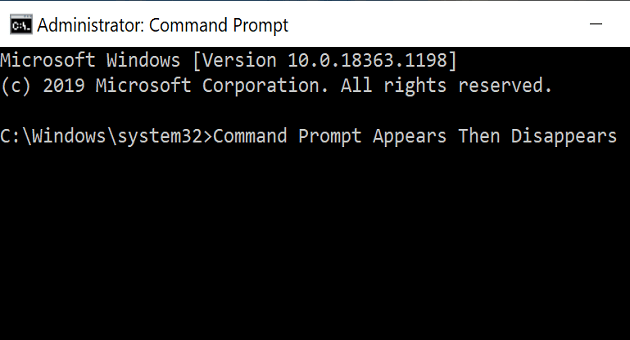
To create a password for your files, open the folder where you will keep your sensitive information. Right-click on a space and choose New. When the side menu appears, choose Text Document. Name your file and press enter. Click on the file to open it and enter the following text:
cls

@ECHO OFF

title Folder Locker

if EXIST "Control Panel.{21EC2020-3AEA-1069-A2DD-08002B30309D}" goto UNLOCK

if NOT EXIST Locker goto MDLOCKER

:CONFIRM

echo Are you sure u want to Lock the folder(Y/N)

set/p "cho=>"

if %cho%==Y goto LOCK

if %cho%==y goto LOCK

if %cho%==n goto END

if %cho%==N goto END

echo Invalid choice.

goto CONFIRM

:LOCK

ren Locker "Control Panel.{21EC2020-3AEA-1069-A2DD-08002B30309D}"

attrib +h +s "Control Panel.{21EC2020-3AEA-1069-A2DD-08002B30309D}"

echo Folder locked

goto End

:UNLOCK

echo Enter password to Unlock folder

set/p "pass=>"

if NOT %pass%== Your-Password-Here goto FAIL

attrib -h -s "Control Panel.{21EC2020-3AEA-1069-A2DD-08002B30309D}"

ren "Control Panel.{21EC2020-3AEA-1069-A2DD-08002B30309D}" Locker

echo Folder Unlocked successfully

goto End

:FAIL

echo Invalid password

goto end

:MDLOCKER

md Locker

echo Locker created successfully

goto End

:End

Replace Your-Password-Here for your new password. When you’ve added the password, click on File at the top left and choose Save as. However, let’s say you named your file WorkStuff. Add a bat file extension to the name to look like WorkStuff.bat.
Additional Info
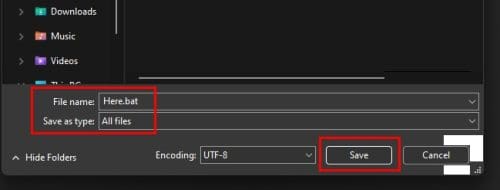
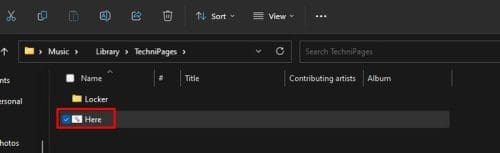
In the Save as type, set that to All files and Save. Close your file, and you’ll now notice the new bat file. Erase the old file, and when you double-click on the new one, you’ll see a locker folder above it. Furthermore, click on the locker folder and start adding your essential files. You can add different documents by clicking on the New option at the top left and choosing the kind of file you want to add.
You can add files such as:
- Word
- PowerPoint
Excel - Text Document, etc.
Once you’ve added all the files you need, don’t forget to lock the folder before you close everything. Double-click on the file name (the one below the Locker folder), and when it asks you if you want to lock the folder, enter a Y and press enter.
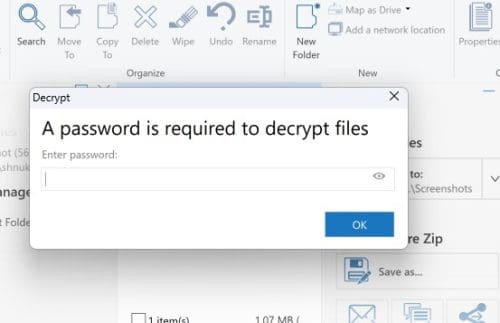
The next time you click to open it, you must enter the password you created earlier. When you lock the folder, you’ll notice that the Locker folder is gone and disguised as one called Control Panel. You only see the Locker folder once you’ve entered your password.
How to Secure a Folder Using Properties (Only for Windows 11 Pro and Enterprise)
This option is only available if your computer runs on Windows 11 Pro or Enterprise. If you meet the requirements, then this is how you can protect your files without adding third-party software, and be done in less than five minutes.
Open File Explorer (Windows +E keys) and look for the folder with the files you want to protect. Right-click on the folder or file and go to Properties. At the bottom right of the Private Properties window, click on the Advanced button. In the Compress or Encrypt attributes section, look for and check the Encrypt contents to secure data option. Click OK, and when that window goes away, click Apply and OK in the remaining window.

You’ll be asked if you want to apply this change to this folder only or if you want to apply it to all subfolders and files as well. Choose an option and click OK. In addition, you’ll need to restart your computer to see the lock icon on the folder you protected.
Note: You might want to test if the process worked by trying to open the folder and expecting to be stopped right in your tracks. But this security measure will prevent someone logged in with another account using your computer from seeing those files.
How to Password Protect Your Files on Windows 11 With WinZip
Windows Home users will see the encrypt option greyed out, but you can add a password to your file by using WinZip. It’s a great third-party software you can use to password-protect your files and many other things. You can try it free for 21 days and decide if you want to keep it or not. You don’t have to enter financial information to use the free trial.
Once you’ve downloaded the software, you can add a password to your files by choosing the folder with the files you want to protect. Click on the Encrypt option at the top and read the warning message; click OK. On the next window, add your password twice and further click OK. WinZip will start preparing your files and ask if you want to keep or delete the original files. Click an option, and the window will close.
But, when you try and open the original file, it’ll open on your computer, and you won’t be asked for a password. But if you open the other file with the compressed icon, WinZip will ask you what you want to do with the file before it asks you for the password to open the file. Enter it and click OK. You should be able to see your files now.
Further Reading
If you’re still in a reading mood, you can read this helpful article on how you can change the password and name of your mobile hotspot on your Android device. You can also see how to find and erase saved passwords for the Edge browser. Are you curious to see how you can unlock your iPhone without a password or computer? And, if you want to see how you can turn off Find My iPhone without a password, here is something for you to read.
Conclusion
In brief, keeping your files safe is important since you never know when someone with the wrong intentions may want to access them. Whether you’re using Windows Home or Pro, there are methods you can try to keep your files safe. Indeed, sometimes you may need the help of third-party software; for others, you can use features that come with your Windows computer. Nevertheless, precautions must be taken to protect important files from the wrong people. Which method are you going to try? Let me know in the comments below, and don’t forget to share the article with others on social media.

If you right click on the FolderLocker it gives you the option to edit, thus revealing your password.
Hi,
Thanks very much for this,
Even though I use windows 10 pro, this seems like a not less good solution,
I too see the hidden map, but I don’t see how it matters if you have a password locking the folder.
Hi, I tried it; but stil you can see as a hidden map: : Control Panel.{21EC2020-3AEA-1069-A2DD-08002B30309D}
( the option”show hidden files” is always on on my pc)
This is after the “big” windows 10 update. any suggestions ? thnx