Dark mode is a feature on almost every app, including Outlook. It helps you save battery life, and it looks good too. That’s why many users look to turn on dark mode in Outlook. It’s easier on the eyes and gives the app a new look. Turning on dark mode in Outlook is quick and easy and can be changed anytime. Keep reading to see how to get dark mode on Outlook on your computer, Android device, and iPad.
Contents
How to Turn on Dark Mode in Outlook on Windows 11
To give your Outlook app the dark mode, look open the app on your Windows computer. If you’re using Outlook new look, you should see a cogwheel at the top right. You can turn on the new look for Outlook by toggling it on at the top right of the old design.
When the new look is on, click the cogwheel and go to Settings. In the Settings window, click on General, followed by Appearance.

At the top, you’ll see options for:
- Light
- Dark
- Use system settings
Under the Modern Themes section, you’ll see two more options for dark mode. One of the options will still give Outlook the dark mode look but with an image of snowy mountains. If you choose the first option, you’ll only get an image of two envelopes with a message that says select an item to read below them. You’ll see what they look like when you click on them. That way, you can change it if you don’t like what you see in the preview.
By scrolling down to the Appearance section, you’ll see more themes. Most are not dark mode, but there are a few to choose from.
Enabling Dark Mode for Outlook on iPad
If you’re using Outlook on your iPad, the cogwheel to go to Settings will be in a different area. When you open the app, tap on the cogwheel at the bottom left of your screen. Swipe down until you come across the Appearance option. Tap on Appearance, and at the top (Under the Theme section), you can choose from options such as:
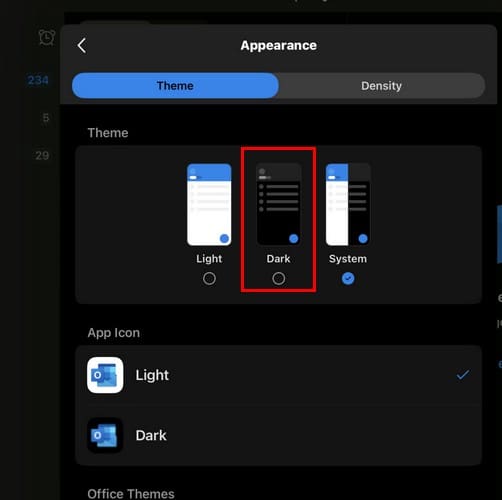
- Light
- Dark
- System
Under the App icon section, you can also apply the dark mode option to the app icon. What will change here is that the background color will change, not the colors on the icon. If you choose another background color, you’ll get confirmation that the change was made. As long as you’re there, you can also select the Density of your inbox. You can choose from:
- Roomy
- Cozy
- Compact
Enabling Dark Mode on Outlook on Android
You can turn on dark mode for Android users by opening your device’s Settings app since the app will use the theme you have for your Android device. You can change it by going to:
- Settings
- Display
- Toggle off dark theme
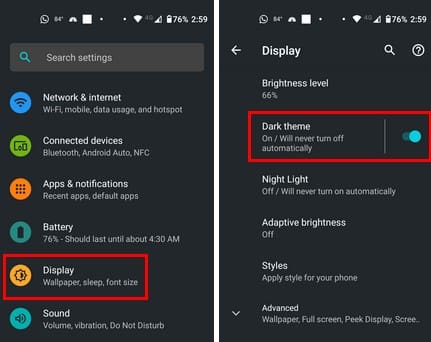
Open the Outlook app, and the dark theme you recently applied to your phone will also apply to the app.
Further Reading
There are other apps you can enable dark mode on. For example, dark mode for Microsoft Teams is available, and it’s also available on Facebook. Other apps where you can find the dark mode feature are WhatsApp and Snapchat.
Conclusion
Dark mode makes looking at your display a lot easier. No wonder many users enable it on other apps, and now you know how to turn it on in Outlook. The steps may change slightly depending on your device, but it shouldn’t be too different. Do you use dark mode on all your apps? Share your thoughts in the comments below, and remember to share the article with others on social media.