When you share an important file in a Teams channel, you probably don’t want people to delete it accidentally or intentionally. If we’re talking about a cornerstone file, such as a common style guide, you need to make sure nobody can delete it. Let’s see how you can disable the delete option in Teams.
Contents
How Do I Restrict Teams Users from Deleting Files?
As a quick reminder, the files you share in Teams channels are stored in your team’s SharePoint folder. If you want to protect a file from deletion, you need to change the permissions in SharePoint and make that file read-only.
Create a New Custom Permissions Role
But first, you need to create a custom permission role in SharePoint and then assign that role to Teams users.
- Go to SharePoint’s Home page, and navigate to Advanced → Site permissions.

- Add a new role and select only the permissions that don’t include the delete option.
- Go to Library and switch the user permissions to the new role you just created.
Edit an Existing Role
Alternatively, you can also change the permissions of an existing SharePoint user group.
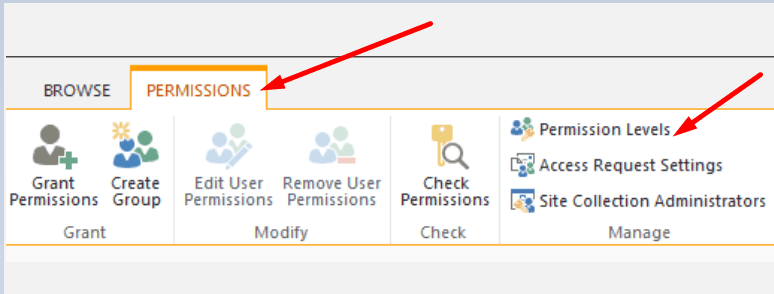
- Launch SharePoint and go to Site permissions.
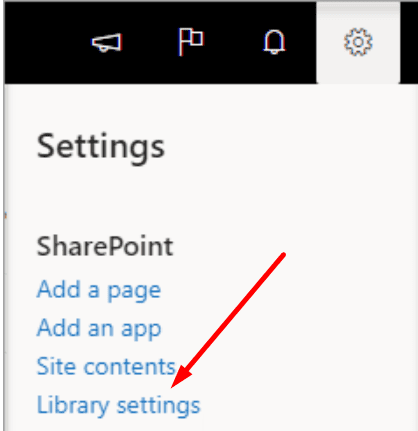
- Then select Documents and then click the gear icon.
- Select Library settings.

- Click Permissions and Management and go to Permissions for this document library.
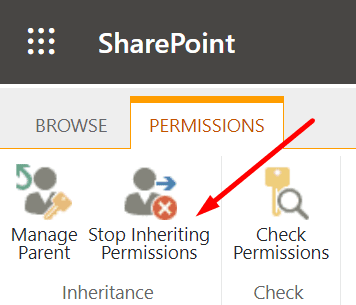
- Next, you need to select Members group and Stop Inheriting Permissions.

- Go to Edit User Permissions. To prevent users from deleting Teams files, change the permission to Read.
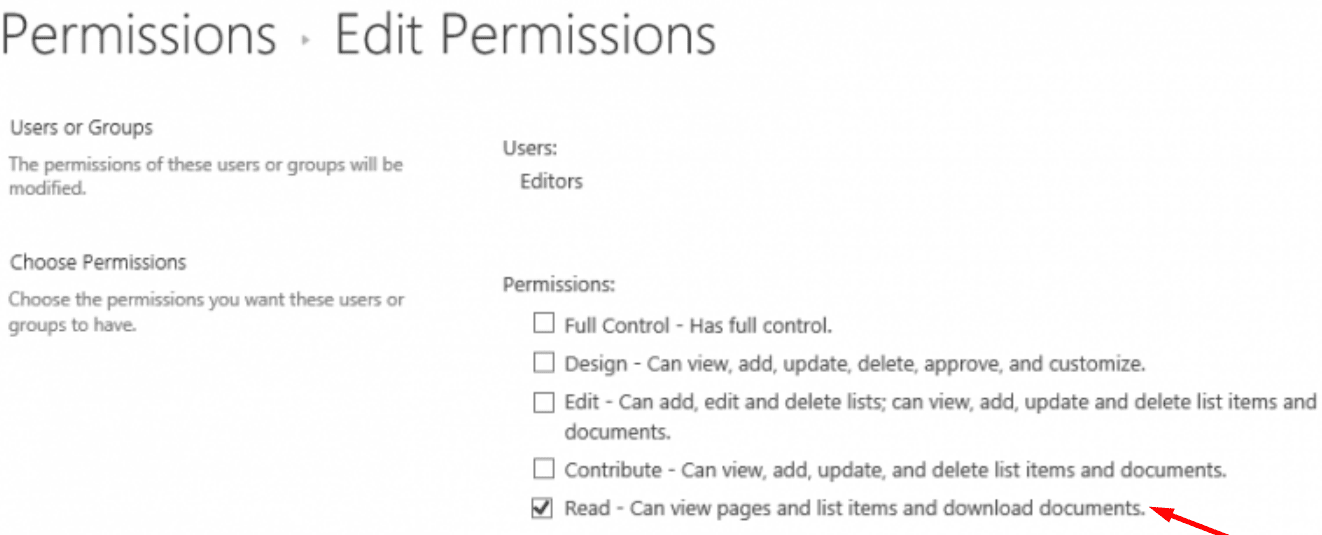
Selecting any of the other permission options allows users to delete documents. But you don’t want that, do you?
Allow Users to Add New Items but Not Delete Existing Files
If you want users to add or edit files but not delete existing documents, you can create a custom SharePoint Permission level. Basically, you can copy your existing permissions and take out the Delete Items permission.
- First, navigate to Site Settings, select Users and Permissions, and click Site permissions.
- Then, go to Permission Level.
- Click Edit permission level.
- Click on Copy Permission level.
- Name the new permission level and make sure you untick the Delete Items checkboxes.
- Hit the Create button and assign the new permission level to the user group you want to prevent from deleting files.
Speaking of preventing users from removing files, you may also want to check out our guide on how to lock files in Microsoft Teams.
Conclusion
When you share important files on Teams channels, preventing users from deleting them is crucial. You can achieve that by setting up specific library settings or creating a custom SharePoint permission level for that user group.
Do you know any other ways to prevent Teams users from deleting files? Feel free to list the steps to follow in the comments below.