
Much of how we interact with computers is through text. To display text on the screen, fonts are used which define the appearance of the characters. Different fonts can be used for different purposes. Linux Mint defines five standard uses for fonts that can be configured independently.
To configure the fonts that Linux Mint uses you need to open the font selector tool. To do so, press the Super key, then type “Font Selection” and hit enter.
Tip: The “Super” key is the name that many Linux distributions give to the Windows key or Apple “Command” key to avoid any trademark issues.
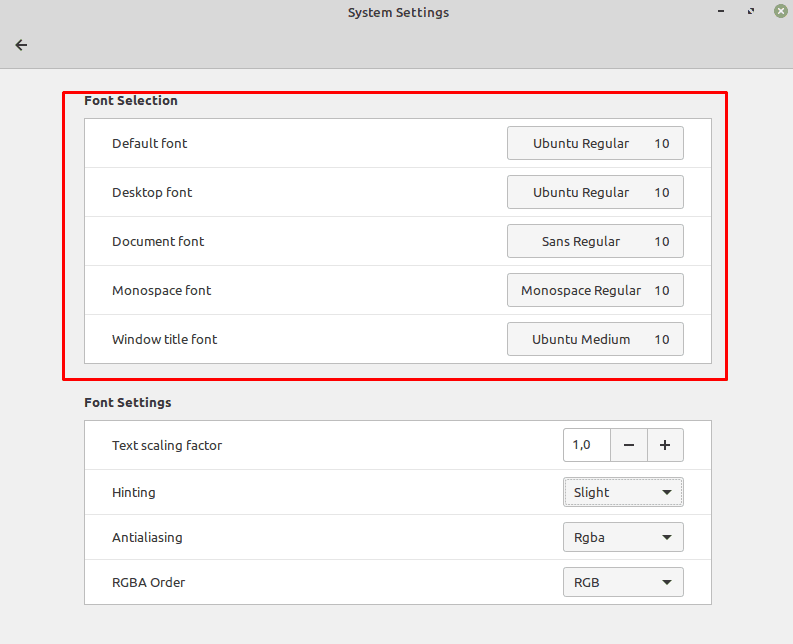
The first of the five fonts “Default font” is used for most text across the operating system. “Desktop font” is used exclusively for the labels of desktop icons. “Document font” is intended to be used when displaying documents, however, most document viewers use their own font settings, so this doesn’t see much use. The “Monospace font” changes the font used by terminal applications. “Window title” font changes the font used for the window title at the top of each window.
Note: The font options only affect some applications. Apps that set their own fonts such as Libre Office Writer or Google Chrome will be unaffected.
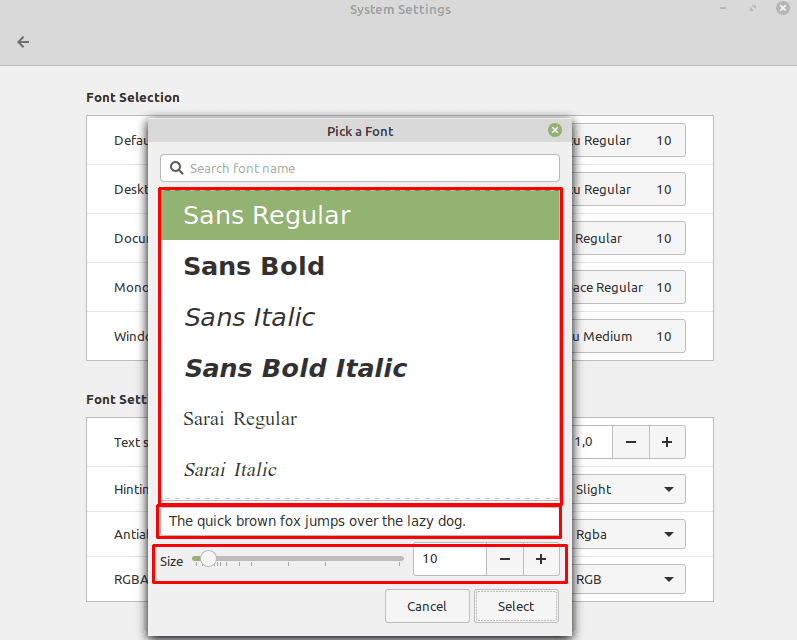
By clicking on the currently used font for any of the five font categories, you can select a new font, or configure the font size. In the “Pick a Font” window, you can use the top text box to search for a font by name. Additionally, the bottom text box is used to show how the resulting font and font size will look.
If you want to switch back to the default appearance, the default fonts are “Ubuntu Regular”, “Ubuntu Regular”, “Sans Regular”, “Monospace Regular” and “Ubuntu Medium” respectively. All fonts default to font size 10.
Font settings
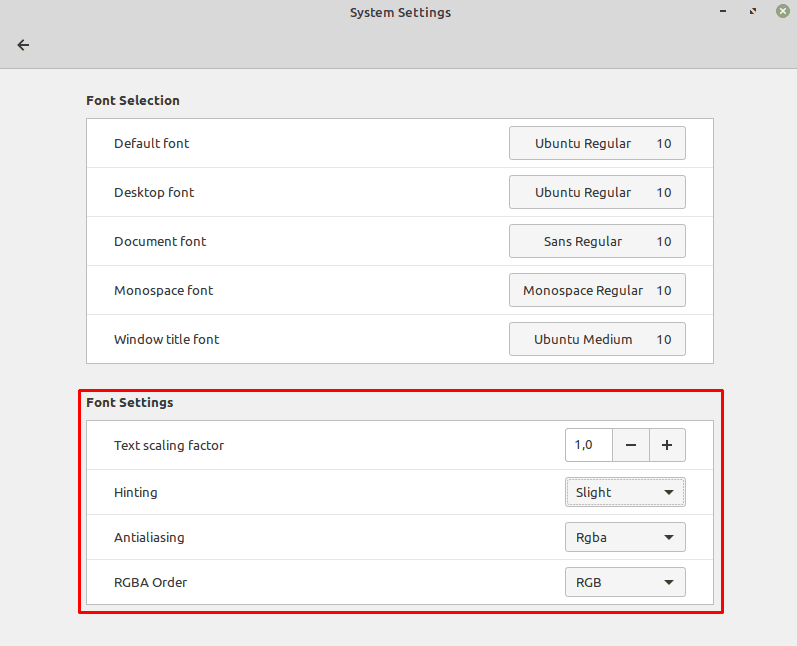
The “Text scaling factor” adjusts the scaling of all affected fonts, with larger numbers scaling the fonts up. “Hinting” is a technique of adjusting how characters are displayed by aligning them horizontally and vertically with the physical pixels on the screen, in an attempt to minimise blurring around straight lines.
“Anti-aliasing” is a process of trying to smooth out jagged edges, especially noticeable on diagonal lines and curves by applying a subtle blurring effect to improve image quality. “RGBA” order is used to configure how the antialiasing effect is applied.
Tip: For anti-aliasing, “RGBA” refers to the type of colours that are applied to smooth edges, specifically: Red, Green, Blue, and Alpha. “Alpha” isn’t technically a colour, instead, it’s the term used to refer to transparency. As part of the smoothing process, some pixels have their colour adjusted by adding colour whereas others are made slightly more transparent.


@brousse.ouillisse
I don’t know about Keepass or Openshot but at least xnview use qt. You can change the font with qt5 configuration tool (qt5ct).
This unfortunately does not affect the font type and size of some applications ;
and I don’t know why, nor how to change their size, then :-(
Examples: KeepassXC font, OpenShot video Editor, Xnview image viewer..
For all the rest of Mint (21.1) and apps, it’s working fine.
Could someone explain this to me or link to any valuable resource ?
Any help is appreciated here.
Works perfectly on Mint 20.3 Cinnamon. Thanks!
And this is also useless on Mint Mate 20.3 desktop
“Font Selection” produces no search results on my Mint 19.3 Mate desktop.