Printers are finicky things that never seem to cooperate when you want them to. Outside the physical printing errors that can happen (jams, running out of ink, etc.), you also have configuration problems to deal with. Error 0x800706b5 is one such example. If this is popping up on your screen, we’ve got some fixes to try to get things working smoothly.
What’s the Problem Here?
Error 0x800706b5 is generally associated with printer configuration or communication problems between Windows and your printer. Configuration issues, drivers, and a stalled Print Spooler service can all contribute to printer problems in Windows. The issue may be with Windows, the printer configuration, or the printer itself, so it’s worth troubleshooting all issues.
Troubleshooting Error 0x800706b5
Speaking of fixes, it’s time to start troubleshooting. Below we have various potential fixes that can help get your printer and PC communicating normally again.
Run the Printer Troubleshooter
Windows has a number of troubleshooters for different components, which can make initial errors easier to solve. Here’s how to run the printer one:
Step 1. Open the “Get Help” app from the Start menu or “Search.”
Step 2. Search for “printer troubleshooter” and select the relevant troubleshooting option.
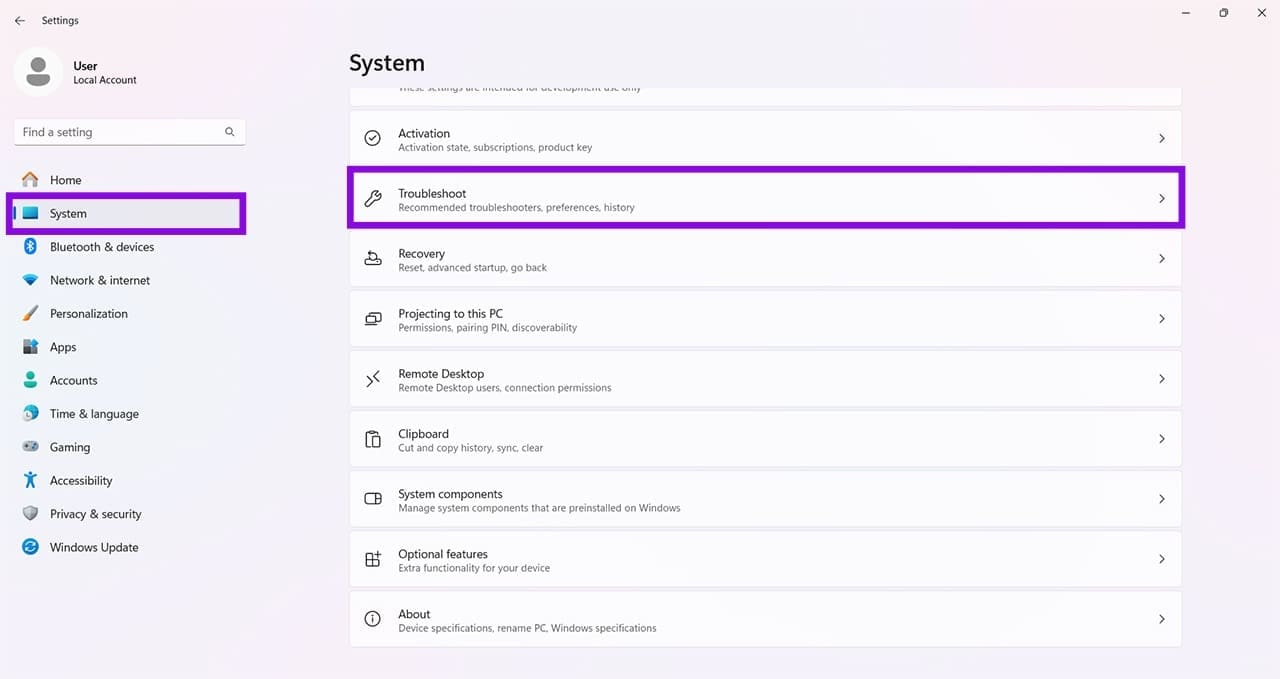
Step 3. Follow the prompts and allow the troubleshooter to diagnose and attempt to fix the problem.
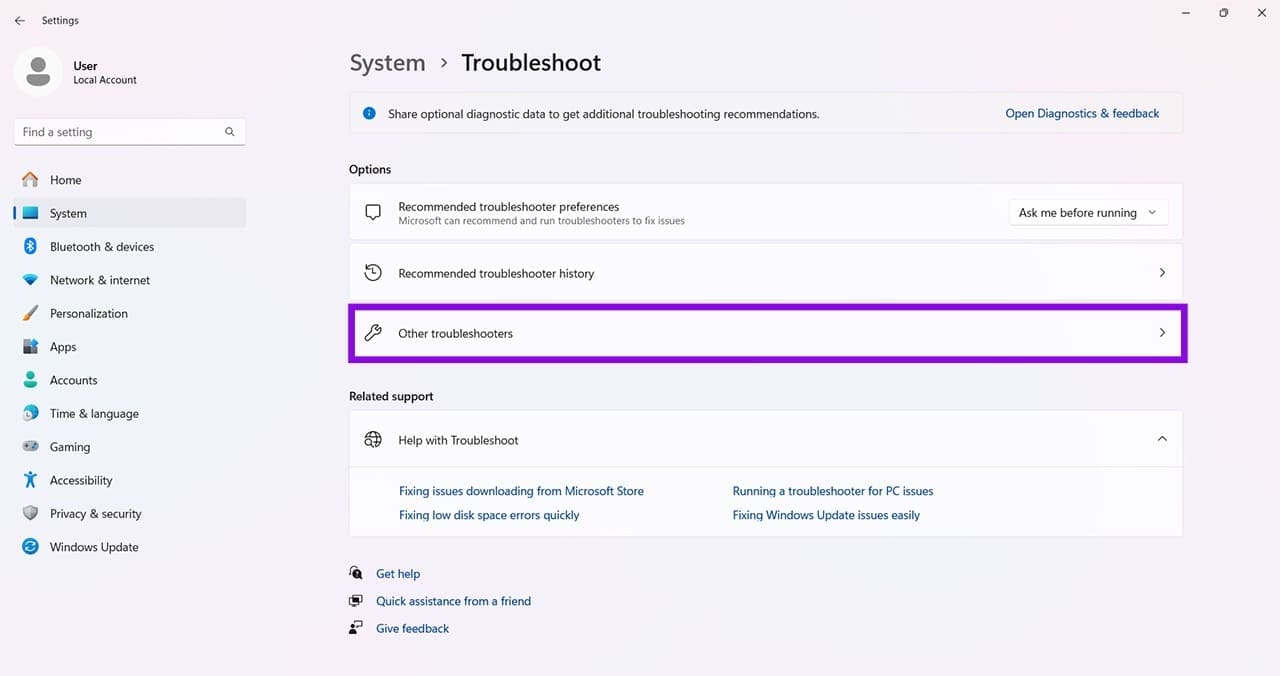
Step 4. Navigate to “Printer” and click the “Run” button next to it.
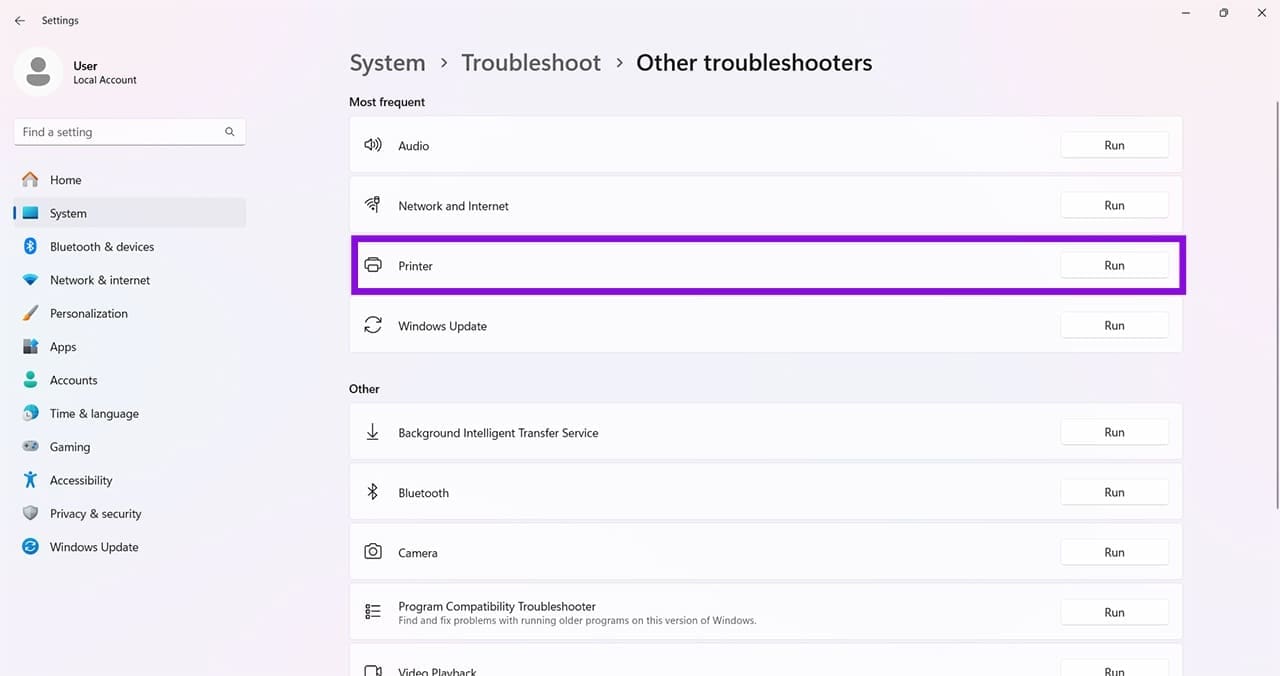
Step 5. Let the process run and follow any actions required.
Remove and Re-Add the Printer
A fresh start is always good, and the same can be said for your printer. Re-adding it to your PC can solve a lot of errors, including 0x800706b5. Here’s what to do:
Step 1. Open the Control Panel via the search bar.
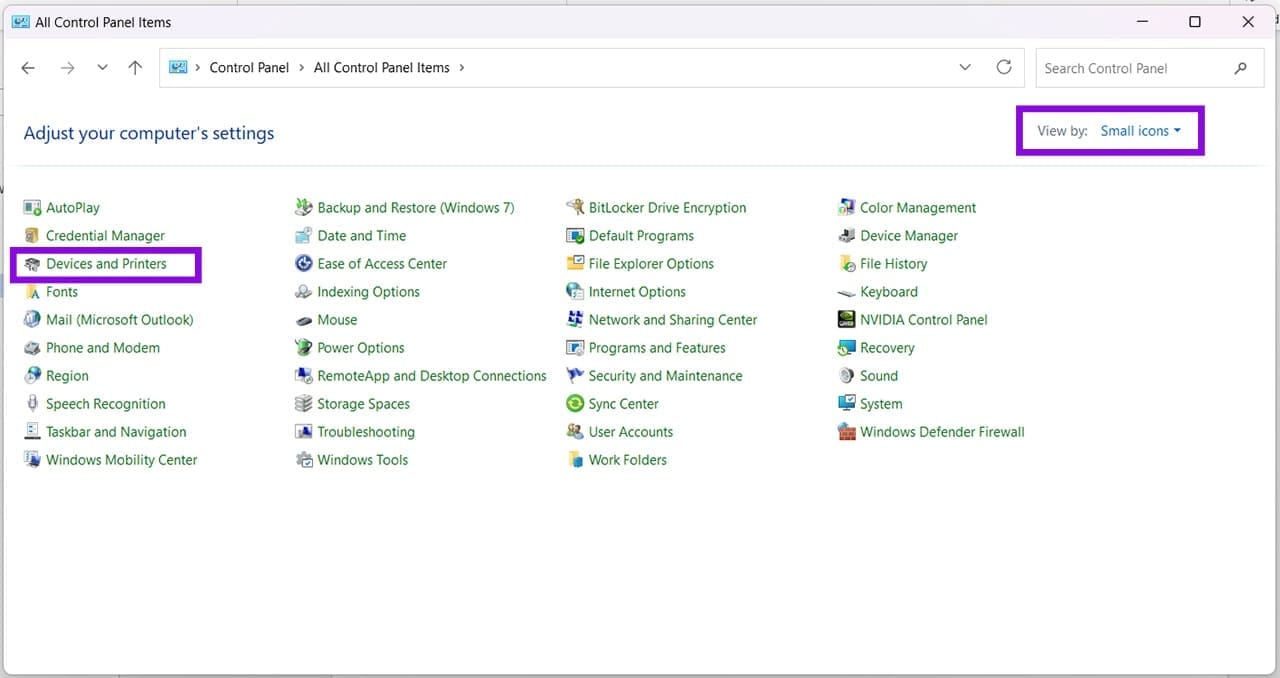
Step 2. In the “Small icons” view, click “Devices and Printers.”
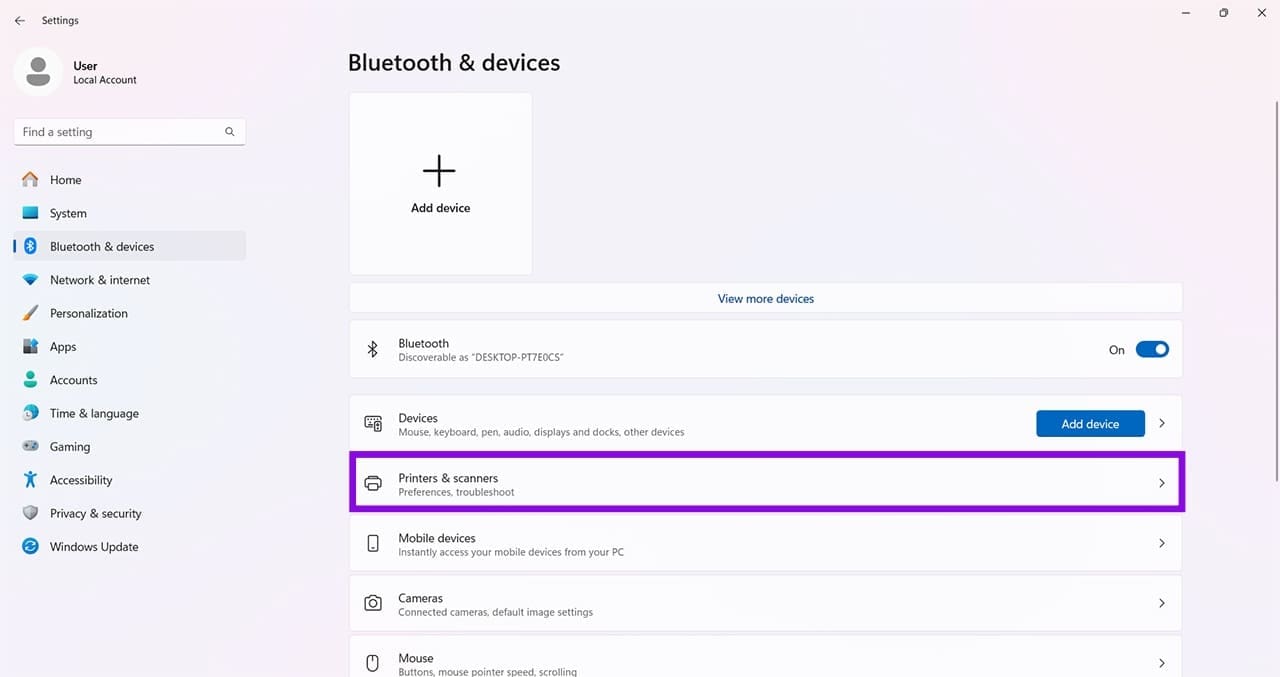
Step 3. Click “Printers & scanners” on the next screen.
Step 4. You’ll see a list of printers. Click your problematic one and click the “Remove” button on the next screen.
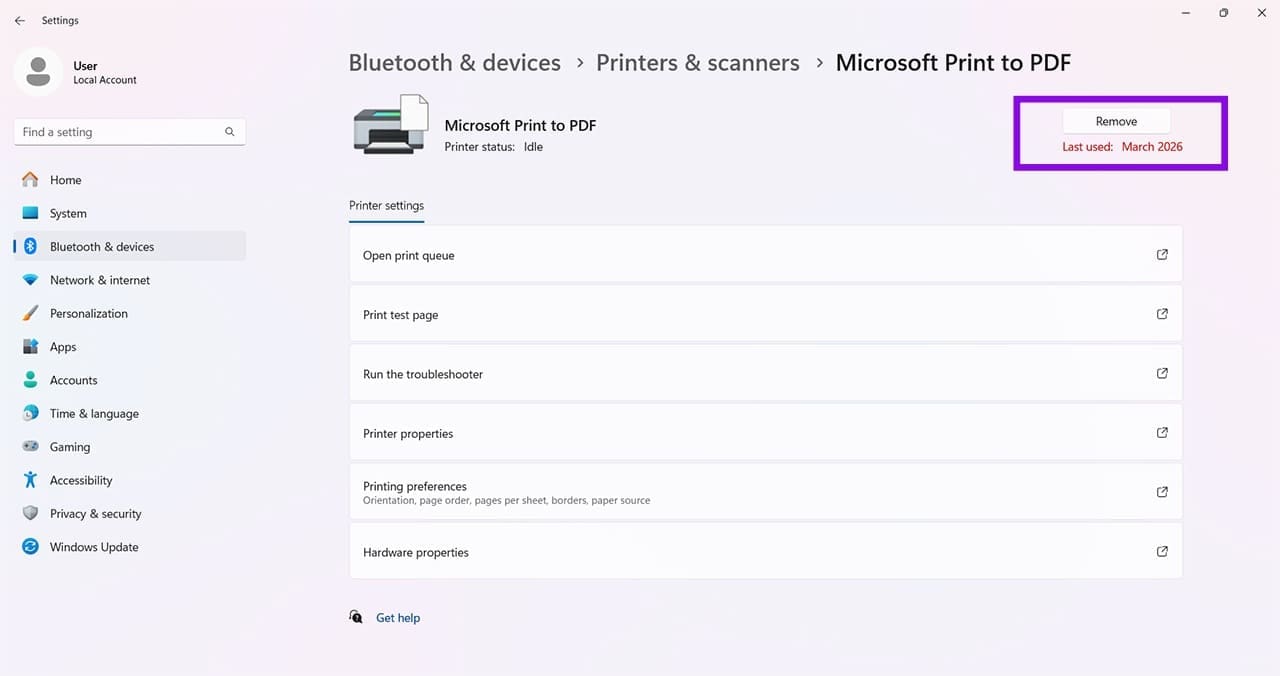
Step 5. The printer will be forgotten.
To add the printer again, do the following:
Step 1. In the previous screen of Settings (Printers & scanners), click the “Add device” button.
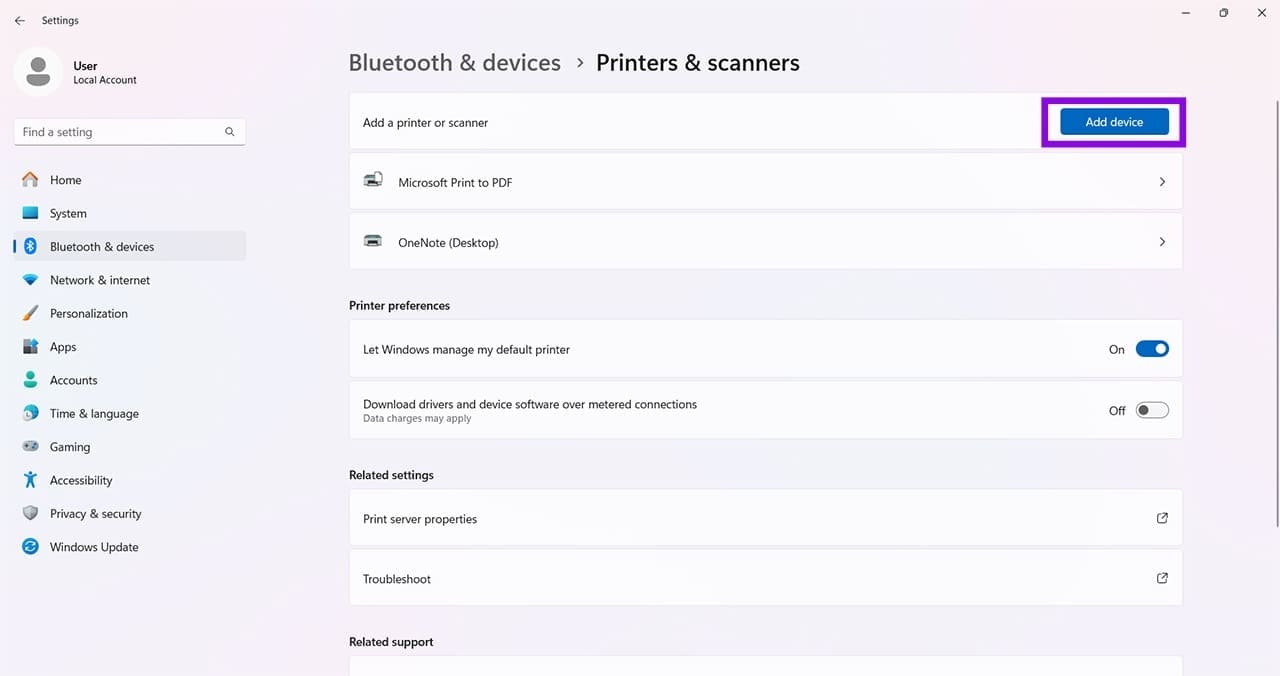
Step 2. Allow the PC to detect any printers connected. If this doesn’t work, click “Add manually” and follow the steps provided.
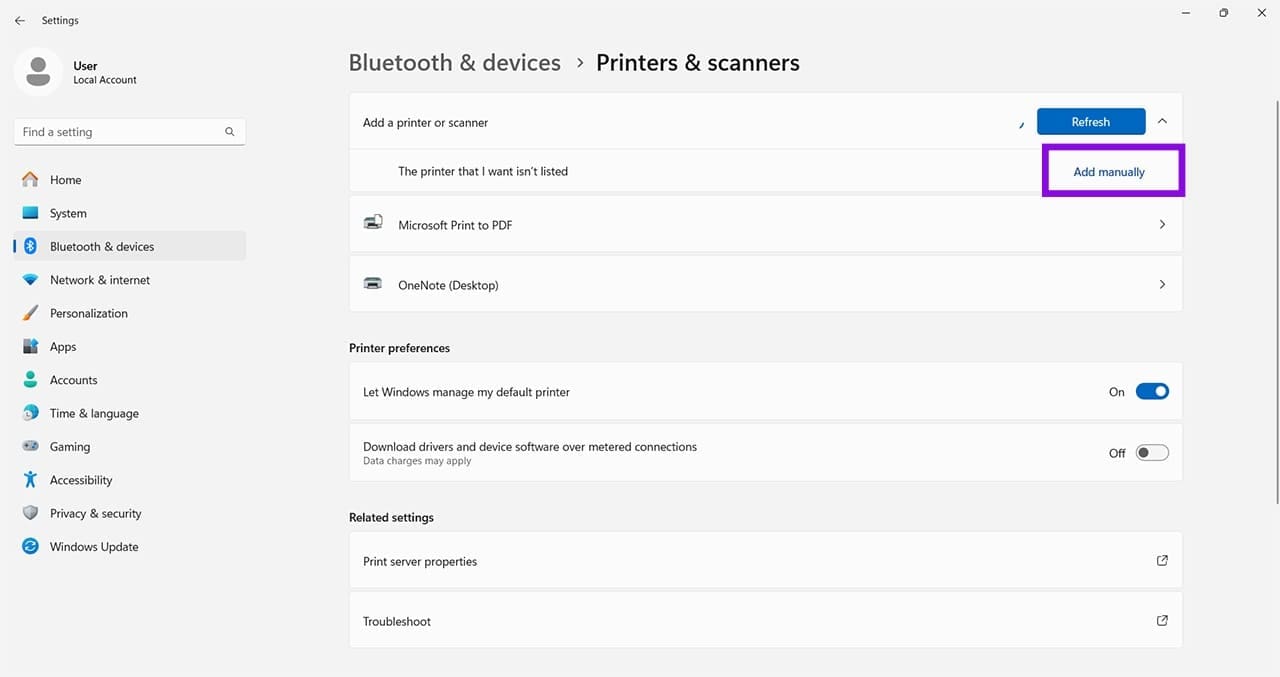
Step 3. Once done, try using the printer and see if it works.
Update Your Printer’s Driver
A major source of printer trouble is an outdated or corrupted driver. To ensure that your drivers are up to date and functional, do the following:
Step 1. Open the Run Dialog (Win + R) and type “devmgmt.msc” before hitting “Enter.”
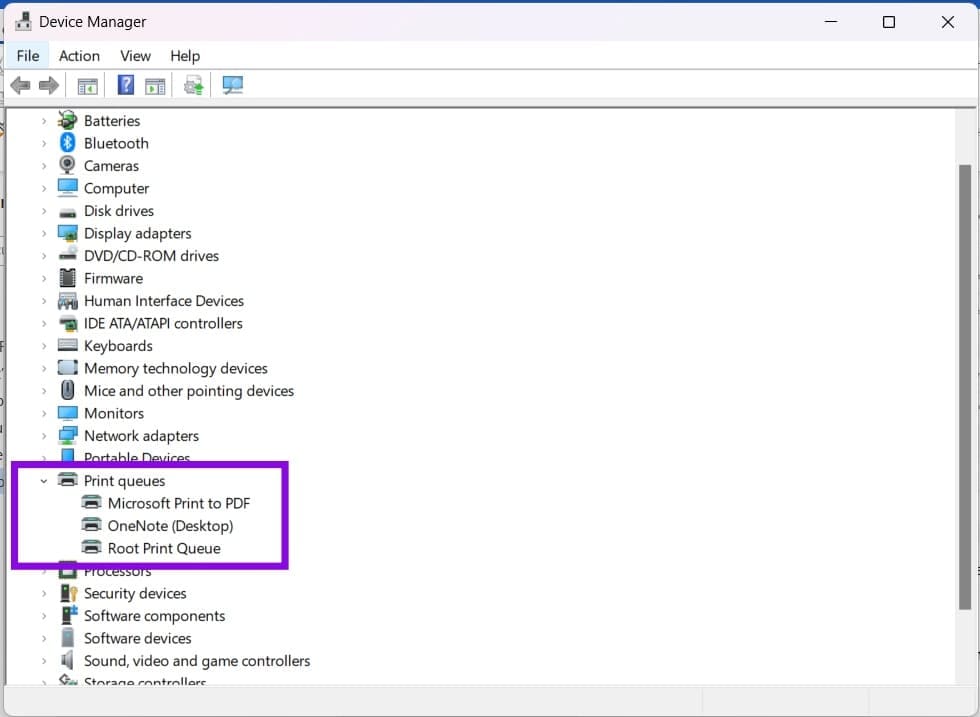
Step 2. In Device Manager, click “Printer queues” to expand it and right-click the problematic printer. If it has a driver error, a yellow triangle will show up next to it.
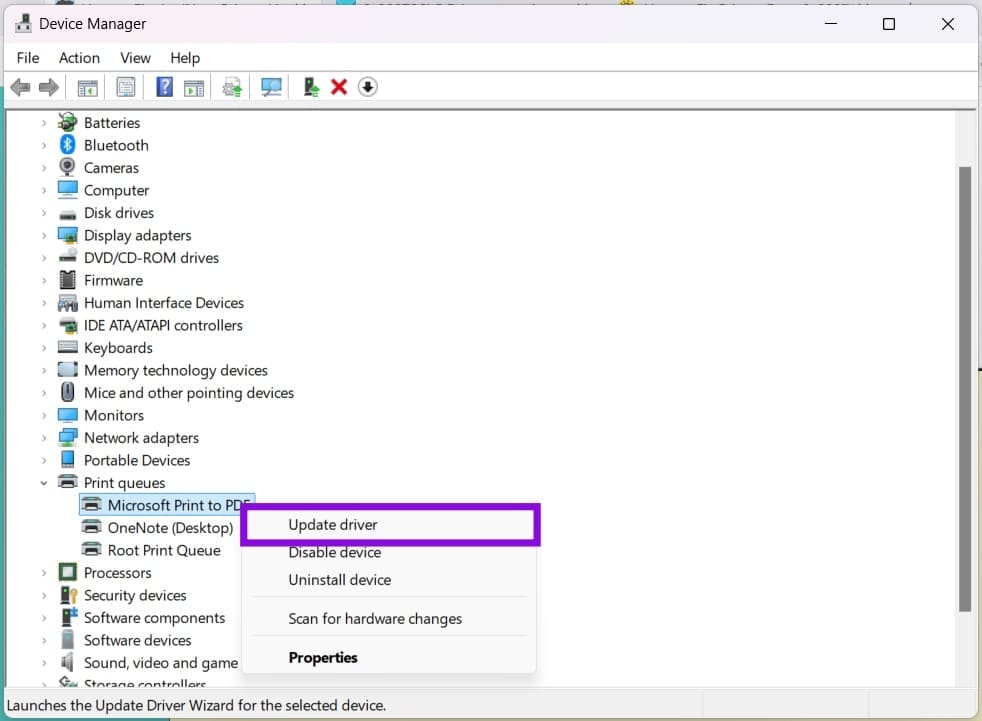
Step 3. Choose “Update driver.”
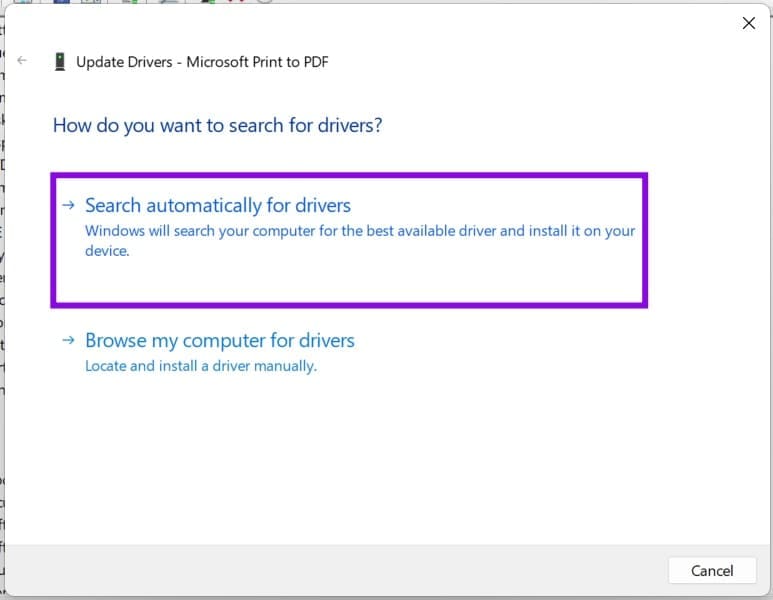
Step 4. In the next pop-up, choose “Search automatically for drivers” and choose any new ones that pop up.
If this doesn’t work, you can choose “Uninstall device” and start fresh. When rebooting your PC, a new driver will be installed. You can also visit your printer manufacturer’s page directly and download the drivers yourself.
Clear the Print Queue
Clearing the print queue and spooler can be a good way to start fresh too. Here’s how:
Step 1. To stop the Spooler, open Services via the search bar, and navigate to “Print Spooler.”
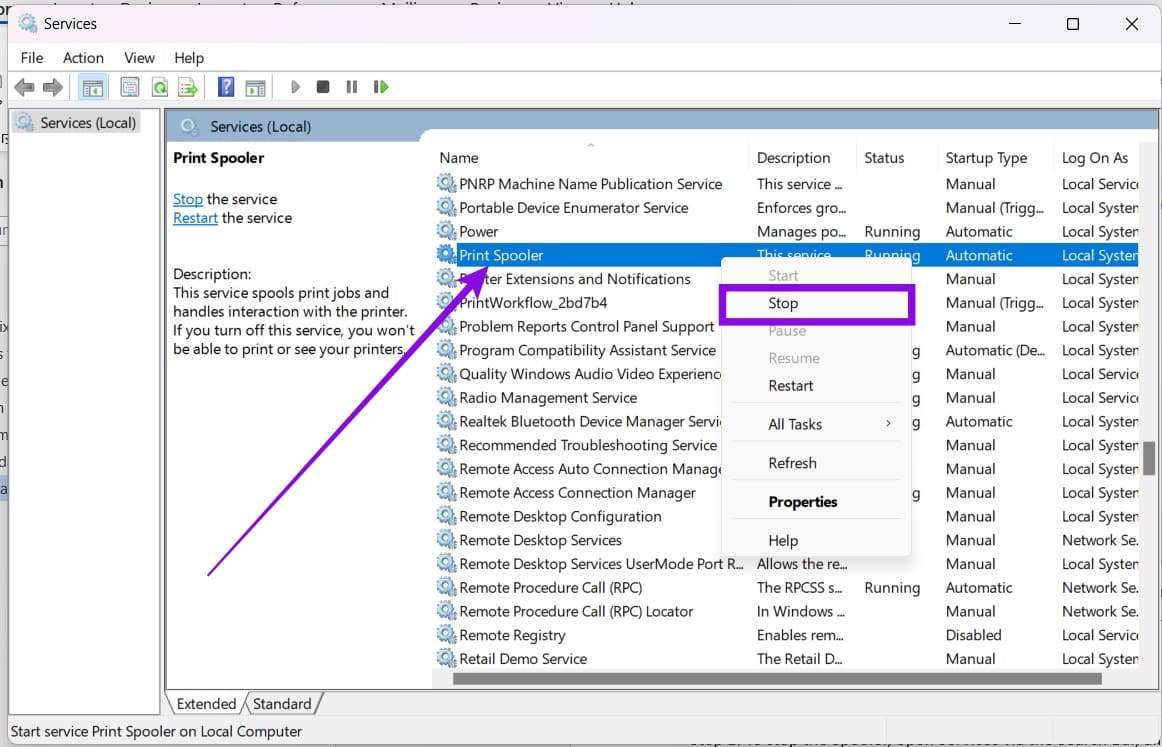
Step 2. Right-click the service and select “Stop” from the context menu.
Step 3. Next, open a new File Explorer window (Win + E) and navigate to “%WINDIR%\System32\spool\PRINTERS.”
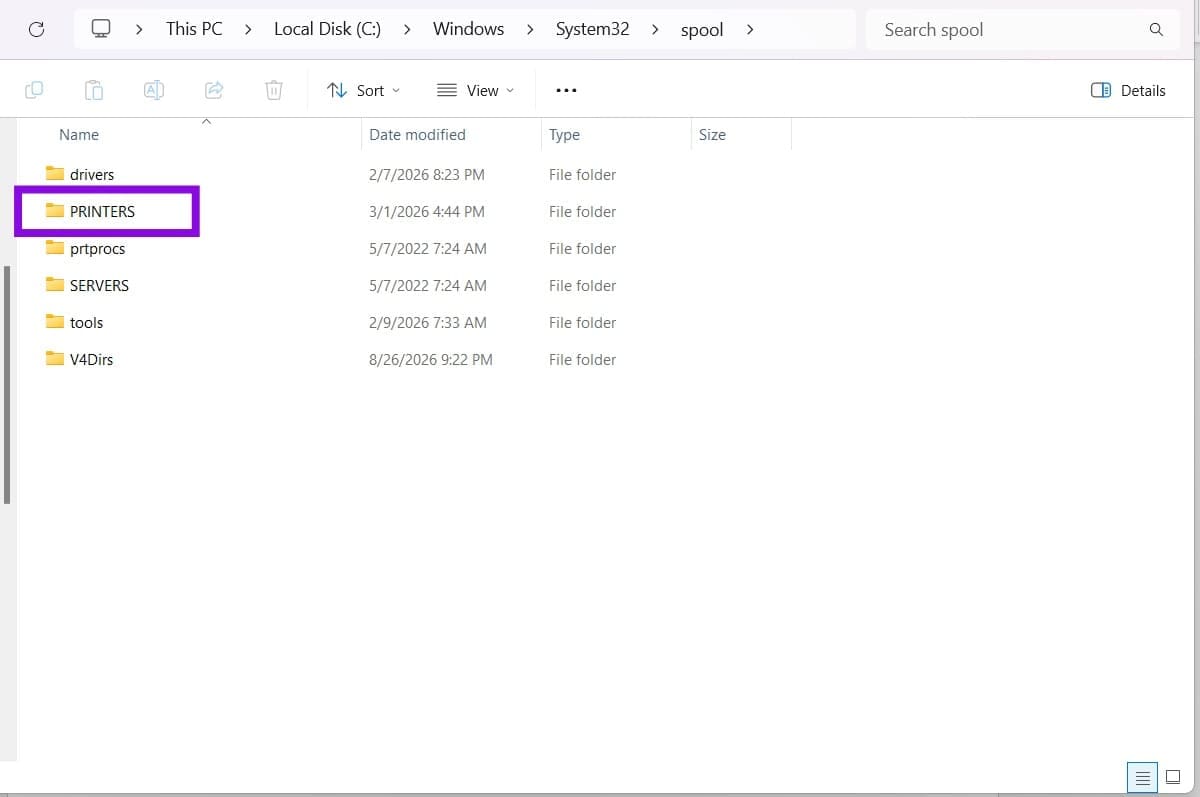
Step 4. Double-click “PRINTERS” and delete all files in the folder. Make sure the Print Spooler service is stopped before deleting the files.
Step 5. Head back to Services and start up “Print Spooler” again.