
Esports athletes are the elite of gamers – and much like a pro runner, they have higher demands for running shoes than a casual jogger, so do esports pros have higher demands for their gaming PCs. Something great for Minecraft or a bit of Lost Ark won’t necessarily hold up to a load of a high-stakes FPS game. When you want to build a PC suitable for esports competitions, you have to expect to spend more than for another gaming machine.
We’ve written a guide for building the best gaming PC for your budget if that’s what you’re after – this article will focus on how to maximize the performance of an esports-capable PC for as little money as possible.
Contents
Step 1: Make a List of What You Need
Naturally, an esports PC still needs the same parts as for any other gaming machine, but you may want to pay more attention to some things. Particularly when it comes to peripherals, having access to good gear can make all the difference. If you already have a high-performance screen or mouse, great – if not, you’ll definitely want to invest in one as you’ll probably struggle significantly without these things!
Step 2: Finalize the Budget, Pick the Parts
Once you’ve made a list of all the parts you need for your new machine, it’s time to select the exact parts you want and thus also finalize the budget you’re working with. Parts like the GPU and, to a lesser degree, the CPU are likely to eat up the lion’s share of your budget, so it’s important to know exactly what sort of costs you’re working with before you start buying your parts. Below is some helpful advice on what to look for when selecting your parts.
If you’re unsure or torn between multiple parts, online tools like pcpartpicker.com can help you suggest things that compliment other parts you’ve chosen or highlight bottlenecks in your planned build.
CPU
Although the GPU will certainly be the heart of your build, you shouldn’t neglect the CPU. A powerful CPU is a must for running challenging games – and it’s a decision that affects several other parts of your machine. The first thing you need to do is decide between Intel and AMD. Both offer very similar performances, though historically, Intel has long been the market leader.
On the other hand, AMD offers significantly cheaper parts with very similar performances and has recently even managed to overtake some competing Intel CPUs. Neither is categorically better or worse than the other, so choose whichever CPU you like best – and remember that this choice will affect other things, such as what cooler and motherboard you buy.
As a rule of thumb, your esports PC should have a minimum of an Intel i5-9000 series or an AMD Ryzen 5 3000 series. Of course, an i7 or i9 or Ryzen 7 or 9 would be even better, but if you are on a tighter budget, a CPU such as the i5-9400F or Ryzen 5 3600 could be a good starting point.
Tip: If you’re trying to get the most out of a CPU without spending more money, you may want to look into overclocking it. While this voids your warranty, it can get you some free extra CPU performance. All high-performance AMD CPUs are overclockable. However, if you’re buying an Intel CPU, you can only overclock parts that have a K or X in the identifier, as parts that don’t have those letters have the multiplier locked and can’t be overclocked.
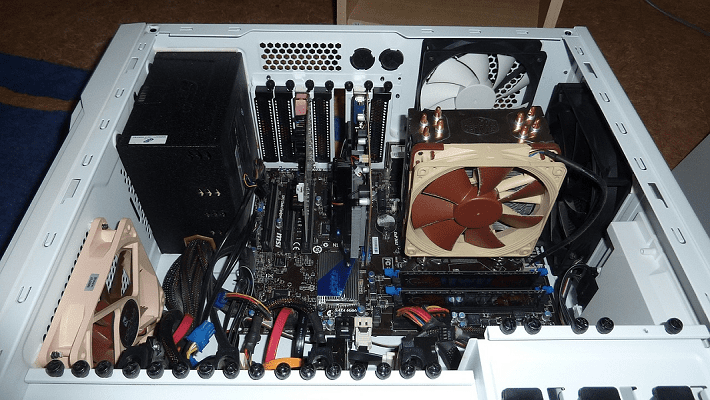
CPU Cooler
Like your motherboard, your CPU cooler may be specific to either an Intel or AMD CPU. Keep an eye out when you select this part – if you buy an Intel cooler for an AMD CPU, it might come with an adapter, but it may not, in which case you won’t be able to build your PC!
While most CPUs come with a stock cooler that you can be sure will be compatible with it, we strongly recommend you upgrade to a better cooling system. Stock coolers tend to be insufficient for high-powered gaming builds and esports PCs. You could go for a liquid cooling solution, which tends to be quieter and more effective than air cooling (at a higher price tag, of course), or for a more powerful air-cooled heatsink. They tend to be much bigger than liquid cooling systems, which could impact your choice in the case and some other parts.
If you go for something like a Noctua fan cooler, you’re unlikely to run into many issues – and you can save a little bit of money compared to if you choose a liquid cooling solution.
Motherboard
Your motherboard is the core of your PC – while it’s hardly the flashiest part, it is one of the most important ones, and you should go for a quality one rather than the cheapest option. Ensure that your motherboard is compatible with your chosen CPU – they generally come in two versions, one for Intel CPUs and one for AMD. Make sure you pick one with the right socket for your CPU, or you’ll be left with incompatible parts.
Motherboards compatible with AMD CPUs will generally have X570 somewhere in the name. Intel-compatible ones tend to have Z490 in the name instead – but either way, if you’re not quite sure, check out the description. Generally, the motherboards will mention somewhere on the packaging exactly what CPUs they are suitable for, often even what generations (such as Intel’s 10th gen or Ryzen’s 3rd gen) they are built for.
Case
Since your esports PC will be quite high-performance, you’ll want to make sure that you get a case that can keep up, not from a design perspective but rather from an airflow one. Generally, the choice of case is entirely cosmetic, so pick whichever case you like the look of, but make sure that it has a sufficient amount of airflow and case fans to keep your system cool. Also, make sure all of your parts fit – your motherboard and graphics card sizes might require you to go for a slightly bigger case than you think!
Tip: Always read the descriptions of your parts carefully – your case will come with info as to what size of motherboard it can accommodate. User reviews might help you determine if your chosen case is suitable for your planned build!
Graphics Card
Unsurprisingly, having a powerful GPU is completely non-negotiable for an esports PC. This will likely be the most expensive part of your build – and it might also be a little harder to come by than others. Be on the lookout for offers and places that have your chosen card in stock, and snatch one up when you get the chance. If you miss out, you might have to wait around until one is back in stock somewhere else, and you’ll be left with a non-working PC in the meantime.
Try to be a little flexible in what card you go for – with the GPU market continuing to suffer from a lack of supplies and available cards, you’re better off buying a card that isn’t quite what you wanted rather than no card at all. As a bare minimum, you’ll want to find a 2060 Super – ideally, you’ll want a 30 series card. In general, cards like the 2060 Super and 2070 Super are more easily available – it might be worth going for one of them and then upgrading a little down the line and re-selling the card you started with. Alternatively, you might have to wait a few weeks or even months until you’ll be able to get the 30 series card you are after.
Tip: Always keep an eye out for cards coming into stock somewhere – there is every chance you could get lucky and get that elusive 3080 with overnight shipping somewhere!
RAM
RAM is an essential part of any esports machine. The bare minimum would be 16GB of RAM, but if your budget can accommodate it, you’re better off with 32GBs in 4 sticks of 8GB each. Even if you decide to stick with 16GB (which will still be sufficient for most setups), make sure your RAM is fast enough – look for a minimum of 3000 or 3200Mhz. Anything slower than that, and you’ll potentially hamstring your system down the line – you certainly won’t be maximizing its performance.
Remember to only use identical sticks in your build. As with any machine, mixing different speeds and sizes (2x4GB and 2x8GB or 2x2800Mhz and 2x3200Mhz) will harm your PC’s performance, so always double-check you have the right type before adding the RAM to your system!
Storage
Games take up space – while not all esports titles take huge amounts of storage, you’ll still want to have access to ample disk space for your new computer. More so than with other computers, you’ll want to go for SSDs over HDDs. While they are more expensive, they are worth the investment – and having the faster read and write speeds that SSDs offer will definitely make for a smoother experience overall.
If your plans can accommodate it, you might want to invest in an NVMe drive. They tend to be even faster than normal SSDs, though not to a degree where they would be considered a must-have for an esports PC. If you have to decide between a smaller regular SSD and a smaller NVMe, you’re likely to be better off with a smaller, regular SATA SSD. Make sure your system has at least 500GB of space available – ideally, you’ll want a TB or more.
PSU
Running esports games regularly and for long periods of time can put quite some strain on your parts. Select a PSU that can keep up with the challenge so you don’t risk your computer failing due to lack of power. While PSUs are available in various power versions from 450W up, you might want to get something around the 650-750W mark as a minimum – this is definitely not a part too cheap out on!
Use an online calculator tool such as the one on pcpartpicker.com to calculate the power draw of your planned build, and make sure to plan in a little bit of extra tolerance as well – if your build uses 630W, go for at least a 700W PSU, rather than a 650W, as you otherwise run the risk of the PSU failing over time.
Tip: Much as you don’t want to cheap out on a PSU, don’t spend too much more than you need either. There’s no need to get a 1600W PSU if your computer only draws 750W. Additionally, while you should try to get a PSU with a decent efficiency rating, there are diminishing returns at the top.
Peripherals
Having good peripherals such as a keyboard, mouse, monitor, and even a headset is essential for esports competitions. There are plenty of brands dedicated to this purpose out there – Razer is one of the most prominent ones, but hardly the only one. Other gaming brands such as ROG also make their own peripherals – and if you want to go for something a little cheaper without losing performance, Logitech can be a good choice.
Consider including an upgrade for your mouse or keyboard in your build if you need to – the best esports PC won’t help you if you use a $10 wireless mouse to play! This is even more true for monitors – the minimum standard refresh rate in esports environments is 144Hz, with many players opting for more expensive 240Hz, or even 360Hz screens instead. While curved screens are quite popular (and look cool), you might be able to save some money by going for a regular one – the important part is the refresh rate; the curve is an optional extra.
Step 3: Hunt for Deals
If you are trying to build yourself an esports PC on a limited budget, hunting for affordable deals is more important than ever. Some of the more expensive parts, such as the GPU, are always worth shopping around for, but they’re not the only ones.
You’ll come across a good deal for parts such as your RAM or SSDs, as they are often on sale. If possible or necessary, you could even wait a little while to see if a part you want goes on sale – near Christmas, or when a new generation of parts is released, prices tend to drop on existing parts. You don’t necessarily need the newest generation version of each part, particularly when there often isn’t a huge difference between an Intel i9-9900KF and an Intel i9-10900X.
Tip: If you are near the end of your budget, consider adjusting your plan a little – as mentioned, shopping around for a good deal could save you a surprising amount of money, which might let you go for a better part; of other areas!
Step 4: Assemble!
Once you’ve bought and received all of your parts, it’s time to put them together. You can build it yourself; there are plenty of online guides on doing so. If you don’t have the confidence to do that, you can probably find a local computer shop that will put it together for you, for a price of course. Local computer shops can also be useful in troubleshooting issues if you have no idea why something might not be working right.
Conclusion
Once you’ve got your esports computer up and running, it’s time to put that buttery smooth framerate to work and get fragging. Share your thoughts in the comments!
