When you discover tips and tricks to better manage your Spotify playlists, things get a lot better. For example, you already know how to erase a playlist on Spotify or even a song. But, would you like to see how you can erase multiple songs?
It’s also possible to create a copy of a playlist and to put the songs you liked into a playlist. There are more Spotify playlist tricks for you to discover; keep reading to see if you’re missing out on one or a few.
Contents
- 1 How to Share Your Spotify Playlist
- 2 How to Erase Multiple Songs Simultaneously from a Spotify Playlist
- 3 How to Upload Music from Your Computer to Your Spotify Playlist
- 4 How to Change the Playlist Cover on Spotify
- 5 How to Make an Identical Copy of a Playlist on Spotify
- 6 How to Order the Playlist Songs in Alphabetical Order
You know what they say, ¨Sharing is caring.¨ If what you want to do is share your Spotify playlist with a friend that also uses the services, here’s what you’ll need to do. If you’re on your Android device, open the app and tap on the Your Library tab at the bottom.
Find the playlist you want to share and long-press on it. When a small window appears, tap on the Share option.
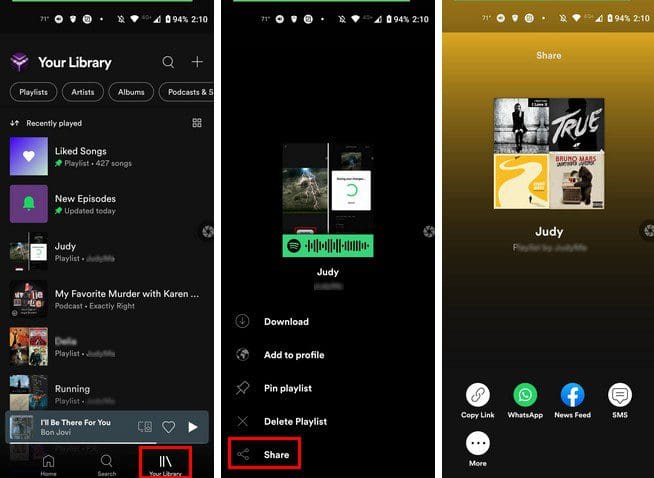
You’ll see different sharing options such as:
- Copy link
- SMS
- More – With this option, you can share the link by using any app you have installed on your Android device by swiping up.
Desktop Client
You can share any Spotify playlist while on your computer by clicking on the Your Library option at the top left of your display. Click on the playlist you want to share and click on the dots under the playlist’s name.
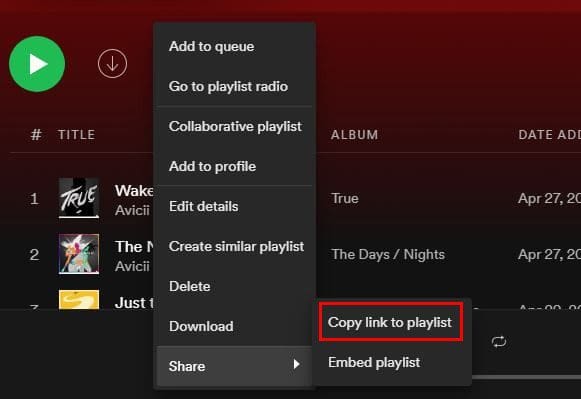
Choose the option that says Copy link to playlist. If you and the person you’re sharing the playlist with have similar taste in music, you could let them add songs. You can do this by choosing the Collaborative playlist option.
How to Erase Multiple Songs Simultaneously from a Spotify Playlist
If you’ve been using Spotify, you know that to erase a song, all you need to do is long-press on it. The Remove option from this playlist option will be the second one from the top. But this can be time-consuming when you want to remove various songs. To erase multiple songs at once, you’ll need to open the Spotify desktop client and go to the playlist with the songs you want to erase.
If you’re using a Windows computer, you’ll need to press the Ctrl button, but you’ll be pressing the Cmd button if you’re using a Mac. Once it’s pressed, start clicking on the songs you want to remove. The selected songs will be highlighted, and when you’re done, right-click on them and chose the remove from playlist option.
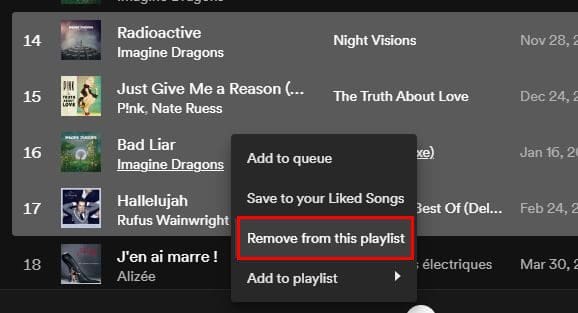
By using the Ctrl or Cmd button, you can do something else. You can use this same method to like multiple songs. By licking a song, that song is added to your liked songs list. Clicking on the heart of various songs can be time-consuming. When you’ve chosen all the songs you want to like, this time, instead of removing them, choose the Save to your Liked Songs.
How to Search for a Song on a Playlist

If you have a lot of songs on your Spotify playlist, finding a specific song can be difficult. By pressing Ctrl or Cmd plus the F key, you’ll be taken to the search tool, where you can look up the song you want to listen to.
How to Upload Music from Your Computer to Your Spotify Playlist
You have a song on your computer that you want to add to your playlist. You can do that by opening the desktop client and clicking on the dots at the top left. Then you’ll need to go to:
- Edit
- Preferences
- Local Files – Make sure this option is toggled on
Under Local Files, you’ll see the options for your files. For example, you’ll see Downloads, Show local files, and Music Library. To disable any of these options, you’ll just need to toggle off that option. The Add Source option will do just as its name states. If the song you need is in a source you don’t see s an option, you can add it through this option.
When you click on this option, you’ll see a small window appear; navigate to where you have the songs you want to upload. When you find it, make sure it’s highlighted and click Ok.
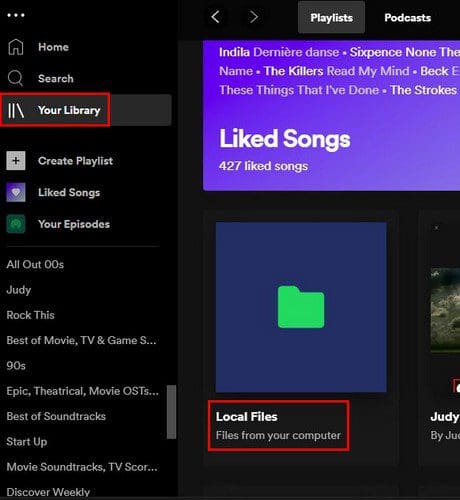
When you click on the Your Library option, you should see the new source you added.
How to Change the Playlist Cover on Spotify
You can personalize how the cover for a playlist looks like in a few easy steps. Instead of having Spotify decide how it will look, you can add your own by opening the playlist and placing the cursor over the current image. You should see a pencil icon; click on it.

In the next window, click on the image and choose your new image. Once you’ve selected it, don’t forget to click on the Save button to make it final. You’ll see options to rename your playlist and add a description too.
How to Make an Identical Copy of a Playlist on Spotify
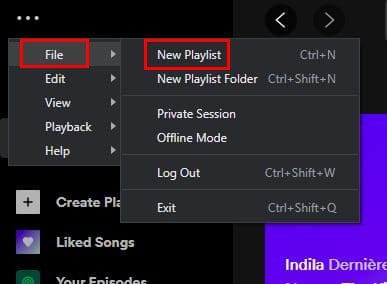
Your friend likes all the songs on your playlist, but you don’t want to share the songs with them. The best thing you can do is create a duplicate Spotify playlist and have your friend make all the changes they want. To make an identical playlist, you’ll need to click on the dots at the top left > File > Create a new playlist.
Once the playlist is created, go to the playlist you want to copy. Click on the first song, followed by the Ctrl + A keys. This is going to select and highlight all the songs on that playlist. On the left pane, locate the new playlist you recently created. Now click on the highlighted song and drag them to the new playlist.
How to Order the Playlist Songs in Alphabetical Order
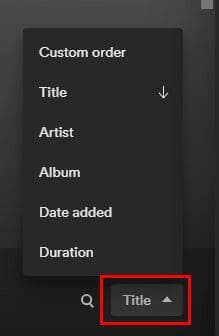
Everyone has their own style when it comes to the songs on their playlist. While some don’t care about the order of the songs, others need to have their songs in alphabetical order. You can do this by clicking on the dropdown menu to the right of the search icon. You can choose from options such as:
- Custom order
- Title
- Artist
- Album
- Date added
- Duration
There are other useful tricks, such as knowing what playlist a song is from. You may have various playlists, and when you hear a song, you have no idea which playlist it’s coming from. You can find out by clicking on the image of the album at the bottom left. You’ll automatically be taken to that specific playlist.
Conclusion
As you can see, there is a lot you can do with your Spotify playlists. You may or may not want to do everything mentioned on the list, but at least you know you have the option. Which change do you think you’re going to start with? Let me know in the comments below, and don’t forget to share the article with others on social media.