

Ever since I began working with computers, the number one question I’m always asked is “How do I make my computer run faster?” It’s the main thing your local computer repair technician deals with on a daily basis. They often make a pretty penny doing it too.
If your computer is running slow, you don’t need to spend hundreds of dollars for a self proclaimed computer tech to fix it for you. All you have to do is know where to look for the utilities the pros use. This tutorial is for the average person who doesn’t know anything about computers but wants to clean their Windows PC off and make it run faster. I will go step by step with each step I take when somebody pays me to make their computer run faster. These steps are often the same steps any computer tech is paid to take.
Contents
1. Uninstall Unwanted Applications
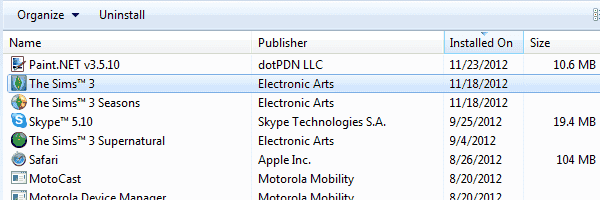
Have a look in Control Panel > Programs > Programs and Features and get rid of anything you no longer need. That old game you haven’t played in two years, that utility you downloaded and used once, anything you don’t use anymore. It’s important to be careful though as uninstalling the wrong program can be problematic. Only remove something you are absolutely sure you no longer need. If you’re not 100% sure about removing an application, err on the side of caution and leave it alone.
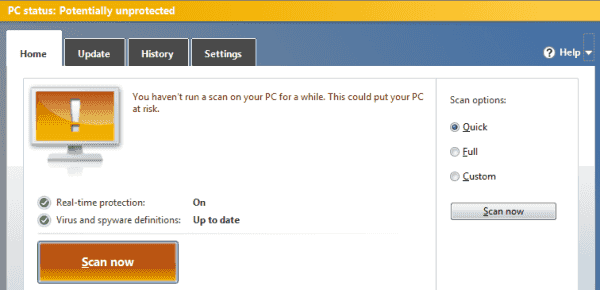
2. Scan For Malware
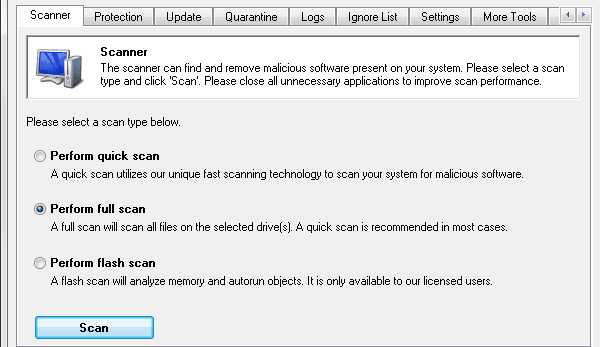
Malware is usually the main reason for sudden speed issues in Windows. There are three main tools I use to clean malware. Malwarebytes, Spybot and Microsoft Security Essentials. All of these tools are free for home users, and they do a superb job at finding any malware on your computer. I normally use both Malwarebytes and Spybot to perform a scan, then uninstall them when I’m done. After that, I install Microsoft Security Essentials as a measure to prevent spyware from being acquired in the future.
3. Scan For Viruses
If the PC already has a reliable anti-virus package the user paid for installed like Symantec, McAfee or Kaspersky, I make sure it’s activated and updated, then I run a scan. If there is nothing installed, I will install a free copy of AVG anti-virus and run a scan with that. AVG is free for home users. Though I believe it installs too many utilities on your computer, it does the best job of any of the free antivirus packages.
4. Eliminate Automatically Running Applications and Utilities
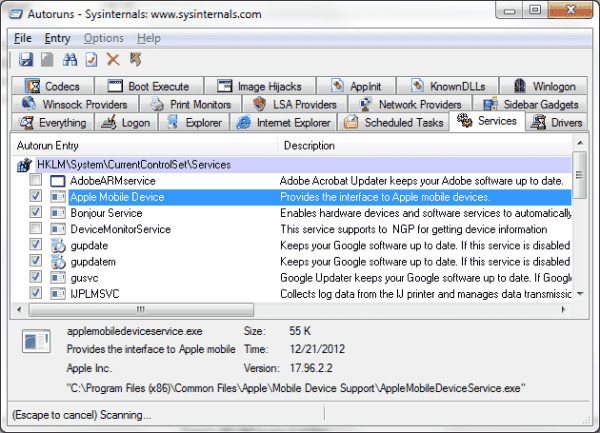
Almost any program you install these days has some part of it that likes to always run in the background. For example, iTunes has about 5 services that it loads when it’s installed in Windows. These services are always running and take up precious resources, causing speed issues. While you can use utilities built into Windows like MSCONFIG to manage running services, I like to download and use AutoRuns instead. This handy utility gives you one screen to manage anything that automatically runs by itself.
There are tons of complex things you can manage with AutoRuns, but to keep things simple, I’m only going to show you a few tabs.
- Services – Check this tab and uncheck anything that references software you no longer use. You may have a few services that may relate to an old printer or smartphone you used to use. Go ahead and uncheck anything that you don’t think you need anymore. However, be careful and err on the side of caution. Don’t uncheck anything unless you are 100% you don’t need it.
- Scheduled Tasks – This tab shows programs that are scheduled to run at specific times. It will probably be filled with utilities that check for software updates.
- Internet Explorer – Only use this tab if you use Internet Explorer to browse the web. You can use it to remove any plugins from IE. Hopefully Malwarebytes cleaned this stuff out for you already, but you might find some browser bars and other utilities that were missed.
5. Clean Your Hard Drive
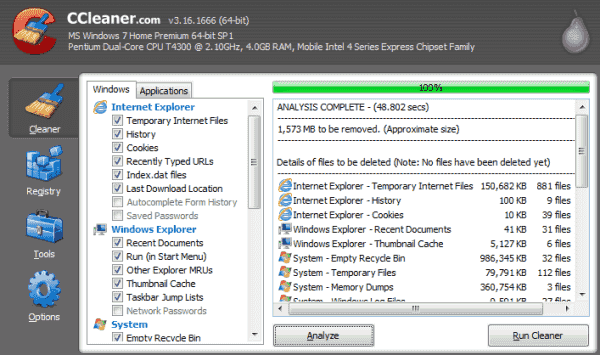
Time to get rid of the unwanted files that are clogging up the hard drive. For this task, I use CCleaner. CCleaner will scour your hard drive for log files, temp files and other junk files that you can afford to chuck. The utility also has a handy registry cleaner feature that you can optionally use.
6. Defragment Your Hard Drive
Your hard drive needs to be organized to where it can find data easily. Defragmenting your hard drive optimizes the disk for quicker access. All versions of Windows come with a Disk Defragment utility. If you want to get fancy though, Piriform (the maker of CCleaner) makes a pretty decent one called Defraggler.
7. Adjust Performance Options
If you don’t really care how Windows looks, you can change some settings to adjust for better performance.
Go to “Control Panel” > “System and Security” > “System” > “Advanced system settings” > “Advanced“, the select the “Settings…” button in the “Performance” area.
From the “Performance Options” screen, you can select “Adjust for best performance” to get the most performance. Otherwise, you can select “Custom” and check just the fancy Windows stuff you like.
With these 7 steps, you should be well on your way to enjoying a faster computer without spending money on a computer tech. How did the process work out for you? Share your experience in the comments section.

None of the steps worked for me. Computer still won’t sleep.
Good info, just a note though – You cannot defrag a SSD, which most computers are these days, as it can reduce the lifespan of the drive.
I didn’t see a date on when this article was posted, but just a warning to others.