Security questions are beneficial when it comes to resetting the password of your Windows 10 account. But if you already memorized your username and password, and/or you wrote your login details on a piece of paper, you may be tempted to disable the security questions.
If you really want to do that, we’ll guide you through the process. Before we dive in, keep in mind that, without these security settings, recovering your password is going to be quite difficult.
Contents
Steps to Disable Security Settings on Windows 10
If You Recently Installed Windows 10
During the Out of Box Experience, you’re asked to set up your account. Instead of adding a password for your account during the setup, choose to do that later.
Then, after you completed the install process, press and hold the CTRL + ALT + DEL keys; there will be a list of options available on the screen. Go ahead and select Change a password.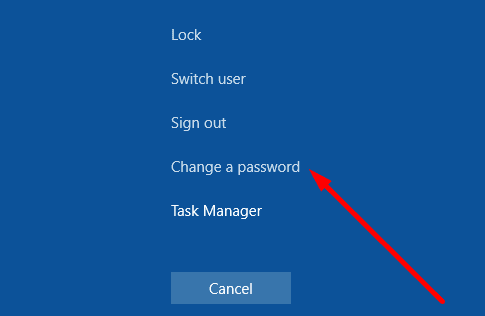
You can now set up a password to protect your account. But you won’t be asked to add any security questions this time around.
If You Already Set up Your Security Questions
Windows 10 users are no longer allowed to change the security questions from Settings. That’s why we’re going to use the Registry Editor.
- Type regedit in the Windows search bar.
- Double-click on the Registry Editor.
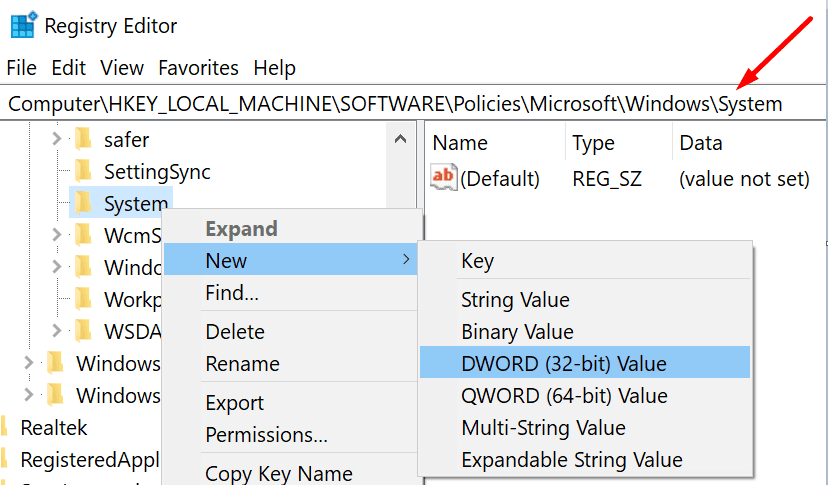
- Then, locate the following folder:
- HKEY_LOCAL_MACHINE\SOFTWARE\Policies\Microsoft\Windows\System
- Right-click on System to open the context menu.
- Select New → DWORD Value to create a new key.

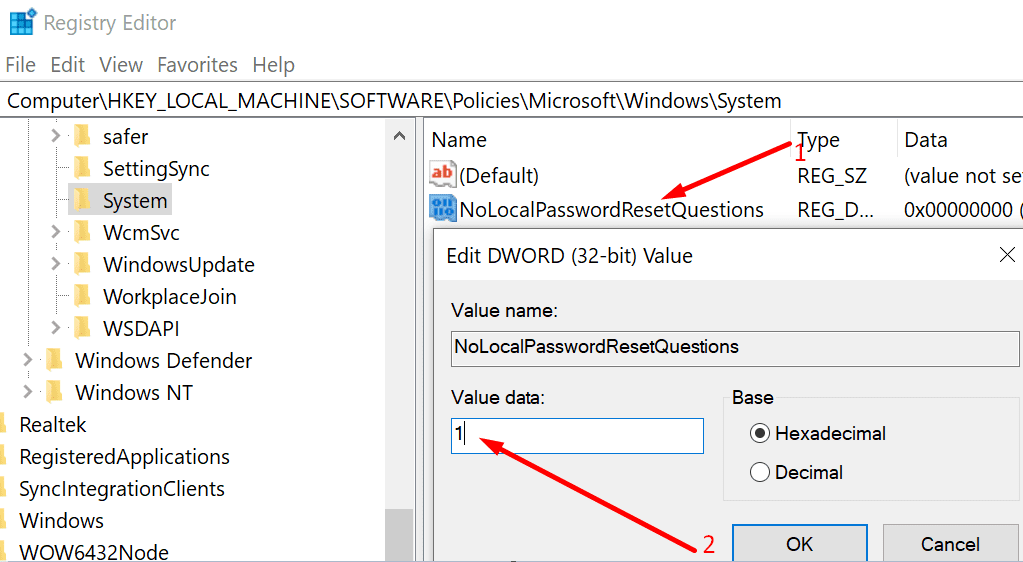
- Name it NoLocalPasswordResetQuestions.
- Then, double-click on the key you just created.
- Go to the Value Data field and type 1 to disable security questions.

- Restart your computer for the changes to take full effect.
If you want to re-enable security questions, you can edit the Value data to 0 (zero) or delete the NoLocalPasswordResetQuestions key.