When you find your Wi-Fi signal strength, you know exactly how much signal you have. Sure, you could try a site that measures your signal strength, but there are other ways you can check without opening another tab that might make your browsing experience even slower. You can check your signal strength using the Command Prompt, the Task Manager, the Control Panel, and more. In this guide, you’ll see how you can see how much signal strength you have without having to install third-party software. You’ll also see the exact percentage of your Wi-Fi signal strength.
Contents
- 1 Find Your Wi-Fi Signal Strength in Settings on Windows 11
- 2 Check Your Signal Strength on Windows 11 Using the Taskbar
- 3 Check Signal Strength on Windows 11 Using the Task Manager
- 4 Check Your Wi-Fi Signal Strength Using the Windows 11 Control Panel
- 5
- 6 Check Your Signal Strength on Windows 11 Using the Command Prompt and PowerShell
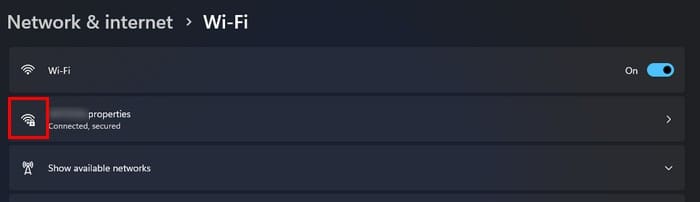
Find Your Wi-Fi Signal Strength in Settings on Windows 11
Settings is one of many other places to check your signal strength. You can go to Settings by pressing the Windows + I keys. Once in Settings, go to Network and Internet. Click on Wi-Fi, and the second option down will show you the network you’re connected to. You’ll see the Wi-Fi strength with a lock on it.
If you prefer another method, try the option mentioned in the following section.
Check Your Signal Strength on Windows 11 Using the Taskbar
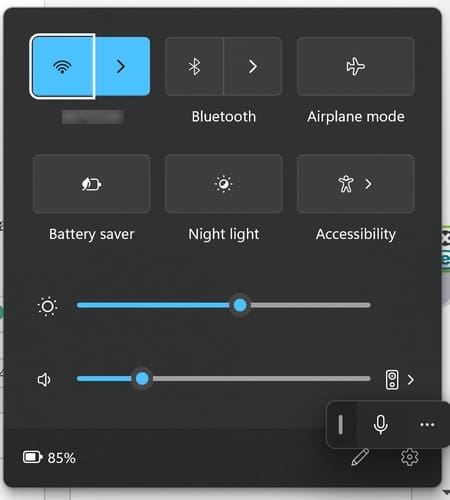
At the bottom right, you’ll see the date and time. You’ll also see how your Wi-Fi signal is doing before that. You can also see the single strength by pressing the Windows + A keys to access the Action Center. If you’re unsure if it’s giving you the signal strength, you can also click on the arrow pointing right, and it’ll show you the network you’re connected to alongside the signal strength.
Check Signal Strength on Windows 11 Using the Task Manager
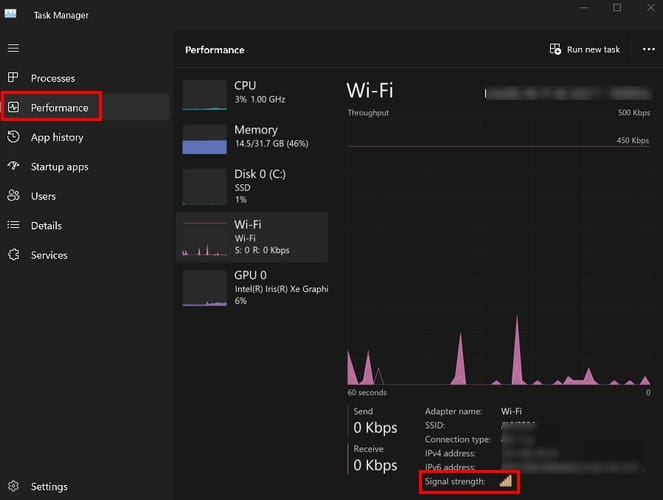
Another way to check how the signal strength is doing on your computer is to use Task Manager. You can open the Task Manager by looking for it in the search field and opening the best result. Or, if you like to use keyboard combinations, you can also press the Ctrl + Shift + Esc keys. When the Task Manager opens, click on the Performance tab, followed by the Wi-Fi option. At the bottom right, you’ll see the signal strength option.
Check Your Wi-Fi Signal Strength Using the Windows 11 Control Panel
If you use the Control Panel frequently, you’ll be happy to know you can check your Wi-Fi signal strength from there too. Open the Control Panel by looking for it in the search field. Go to Network and Internet > Network and Sharing Center when it’s open. Under View your active networks, look for the network you’re connected to, and hopefully, the signal strength is good.

You can get a better look at the signal quality if you click on the blue Wi-Fi link, and a Wi-Fi status window will appear. Look for the option that says Signal quality to get your reading.

Check Your Signal Strength on Windows 11 Using the Command Prompt and PowerShell
If you’re comfortable using the Command Prompt or PowerShell, there are commands you can use to see your Wi-Fi signal strength. The above options will show you how your signal strength is doing, but they won’t show you the exact percentage of the signal. If you need to know the specific strength of the signal, the Command Prompt and PowerShell can help. Ensure that you use both as an administrator. For the Command Prompt, enter netsh wlan show interfaces and press enter.

The command you’ll need to enter for PowerShell is longer and different. To check the signal strength using PowerShell, enter (netsh wlan show interfaces) -Match ‘^\s+Signal’ -Replace ‘^\s+Signal\s+:\s+’,”
There are various ways you can check your signal strength on Windows 11. You can always try the others if one doesn’t work out for you.
Tips to Improve Wi-Fi Signal Strength
If you see that your signal strength is low, there are different tips you can use to help improve it. For example, you can move closer to your router and change your Wi-Fi channel. You can also update your firmware and ensure no unauthorized guests use your Wi-Fi.
If you’re in a two-story structure, you can try putting your router on the top shelf to put it as high as possible. Remember to point your router’s antenna (if it has one) in the direction you want to aim the signal. You can also try unplugging electronics such as microwaves, cordless phones, etc., to rescue the interference and get a better signal. You can always plug them in later.
Further Reading
Speaking of Wi-Fi signal strength, as mentioned before, one way to get a good signal is to remove anyone else using it. Here are some tips on how you can remove whoever is stealing your Wi-Fi. To get the best signal, it’s also a good idea to know what Wi-Fi dead zones are and how to avoid them. Remember that you can also use the search bar to look for articles on a specific topic.
Conclusion
When you’re not sure if you are getting all the signal strength you’re paying for, it’s good to know how to check its strength. You can check from the Control Panel, PowerShell, Command Prompt, and more. The easiest way to check is by using the taskbar. Which is your preferred method? Share your thoughts in the comments below, and don’t forget to share the article with others on social media.