

An ICC profile is a set of data that your Windows 10 computer relies on to match your display color values to your external devices. In other words, it calibrates the color accuracy of your devices.
Your PC activates the ICC profile every time you connect a camera or a printer. Using the correct ICC profile is crucial when working with image editing tools such as Photoshop. You want to calibrate your devices so as to get the same colors on both.
For example, not using the right ICC profile may result in getting different shades of green on your PC and printer.
Steps to Install an ICC Profile on Windows 10
Method 1
- Download the .icc profile you want to install.
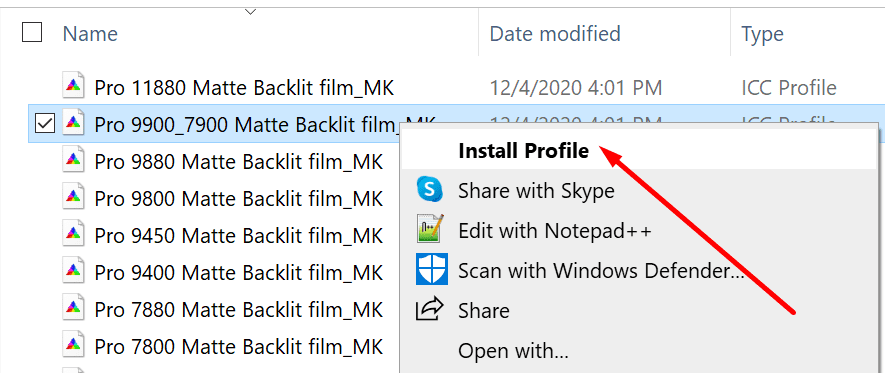
- Go to the Download folder, and right-click on the ICC profile.
- Select Install profile.

- Wait until Windows completes the install process.
Method 2
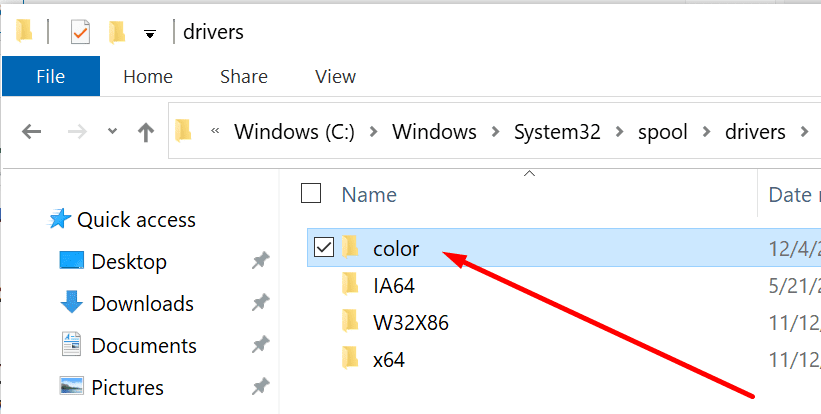
- Copy your ICC profile to C:/Windows/system32/spool/drivers/color.

- Go to Control Panel.
- Navigate to Color Management.
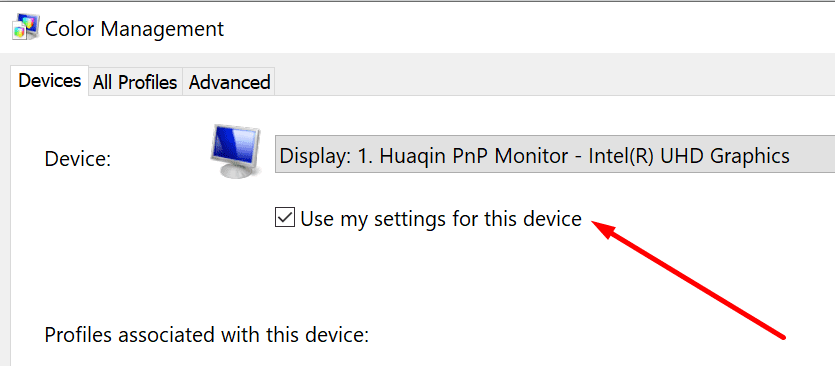
- Enable the following option: Use my settings for this device.

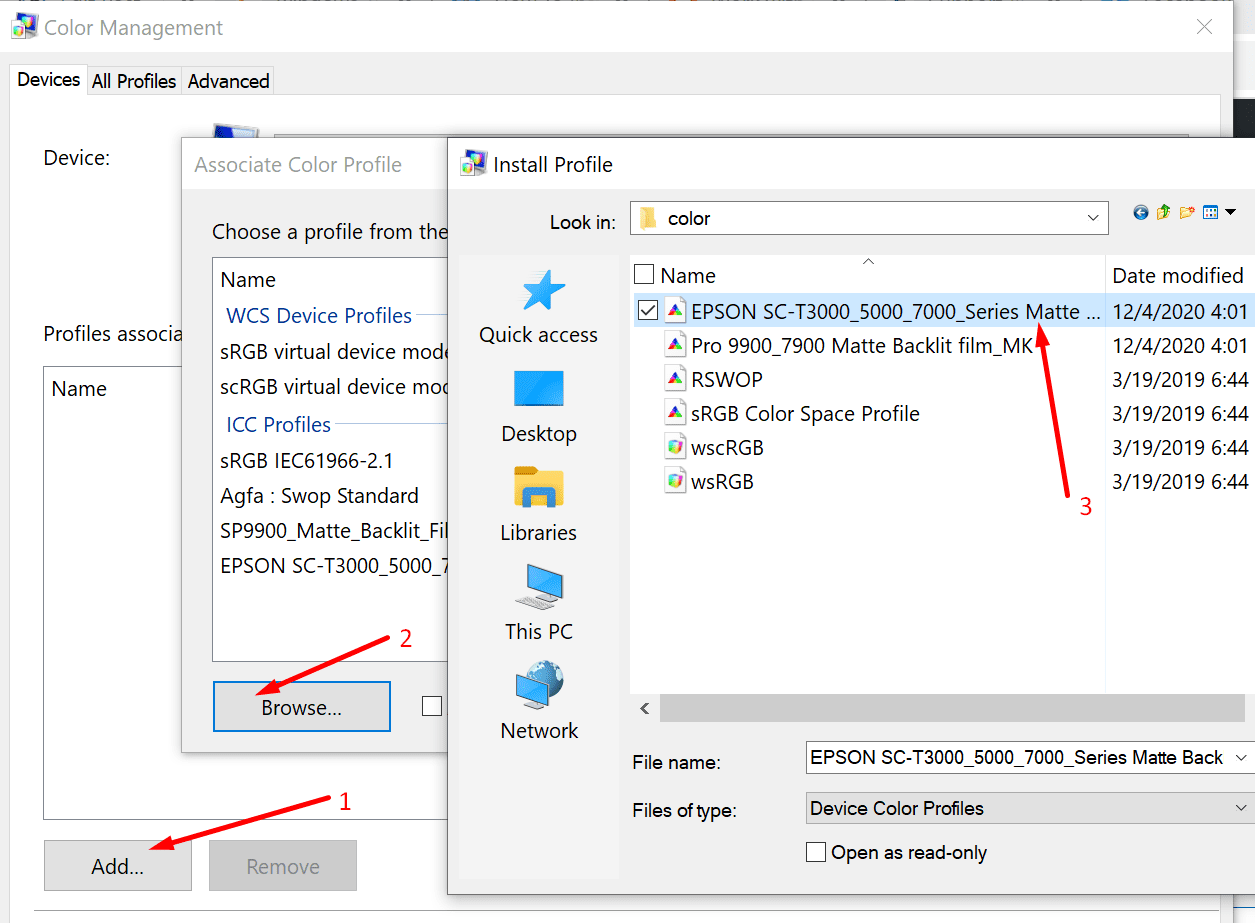
- Then add your ICC profile.

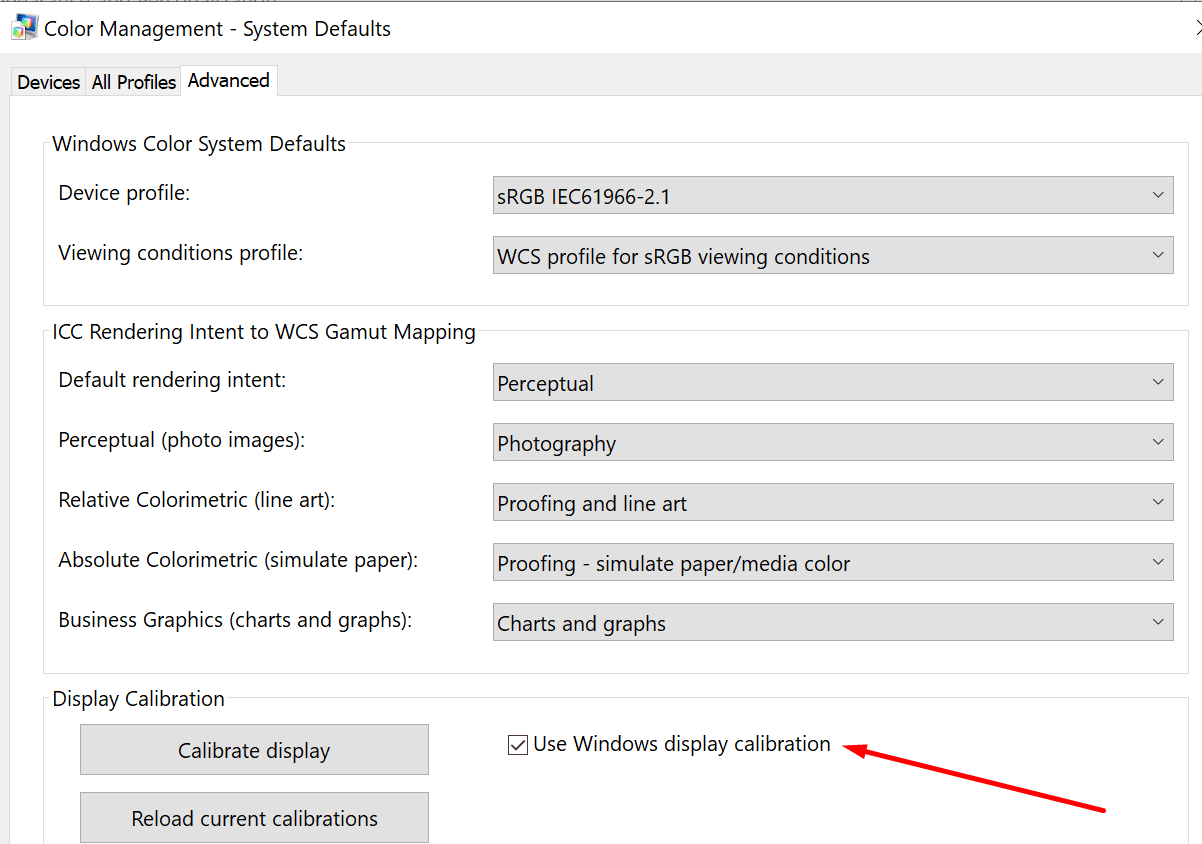
- Navigate to the Advanced tab.
- Select Change system defaults (bottom of the window).

- Then enable the option called Use Windows display calibration.

Where Can I Find The Right ICC Profile For my Device?
The main source for ICC profiles should be the official website of your device’s manufacturer. For example, if you need an ICC profile for your Epson printer, go to Epson’s website.
Select your printer model and go to the page where you can download the ICC profile for your device model. ICC profiles usually come in a .zip file format. In other words, you need to first unzip the folder and then extract the files.
The bad news is that not all hardware manufacturers provide users with ICC profiles. Another option is to simply search for the ICC profiles you need on third-party websites. But don’t download your ICC profiles from shady-looking websites. The risk of malware tagging along is just not worth it.


Yes thank you! I love screenshots – so much easier to follow. Thank you for this!