
Copying registry keys from one device to another is an effective way to quickly configure Windows settings to a new computer in your home or office. Manually copying registry keys would take forever and run a high risk of errors – this is a better way. Exporting and importing the registry keys though Command Prompt provides an efficient path to ensure your registry entries are copied across correctly. So how do you import and export registry keys via command line?
For those unfamiliar with it, the Windows registry is a database, which stores a large number of configuration options for Windows, and for other software installed on the computer. Settings are saved in the registry as registry keys, these are both the name of the setting, and the value of the setting, where applicable.
The registry is split into five trees that carry settings for different use cases, each of these is its own RootKey. One RootKey is “HKCU” or “HKEY_Current_User”. The HKCU RootKey is used for settings that apply specifically to the currently logged in user. Each RootKey has a number of Subkeys, which in turn contain further SubKeys.
The full name of any registry key is the name of the RootKey, followed by the names of each SubKey needed to get to the specific key intended, connected by a backward slash. For example, the registry key “Settings”, is a SubKey of “Printers”, which itself is a SubKey of the RootKey; HKCU. The full name for this registry key is “HKCU\Printers\Settings”.
The first step is to open Command Prompt. To do so, open the Start Menu by pressing the Windows key, then type “Command Prompt”. Don’t just launch it though, you’ll need to start it with administrative privileges. To do so, either click “Run as administrator” on the right-hand side of the Start Menu, or by right-clicking on the app and selecting “Run as administrator” from the dropdown list.
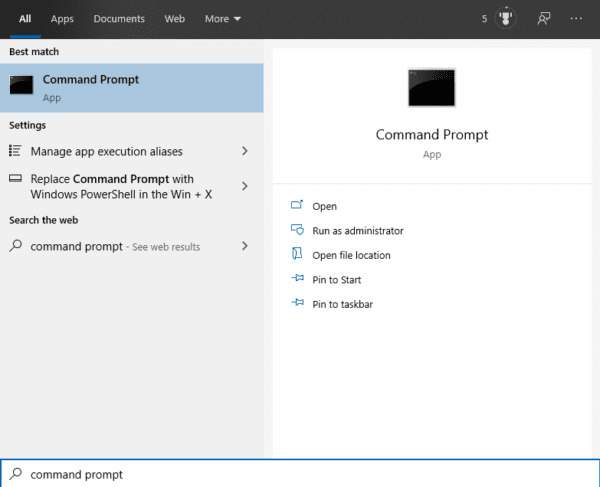
Tip: If Command Prompt is not present on your device, Windows PowerShell will work identically.
Once Command Prompt is open, type the command “Reg export /?”, to see the help page for the registry export command. This page explains what each of the arguments do, what order they need to be in, and which ones are optional.
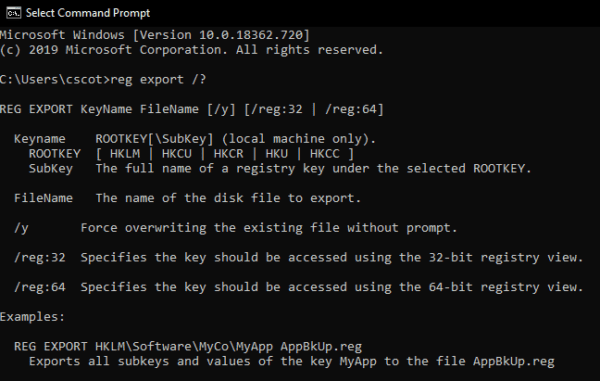
The Keyname argument is the name of the registry key that is to be exported, it is split into two sections, the RootKey and SubKey. The Rootkey is one of the five registry trees. You can either write them out in full i.e. “HKEY_Current_User” or in their shortened form i.e. “HKCU”.
The SubKey is the path to the SubKey you want to be exported. The path can be to a single specific SubKey, all the way to the maximum 512 levels deep, or it can be to a high-level SubKey with further SubKeys. It is also possible to leave the SubKey blank, this will export the entire RootKey tree, including all of its SubKeys. If you don’t know which specific one you want, choosing a higher level one that includes what you are looking for is your best bet – just don’t go too high, or you may end up with things you don’t want.
The FileName is the name of the file you want to export the registry keys to. If you just provide a filename with no path information, then the file will be saved in the current directory that Command Prompt is in. If you’ve launched Command Prompt with administrative permissions, then it will have opened in the “C:\Windows\system32” directory. System32 is NOT a good place to save an exported registry key file as it contains sensitive Windows components, you should instead consider using a user directory such as your desktop. Starting your file path with “%UserProfile%” moves the output directory to your user directory, e.g. “%UserProfile%\Desktop” will save a file to your desktop directory.
Tip: The file name should always end with the .reg file extension. This is the recognised registry settings filetype.
The other command arguments are less important and entirely optional. For example, /y automatically overwrites files with the same name, if they exist. The /reg:32 and /reg:64 arguments allow you to specify if the key is accessed with the 32- or 64-bit registry view respectively.
Now you’re ready to write and run the actual command. The command should be “reg export ‘RootKey[\SubKey]’ ‘FileName’”. No quotes are necessary – just type in the Keynames you need. The RootKey and the FileName are mandatory items, whereas the SubKey section can be left blank to export the entire RootKey.

If the command completed properly, a message will be printed to the Command Prompt window saying, “The operation was completed successfully.” The command may take some time to run, so you may need to wait for the confirmation to appear.
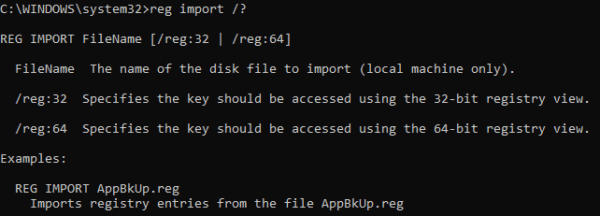
Now, you should have a reg file saved in the location you specified. You can copy this to another computer to import it there. Once on your target computer, you can view the command arguments by typing the command “Reg Import /?”. The arguments for the import command are very similar to those for the export command.
Tip: Before modifying the registry, you should create a proper system restore point. A restore point will provide a “known good” registry configuration that you can revert to if there are any issues after the import.
To import the reg file run the command “reg import ‘FileName’” where “FileName” is the file path to the reg file you want to import. Again, once the process completes successfully, the message “The operation completed successfully” will be printed.