Everyone has their routine when it comes to bedtime. Some need total silence, while others need to have their computer on. But, the issue with this last sleep routine is that your computer will stay online for quite some time. The good news is that your Windows 11 computer can be set to turn off after a while. That way, you don’t wake up worried that you fell asleep and left your computer on.
Contents
How to Scheule the Sleep Timer
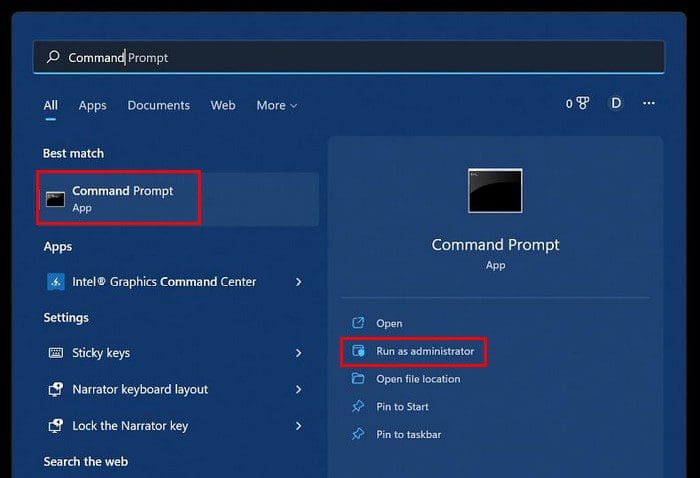
Thanks to the sleep timer in Windows 11, you don’t have to worry about leaving your computer on all night. You can set up the exact time you want your computer to sleep by going into settings. To get started, go to your computer’s settings by clicking on the Windows start button and clicking on Settings. Open the Command Prompt using the search tool and select it from the results.
Once it’s open, type the following command: Shutdown -s -t 3600 (One Hour).
If one Hour is not enough, multiply the seconds by the number of hours of your interest. 3600 for one Hour, 7,200 for two hours, 10,800 for three hours, and 14,400 for four hours. The -s command indicates what your computer needs to do. The -t command is for the time. That’s all there is to it. Now you don’t have to worry about leaving your computer on more time than it should. But what if you remembered something at the last minute and need your laptop on longer?
Creating Sleep Timer Shortcuts
You can create a shortcut to activate the sleep timer and another to stop it. This saves you valuable time since you only need to click on this shortcut to make it happen. Let’s start by creating the shortcut.
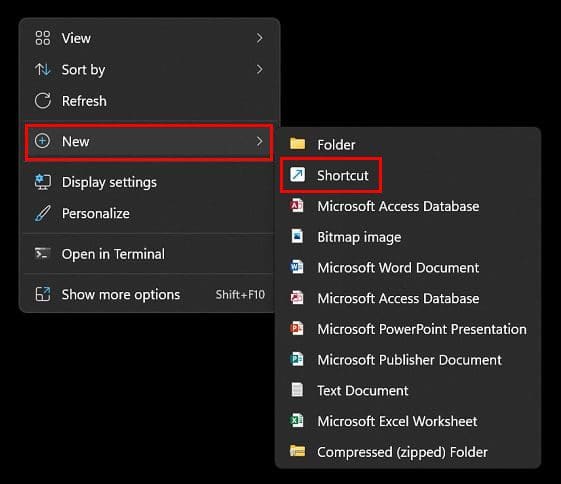
You can do this by right-clicking on your desktop and clicking on the New option, followed by the shortcut. Add this command: Shutdown -s -t 3600, where it asks you to type the location.
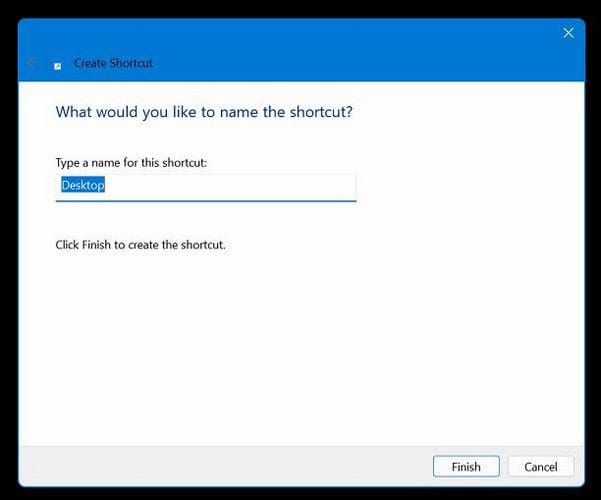
Once you give the shortcut a name the shortcut, don’t forget to click on the Finish option.
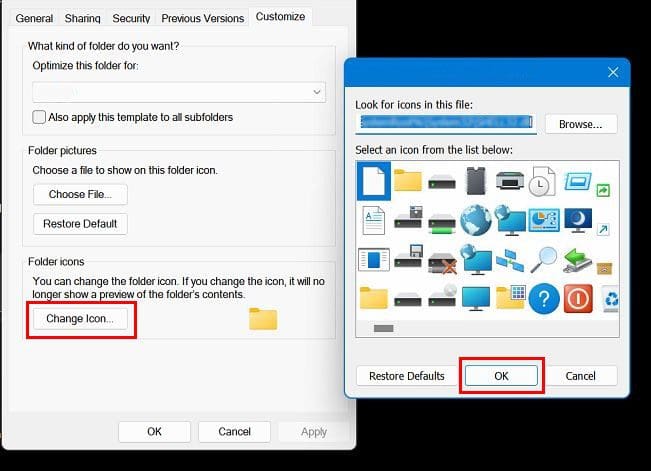
It’s not an obligation, but it adds your personal touch. It’s also possible to add an icon to your shortcut. Right-click on the newly made shortcut and choose the Properties option. Pass the warning and select the Change Icon option. Here you’ll see various options to choose from.
To cancel the sleep timer, you’ll need to repeat the previous steps of right-clicking on your desktop and choosing New, followed by the Shortcut option. Enter the following command: Shutdown -a. Give your shortcut a name and click on the Finish option. You can also add an icon to this shortcut by right-clicking on it and choosing properties.
Power and Sleep Windows 10
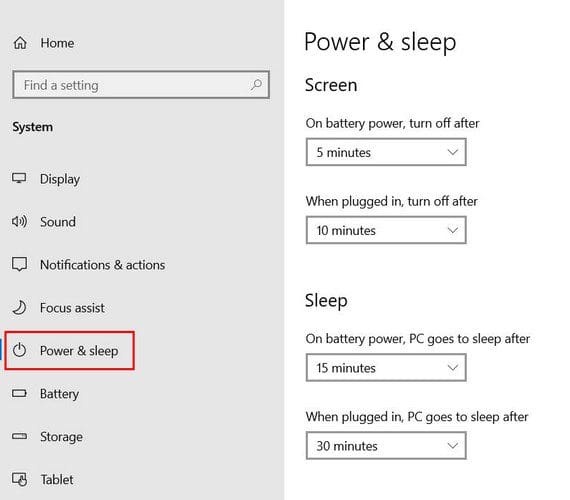
If you’re on Windows 10, you can go into your computer’s settings to manage the sleep options. The fastest way to access those settings is by typing sleep in the search bar and choosing the only option that’ll appear.

At the top, you’ll see time options for when your computer is plugged in. You can have it go to sleep or turn it off. Whatever works best for you. This section will only apply to your screen. If you want the sleep settings to apply to your computer, choose a time in the section below.
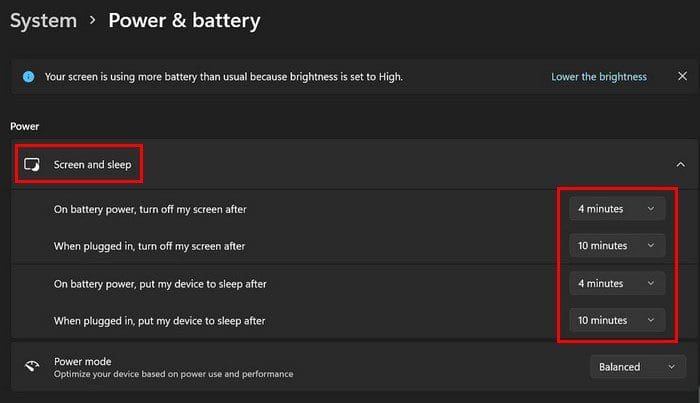
You can access the same options if your computer runs on Windows 11. You’ll need to click on the Windows Start menu and go to Settings. Go to System, followed by Power and battery. Under the Screen and sleep option, click on the dropdown menu to see the available time options.
Conclusion
Setting a timer on your computer means you don’t have to worry about leaving it on for hours on end. To speed things up a little, you can create shortcuts to enable and disable the shutdown. By turning off your computer at the right time will help you take care of your computer and not make it work overtime. What time did you add to the timer? Share your thoughts in the comments below, and don’t forget to share the article with others on social media.