The user account that first creates a Slack workspace is the “Primary owner” of the workspace by default. When you invite new users to the workspace, they are added as full members. By default, the security settings of a new workspace are pretty lax. Workspace members will be able to see and change many potentially sensitive settings unless you change the permissions.
Unless your workspace is minimal, you’ll likely want there to be several trusted users that have administrative permissions. These admin users can help manage the workspace, while most users will have administrative permissions restricted. Granting other users admin rights is one part of managing the workspace members. You can also deactivate the accounts of other users.
Tip: Deactivating someone’s account disconnects their sessions and prevents them from logging back in. All of their messages are maintained, however, for logging reasons. This is intended to be used when someone leaves a company, for example.
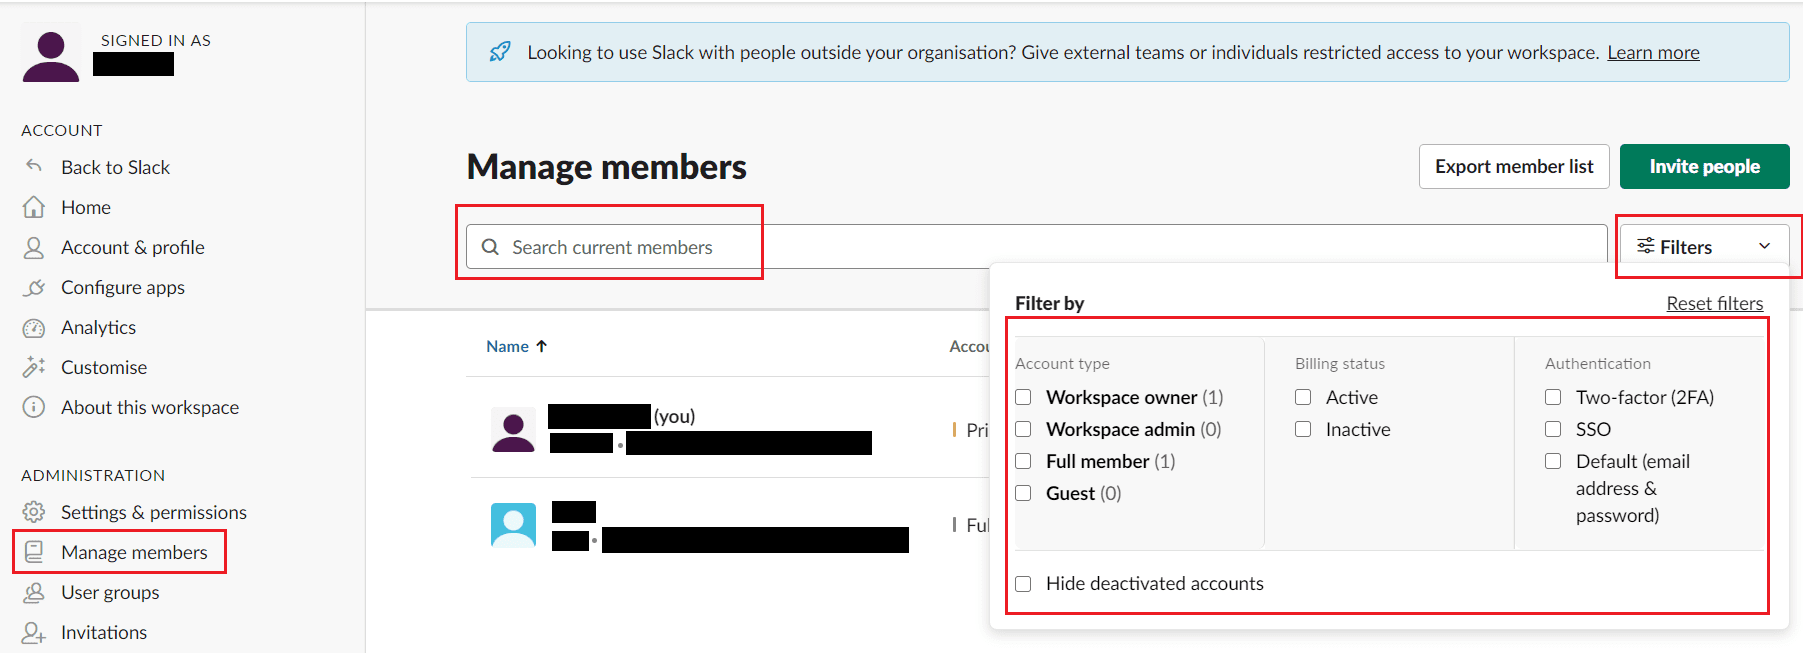
On the member management page, you can also filter the list of accounts by certain features. For example, you can search for accounts using two-factor authentication. Alternatively, you can limit your search to inactive accounts that aren’t affecting your bill.
How to Manage Workspace Members
To be able to manage your workspace members, you need to go to the member management settings. To do so, you first need to click on the workspace name in the top-right corner.
Next, in the dropdown menu, select “Settings & administration,” then “Manage members” to open the Member management page in a new tab.

You can search for users using the “Search current members” textbox in the member management settings. You can apply any filters to your search by clicking the “Filter” dropdown box, then selecting the filters you want.
Note: While you can apply filters to show only items that match the filters. You can’t select filters to only show results that don’t match the filters.
To deactivate a user’s account, click on the relevant triple dot icon in the right-most column, then click “Deactivate account.” To change a user’s account type, click “Change account type.” In the popup, you can choose which account type you want to set them to.

Managing permission levels is an important part of workspace management. By following the steps in this guide, you can manage the members of your workspace.