

OneNote error 0xE00001AE doesn’t affect users as frequently as error 0xE40200B4 or other sync issues. It usually indicates that a certain section file is corrupted. The good news is that you can quickly fix this problem.
Contents
6 Quick Fixes For OneNote Error 0xE00001AE
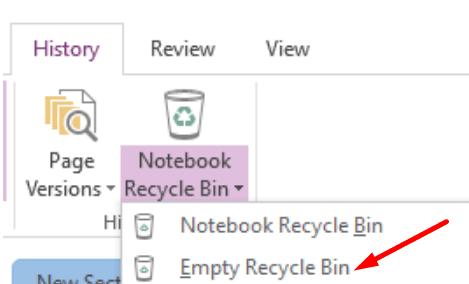
Empty the Recycle Bin
Delete all the files from OneNote’s Recycle Bin. To do this, launch OneNote and click on the drop-down menu under Notebook’s Recycle Bin button. Then click on the Empty Recycle Bin button. Hit the Yes button to confirm your choice.
Create a New Section
Alternatively, you can also create a new section to replace the corrupted one. Simply create a new section in the same notebook. Then copy all the pages from the problematic section that initially triggered error 0xE00001AE to the new section.
After you did that, simply delete the old section and press Shift + F9 to re-sync your notebook.
Export the Problematic Section
- Right-click on the corrupted OneNote section file and click on Export.
- Enter a name for the file and save it as a OneNote Section (*.one). Select the Page Range as Current Section. Then save the file on your desktop.

- The section should now be available under Open Sections.
- Right-click on the section and select Move or Copy.

- Select the notebook where you want to copy that section.
- Open the notebook with the corrupted section. The section you just copied should be visible there. You can sync it.
- You can now delete the corrupted section. Right-click on it and select Delete.
- Right-click on the section you recently copied. Go ahead and rename it. Use the same name as that of the deleted section. Check if the error is gone.


Don’t Use Multiple Apps Simultaneously
If you’re using two OneNote apps at the same time, close one of them. Don’t use multiple apps to work on the same document, especially if you’re offline.
If you do that, Onenote will get pretty confused next time you go online. In other words, the app won’t know which changes to take into account.
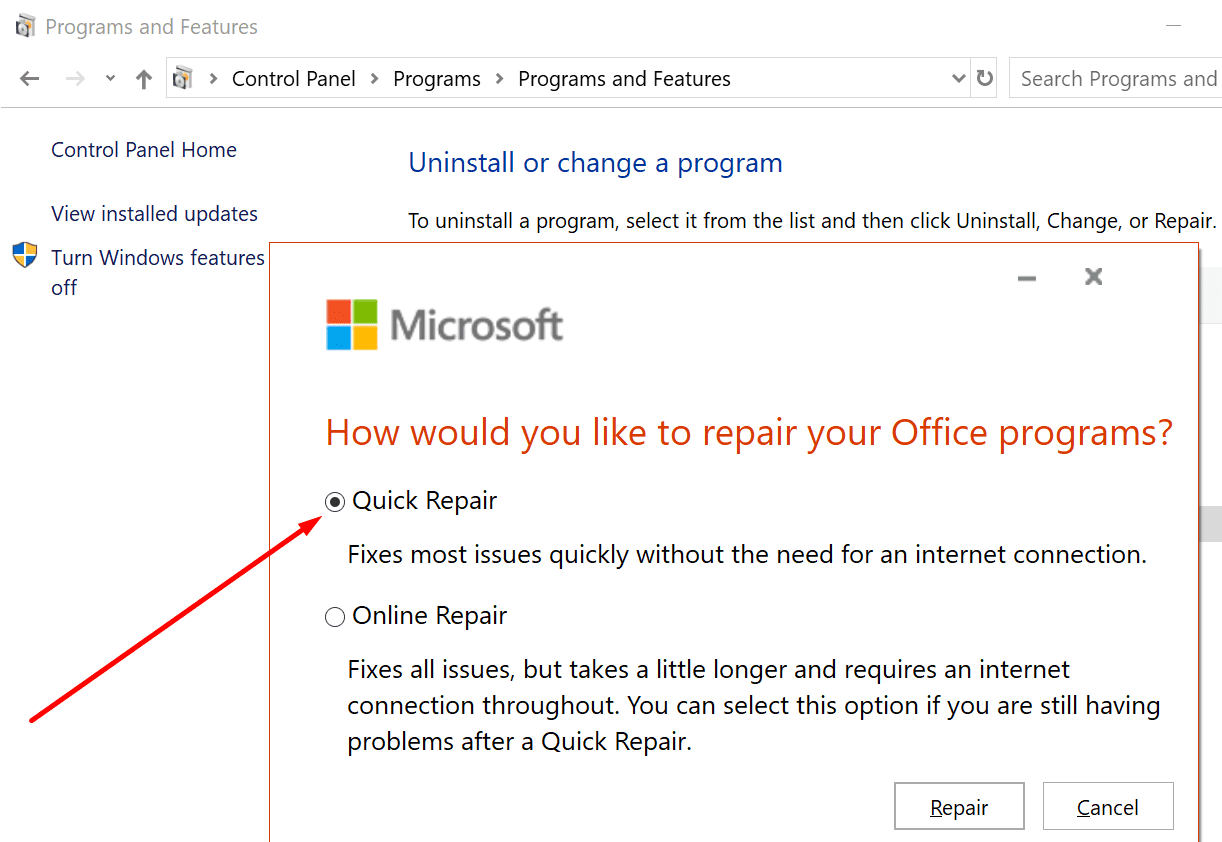
Repair Office
Repairing Office could help you to fix the annoying OneNote sync issues you’re experiencing due to error code 0xE00001AE.
- Open the Control Panel and click on Programs, then on Programs and Features.
- Select your Office Suite installation folder.
- Click on the Change button and select Quick Repair.

- Restart your computer and launch OneNote.
Clear the OneNote Cache Folder
If the error persists, clear your cache folder. Go to C:\Users\UserName\AppData\Local\Microsoft\OneNote\16.0 and open the Cache folder.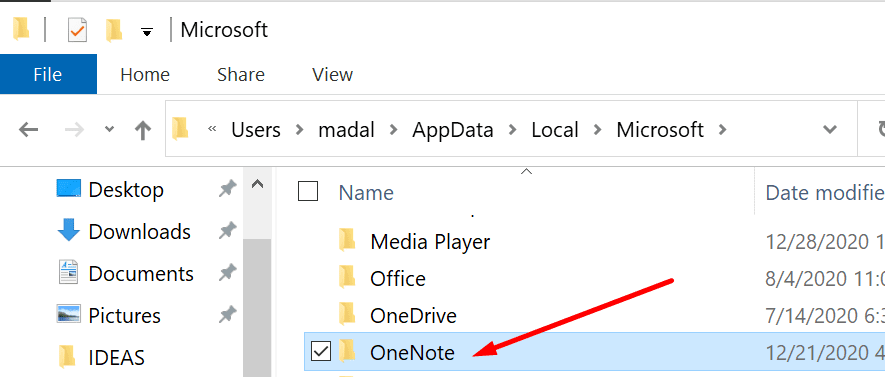
Select and delete all the files from that folder. Restart your computer again. Error 0xE00001AE should be history now.


This was helpful, thanks!