
If you use Microsoft Word to write and edit documents, the program will flag many of the specialized terms you used. This is because each domain or field comes with its own terminology. And the dictionary that Word relies on simply does not include your terms.
So, what can you do about that? Well, one solution is to right-click on the word that Microsoft Word flagged and select Add to dictionary. The program will then add that word to your default Custom Dictionary. As a result, Word won’t flag it the next time you use it.
But there’s even a better option. You can create and upload your own Custom Dictionary to Word. That’s a convenient approach, especially if you often work with documents about the same field — say civil engineering, medicine, you name it.
Steps to Create a Custom Dictionary in Microsoft Word
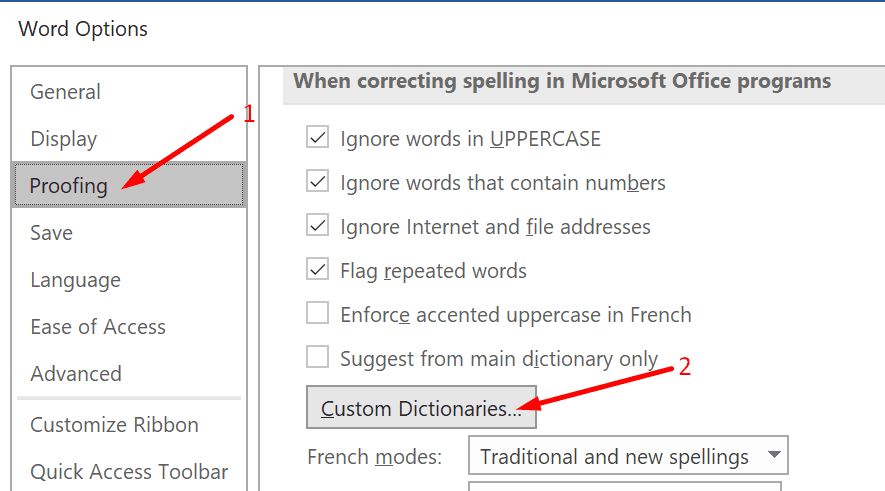
- Click on the File tab.
- Then go to Options.
- Click on Proofing.
- Next, hit the Custom Dictionaries button.

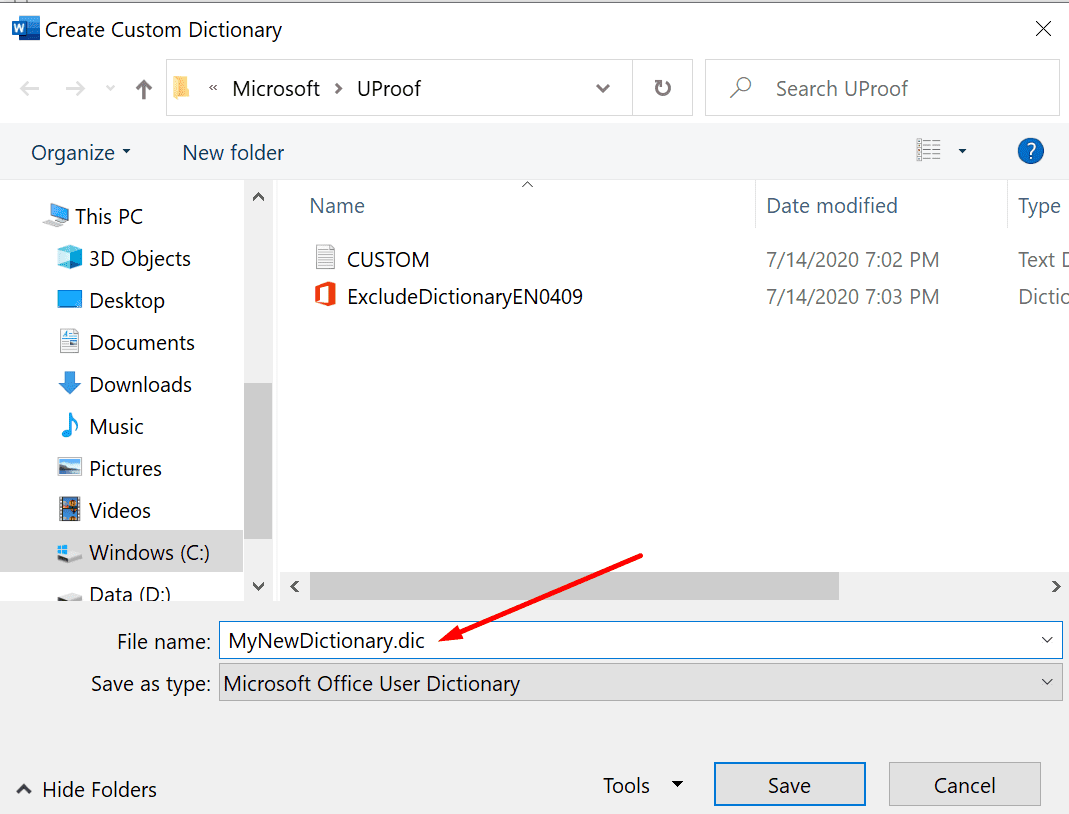
- Select the options you’re interested in to enable the New button.
- Note: You need to untick All Languages or English to make the New button available.
- Hit New when the button is no longer greyed out.

- Select the location where you want to save your custom dictionary. Or you can simply keep the default location that Word suggests.
- Name your Custom Dictionary and hit the Save button.

- Your new Custom Dictionary should now be visible under the Custom Dictionary section.

How to Add New Words to Custom Dictionary
After you created your custom dictionary, you can add new words to it or delete existing words. To do this:
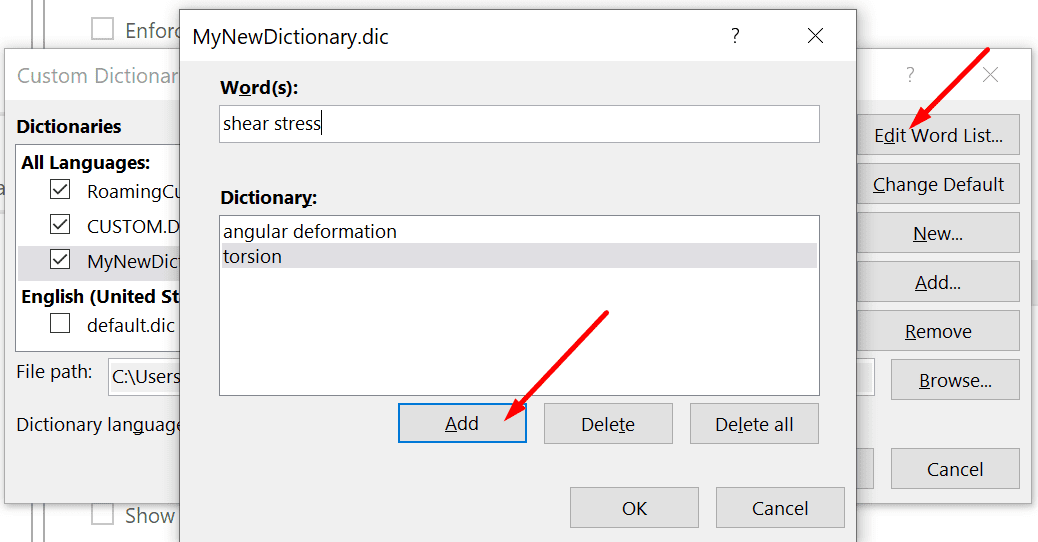
- Navigate to your list of Custom Dictionaries. Go to File → Options Proofing → Custom Dictionaries.
- Hit the Edit word list button.

- Enter a new word and hit the Add button to add to the dictionary.
- Or you can select an existing word and hit Delete to remove it from the dictionary.
Enjoy using your new Word dictionary.