
Have you ever wondered what that camera icon is when the cursor hovers over the image? That’s the Visual Search icon you’ll find in Microsoft Edge. With this feature, you can find similar photos, pages, recipes, and products.
The feature is helpful, but seeing the camera icon every time you hover the cursor can be distracting when you have to take a screenshot. That’s why users may turn it off and take screenshots without the camera icon appearing. Don’t worry about turning it off and not being able to use it ever again since the changes can be modified at any time. Here are the steps to follow.
Contents
How to Disable Visual Search in Microsoft Edge
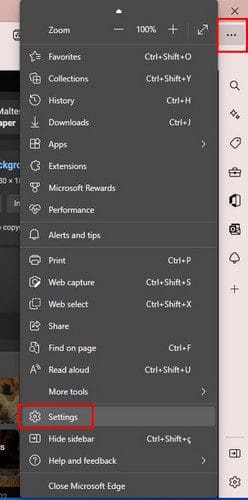
You’ll completely turn the Visual Search tool off by following the steps mentioned in this section. If what you want to do is only turn it off for specific sites, then you’ll need to follow a different set of instructions, and you’ll need to follow the steps in the following section. But if you’re sure that you want to turn it off for all sites, here are the steps to follow. Once the browser opens, click on the dots at the top right and go to Settings.
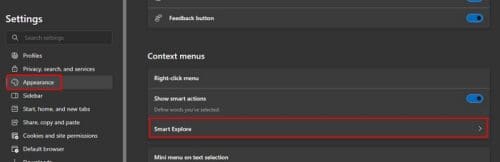
Once you’re in Settings, click on Appearance on the left, scroll down to the Context menus section and click on the Smart Explore option.
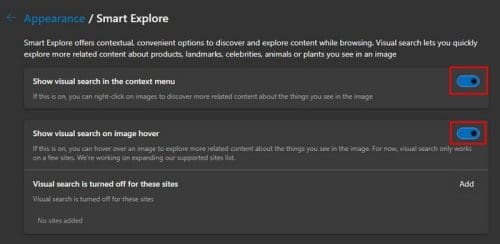
In this last section, you’ll see two options: turn it on or off. One of them will allow you to see the visual search on the image hover. The other option will show or hide the visual search icon when you hover over an image.
The changes are applied instantly, so you don’t have to restart the browser. If you ever change your mind at any time and want to turn it back on, you can follow these steps and toggle it on, or vice versa.
How to Disable Visual Search for Specific Sites
In the Smart Explore section, you’ll also see an option called Visual search is turned off for these sites. It should be all the way at the bottom. If there is a site that you want to exclude from the Visual Search, click on the add button and type the URL of the site.

You can go ahead and add as many sites as you want. Once you’ve added the last site, you’re all set. You can erase them all, or you can remove only one. Visual search is very useful since it can give you information on a specific image. For example, let’s say you want to see how many sites a particular image is on. This is what you can do.
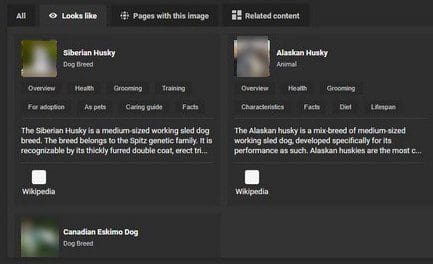
Let’s say you’re searching for an image of a husky and see a specific image you like. Click on the Visual Search button and drag the image toward the indicated area to begin searching.
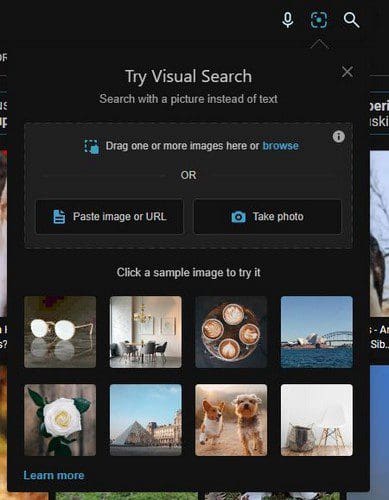
The image will be placed on one side, and on the other side, you’ll all sorts of information on the image. You’ll see a section called Looks Like, where you can see similar objects or animals that look like the picture you’re researching on. You can also see how many sites that specific image is on, and the last tab you’ll see is called Related content.
Further Reading
As long as we’re on the subject of searching. There are various articles you can keep reading that have helpful tips. For example, if you’re having trouble with your Chrome browser, you can see how you can fix Chrome errors while searching for harmful software. Another error you might come across is when your Windows computer is not searching or indexing PDF files. There’s a fix for that too. Happy reading!
Conclusion
There are more reasons to keep the Visual Search option on than off. But if you ever need to turn it off, you know it can easily be done by going into Edge’s settings. You have the option of turning the feature completely off or only disabling it for specific sites. Add the URL of the sites you want to disable the feature for and keep it on for the remaining sites. That way, you can have the best of both worlds and not have to turn it off completely. Did you completely turn the feature off? Share your thoughts in the comments below, and don’t forget to share the article with others on social media.