Sooner or later, you’ll need to take a screenshot of something. You may already be using a tool for screenshots, but you won’t need it since you’re using Edge now. Microsoft Edge has a built-in screenshot tool where you can take screenshots of a particular area or the entire screen.
Once you’re done taking the screenshot, Edge also offers editing tools to give the screenshot your personal touch. It may not be as much as other softwares that are exclusively for editing, but if you’re not looking to do too much, it’s perfect.
How to Take Screenshots in Edge
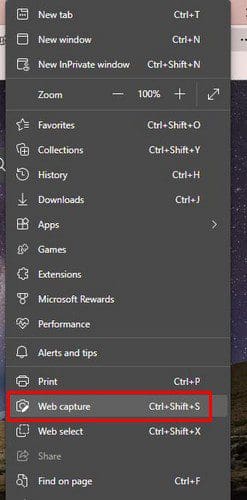
If this is your first time using Edge, or you haven’t customized it, then you probably haven’t added the screenshot icon at the top. Once you add it, it will give you faster access to the feature. But, if you already have too many and want another way to access the feature, you’ll only need to click on the dots at the top right and choose the Web Capture option.
If you want to access the Web capture option faster, you’ll need to go to Settings. You can do this by clicking on the dots, followed by Settings. If you don’t see the dots, you can click on your profile picture and go to Profile settings. You can move to Appearance after that. Once you’re in Appearance, scroll down and toggle on the Web selection option.

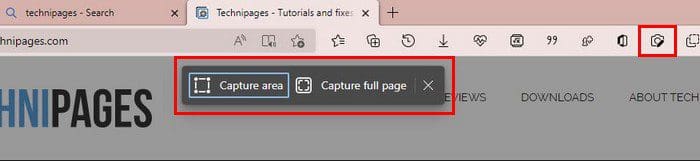
As soon as you toggle it on, you’ll see the camera icon appear at the top. Now, it’s time to take your screenshot. Once you click on the camera icon, your screen will go darken a little, and you’ll see two screenshot options at the top. One is to take a screenshot of an area, and the other to take a full page screenshot.
If you decide to take a screenshot of a particular area, you’ll see options at the bottom right to save or edit it.
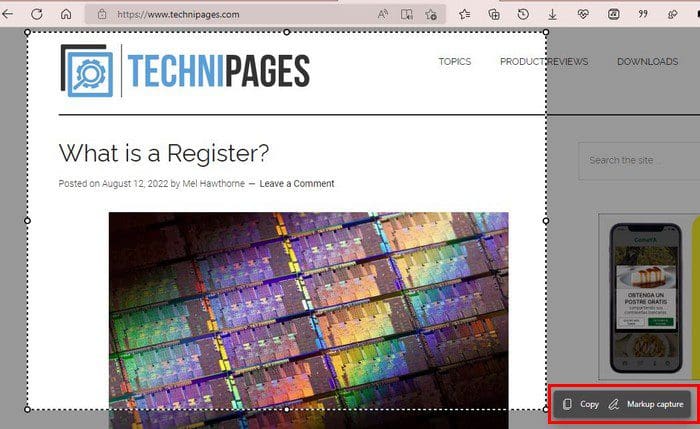
When you edit the screenshot, you won’t see a large variety of editing options, such as emojis. You’ll see a pencil icon allowing you to draw on your screenshot. You’ll see a slider at the bottom (when you click on the pencil icon) to adjust the pencil’s thickness.
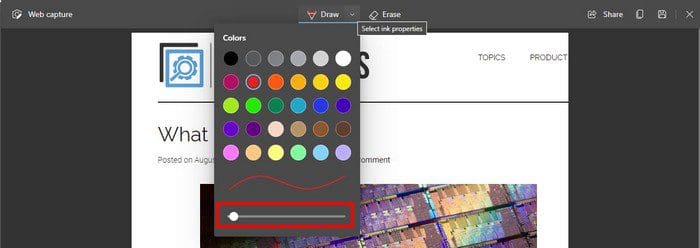
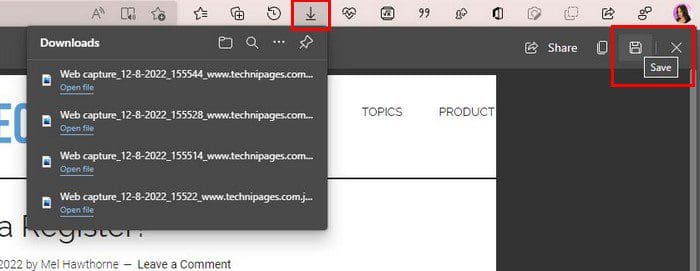
You can choose from different colors, but it would have been nice if it had a custom option to create your own color. If you make a mistake, you can always use the eraser at the top. At the top right, you’ll see the save option and the option to copy the screenshot.
By copying it, you can paste it elsewhere. For example, let’s say you have a Google Docs file open and want to add the screenshot you copied. By pressing Ctrl + V, you can paste the screenshot to your file. The screenshot will be downloaded in JPG by clicking on the Save icon. At the top, you should see an open to open the file.
Full-Page Screenshots
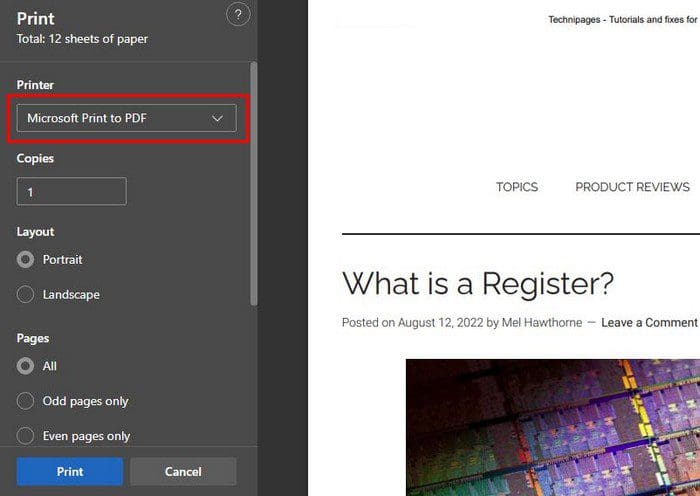
When you take a full-page screenshot, it will not be divided into pages. It’ll be simply one long image. You’ll also see the same editing options you saw for the specific area screenshot. If you need the file in PDF format, you’ll need to click on the dots at the top right of the page and click on the Print option. In the next window, you’ll see the option to download the page in PDF format.
Conclusion
With Microsoft Edge, you won’t need a third-party app to take screenshots. The editing options could improve, but hopefully, that’ll improve soon. But, if you’re ok with really basic editing options, then this option should do it. You have the option of taking a full-page screenshot or of a specific area. What are your thoughts on the screenshot tool? Let me know in the comments below, and don’t forget to share the article with others on social media.