When it comes to editing photos, there are a lot of great tools out there, such as Snapseed for basic edits on your phone or more robust options like Lightroom or Photoshop. However, some pretty awesome tools are also available in the built-in Photos apps on your iPhone or Android phone.
You might want to use a more robust photo editor to remove background objects that ruin an otherwise-perfect picture. Removing background objects in photos can serve various purposes, such as enhancing aesthetic appeal, drawing attention to the primary subject, addressing privacy concerns, and maintaining professionalism in product photography. Thanks to Google’s Magic Eraser, you no longer need to worry about using different photo editors.
Google has continued implementing new and useful tools and features into the Google Photos app on Android and iOS. One example is the Magic Eraser tool, and for the first time since it was introduced, you can use Magic Eraser on practically any smartphone.
Contents
What is Magic Eraser?
![]()
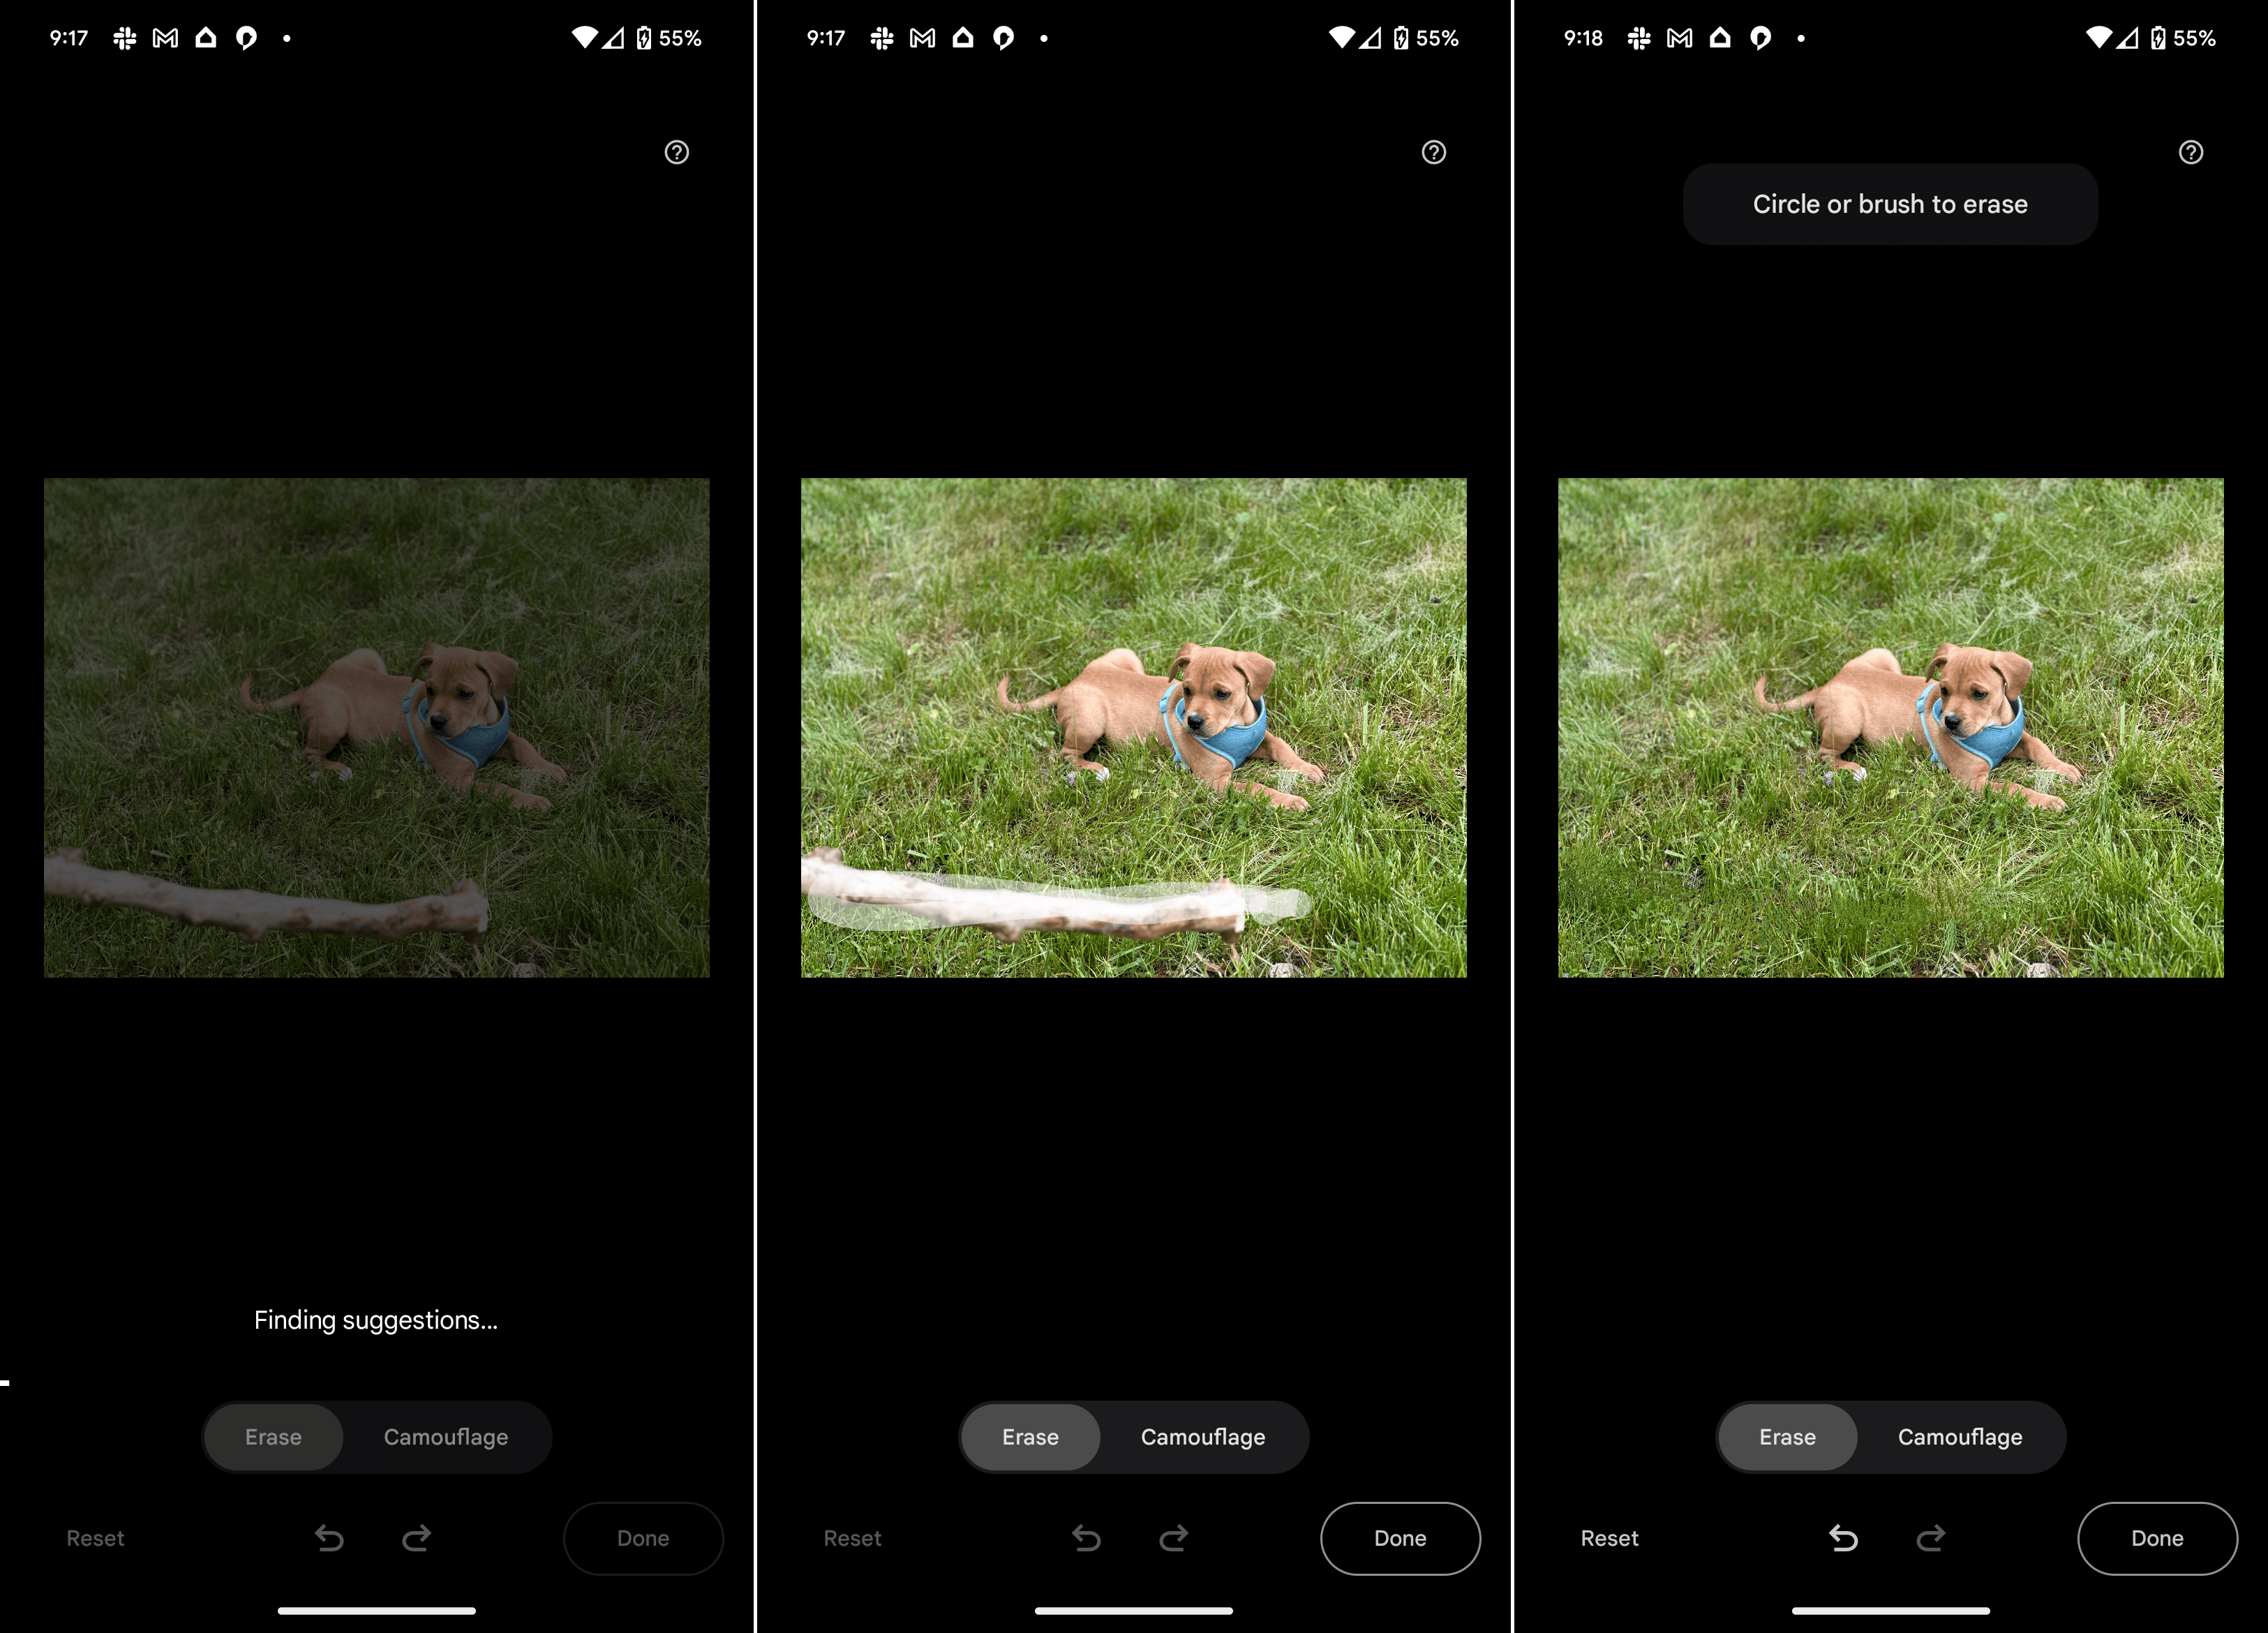
Magic Eraser is an AI-powered editing tool that allows you to remove unwanted objects from your photos. It was first released in 2021 as an exclusive feature for Pixel phones, but it is now available to all Android users through the Google Photos app.
This is one of the most helpful photo-editing tools we’ve ever used, making it easy to get rid of people or objects in the background you don’t want to see. It has also sparked a bit of a revolution in other photo editors, as we’re seeing more and more implementations of similar features, all powered by AI.
Perhaps the most exciting aspect of Magic Eraser isn’t what it’s capable of. But instead, Google opened up Magic Eraser for everyone, integrating it into Google Photos. The only “catch” is that if you want to use Magic Eraser on a non-Pixel Android device or an iPhone, you’ll need to be subscribed to Google One.
How to Use Google’s Magic Eraser on Android
- Open the Google Photos app on your Pixel or Android device.
- Select the photo that you want to edit.
- Tap the Edit button in the bottom toolbar.
- Swipe to the left and select Tools.
- Tap the Magic Eraser button.
- Wait for the image to be processed.

- Tap the Erase All button to remove any of the suggestions.
- If not, use your finger and circle or highlight the item(s) that you want to have removed.
- Repeat for anything else that you want to remove.
- Once you’re finished, tap the Done button in the bottom right corner.

How to Use Google’s Magic Eraser on iPhone
As a reminder, if you want to be able to use Google’s Magic Eraser on iPhone, you’ll first need to be subscribed to Google One. Google One is a subscription-based service that offers expanded cloud storage, additional benefits, and premium support across various Google products. By subscribing to Google One, users can get extra storage space for Google Drive, Gmail, and Google Photos, which can be shared with family members.
The service also provides access to Google experts for technical support and exclusive features and benefits, such as discounts on Google Store purchases, Google Play credits, and more. The subscription plans come in different tiers, offering varying storage capacities and pricing options to suit individual needs. Pricing starts at $1.99 per month for 100GB of additional storage and goes up to a whopping 30TB of storage for $150 per month.
Provided that you’ve already signed up for Google One, here’s how you can use Google’s Magic Eraser on iPhone:
- Open the Google Photos app on your iPhone.
- Select the photo that you want to edit.
- Tap the Edit button in the bottom toolbar.
- Swipe to the left and select Tools.
- Tap the Magic Eraser button. You’ll notice a Google One icon to denote your access to the feature. Otherwise, it won’t be present.

- Wait for the image to be processed.
- Tap the Erase All button to remove any of the suggestions.
- If not, use your finger and circle or highlight the item(s) that you want to have removed.
- Repeat for anything else that you want to remove.
- Once you’re finished, tap the Done button in the bottom right corner.


Tips on How To Use Google’s Magic Eraser
Magic Eraser is a powerful tool that can remove various objects from photos, including people, power lines, and even graffiti. It is a great way to improve the look of your photos and remove any unwanted distractions.
Here are some tips for using Google’s Magic Eraser:
- Make sure that the photo you want to edit is in focus. Magic Eraser works best on photos that are in focus.
- Use a light touch when drawing the box around the object you want to remove. If you draw the box too large, Magic Eraser may remove more than you want.
- You can adjust the size of the box after you have drawn it. If you accidentally remove too much, you can undo the changes by tapping the Undo button.
- Magic Eraser may not be able to remove all objects from photos. If Magic Eraser cannot remove an object, you can try adjusting the box size or using a different editing tool.
Google’s Magic Eraser is a powerful tool that can be used to improve the look of your photos. It is a great way to remove unwanted objects from photos and create stunning images.