The BIOS is a central part of your computer’s functionality. Some manufacturers distribute BIOS updates through Windows Update, but you may need to download and install them manually. If you decide you want to update your BIOS manually, follow this guide to find the current version number and the correct installation instructions from your computer’s manufacturer.
Why Might You Want to Access BIOS on Windows 11?
BIOS stands for Basic Input/Output System and is firmware that initializes a computer’s hardware when it starts up. What it does is simple, but without it, your Windows machine won’t even switch on correctly.
The BIOS runs a system called POST, which means “Power-On Self-Test.” This process checks that the computer can switch on and that all the connected hardware and components are running as expected. After initializing the hardware, the BIOS or UEFI firmware hands control to the bootloader, which then starts the operating system.
BIOS used to be a read-only function, but today, it’s stored on Electrically Erasable Programmable Read-Only Memory (EEPROM), allowing users to update it with new features or upgrades as needed. Checking your BIOS details and updating it if necessary can give you the peace of mind that your computer is running optimally.
How to Update BIOS Windows 11: Step-by-Step Guide
Step 1. If you’re using a laptop, make sure it’s plugged in. Any interruption to power during a BIOS update could completely corrupt the files and stop your computer from working at all. Before you update your BIOS, find out what the current version is. Open the Run window by pressing WIN + R.

Step 2. Type msinfo32 into the Run window and press OK.

Step 3. You’ll now see all relevant system information about your Windows computer. Make a note of the BIOS version. [INSYDE Corp. V1.66, 28/05/2026]
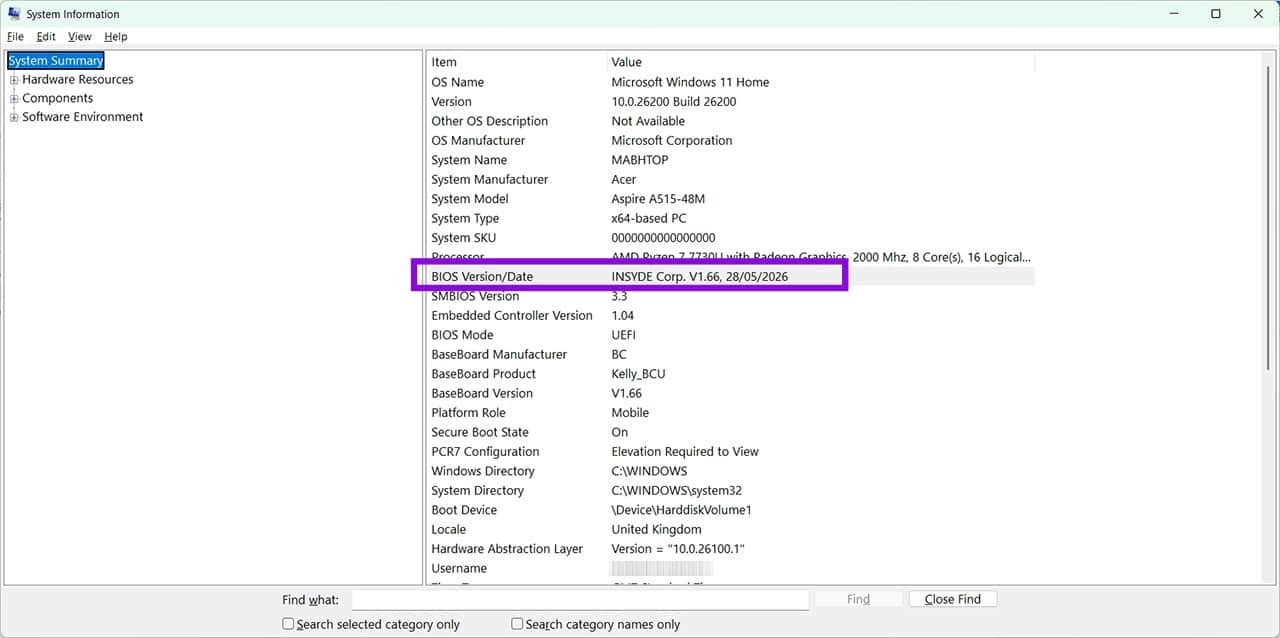
Also make a note of:
- System Manufacturer
- System Model
- BIOS Mode (this will show either BIOS or UEFI, and some manufacturers may need this info.
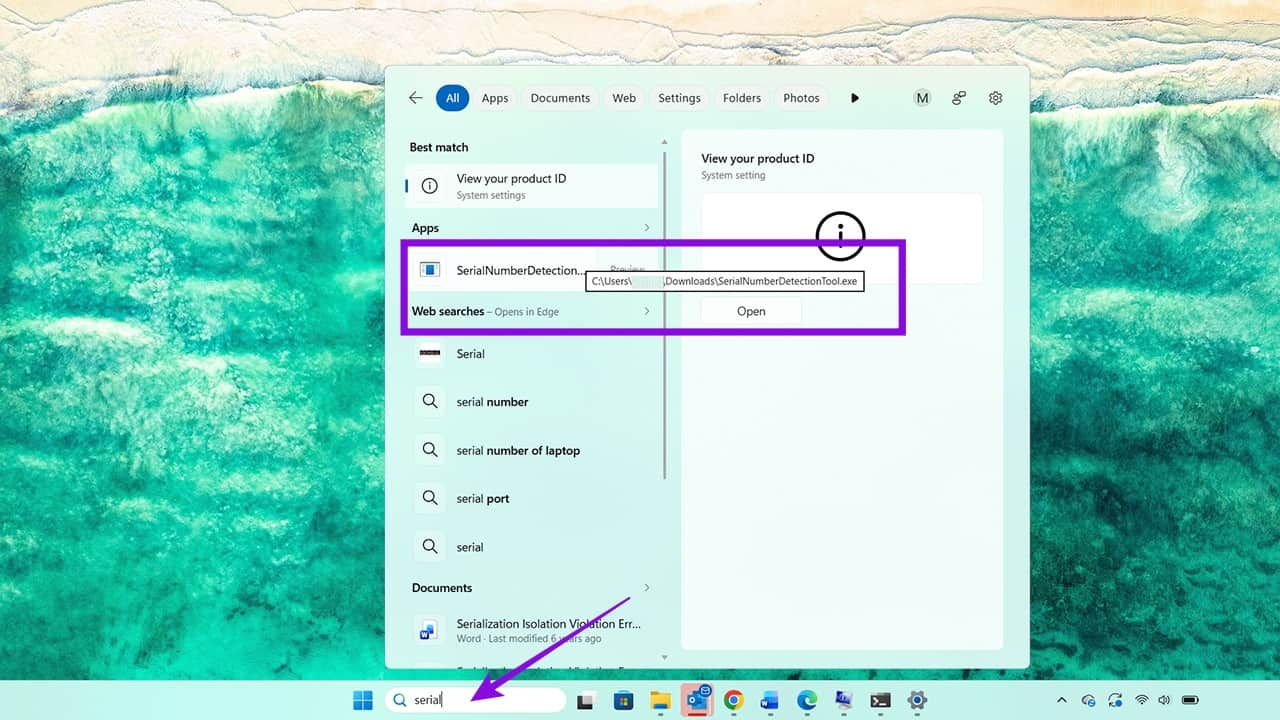
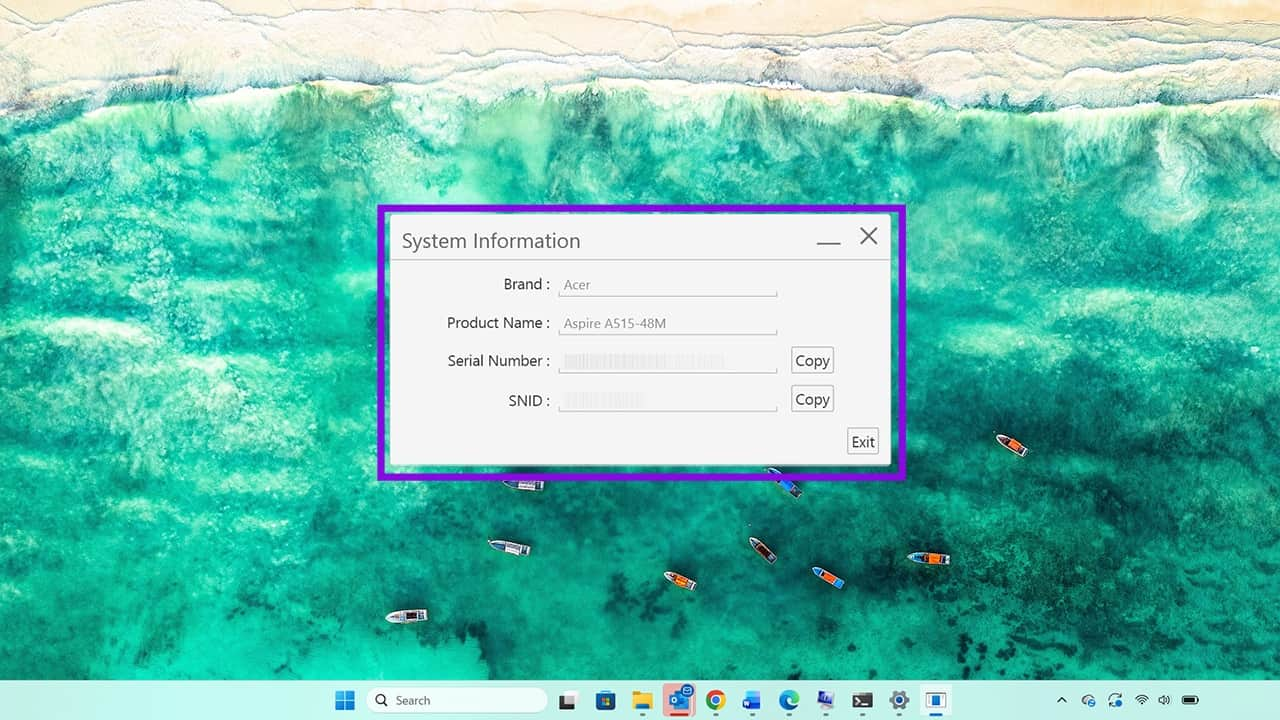
Step 4. You will also need your serial number. If you’re using an Acer computer, download the Serial Number Detection Tool from Acer’s support website and run it. The tool will display your serial number and SNID.
You’ll see the serial number of your device displayed on the screen. Tip: If you have trouble finding your serial number, it’s usually printed on a label on the base of your laptop or somewhere on the outside of your tower PC, usually at the back.
Step 5. Open a browser window and search for your computer’s manufacturer’s website. In this instance, it’s the Acer website. Head to the Support section, and there should be a clearly marked area to enter your serial number. Do this, then press Enter.

Step 6. You’ll now see the details of your computer and a list of options for support.

Scroll down until you see BIOS/Firmware.
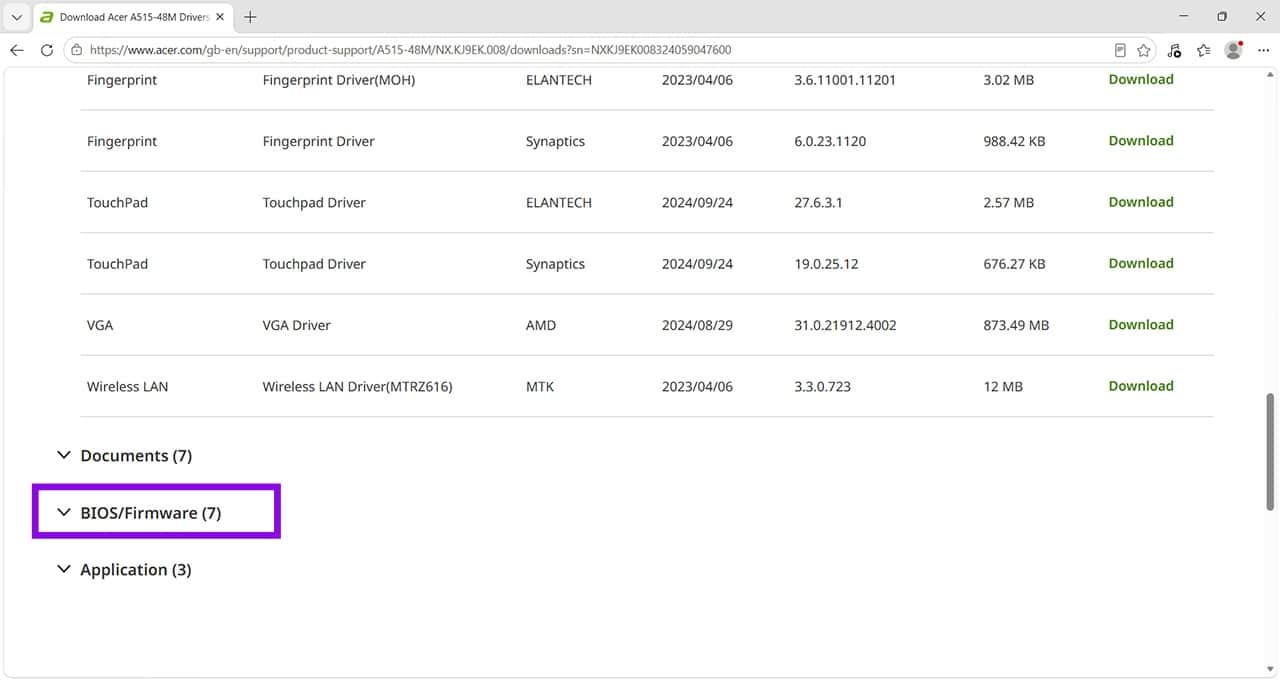
Step 7. Click the drop-down arrow and look at the BIOS versions. This means the computer is already running the latest BIOS listed by Acer, so no update is necessary. However, if there were a more recent version, you would click Download next to the relevant BIOS version and follow the on-screen instructions.
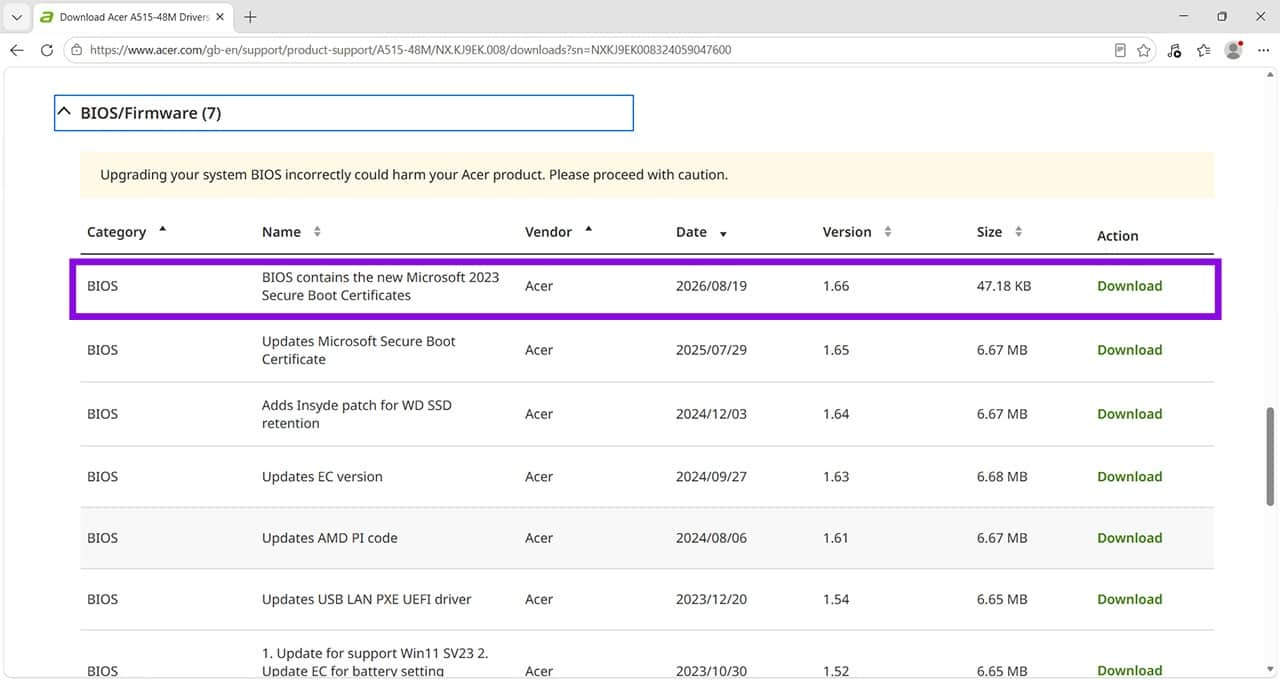
Step 8. Once you have successfully downloaded the new BIOS version, double-click the downloaded file to open it in Windows Explorer.
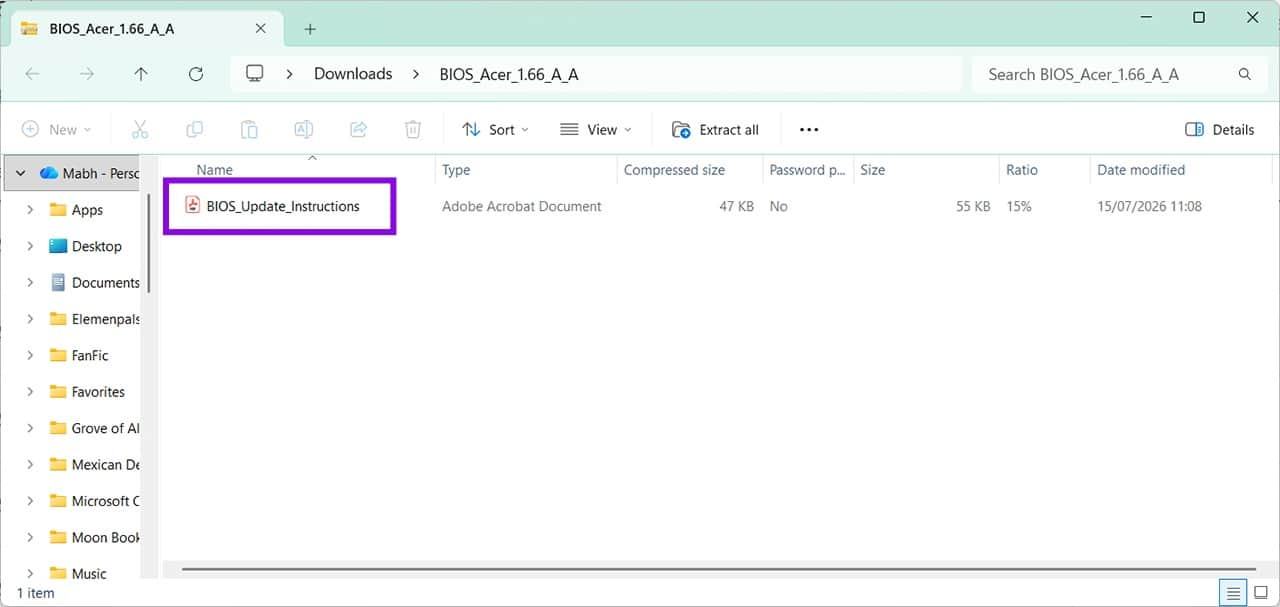
In this instance, the BIOS is not an executable file, but a PDF explaining that the BIOS updates are automatically applied by Windows Updates.

If you did download an executable file, you would follow this process. These may involve running the update in Windows or restarting your computer and completing the installation through the BIOS/UEFI utility. Before proceeding:
- Read any README documents that accompany the update
- Confirm that the update is intended for your exact computer model.
- Restart your computer. If you’re instructed to enter the BIOS/UEFI setup utility, use the appropriate key for your computer. Refer to guidelines from the manufacturer or try these:
- Acer: Press F2 or fn + F2 or Del
- ASUS: F2 or Del
- Dell: F2
- Samsung: F2
- Lenovo: F1 or F2
- Once in the BIOS menu, follow the instructions from the manufacturer’s README file.