

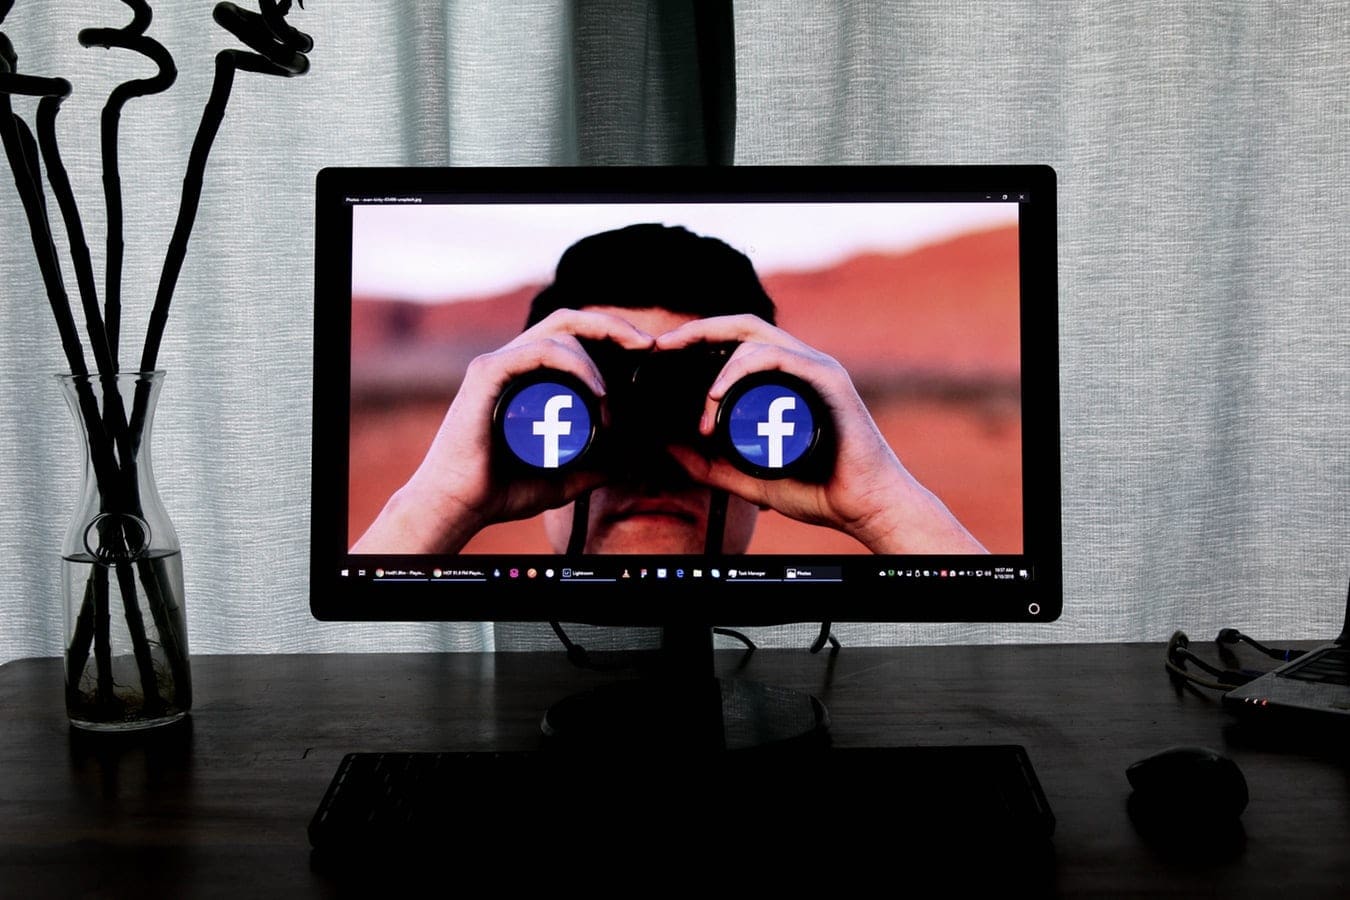
Facebook is a useful place to keep in touch with your friends and family, but you might not want others knowing what you’re up to. On top of that, you may wish to control other settings — such as which of your pictures can be viewed by people who aren’t on your friends list.
Contents
Related Reading:
- How to Change Facebook Privacy Settings on a Computer
- Facebook: The Most Important Privacy Features That You Should Know
- How to Stop Facebook Friends From Seeing Your Activity
- Facebook: How to Share Posts With Specific People
- How to Make All Facebook Posts Private
Changing your privacy settings on Facebook has the potential to be complicated if you’ve never tried to use them before. But today, we’re going to help you customize things however you feel is necessary. Keep reading to learn how to access and change your Facebook privacy settings from a smartphone or tablet.
How to Access Your Facebook Privacy Settings on Mobile
Before we can look at how to change your Facebook privacy settings on a smartphone or tablet, you need to know how to access them in the first place.
The easiest way is to use the Privacy shortcuts feature, which you’ll find when looking for the other settings on Facebook. Click on the downward-facing arrow in the top right-hand corner, which you’ll see next to your names.

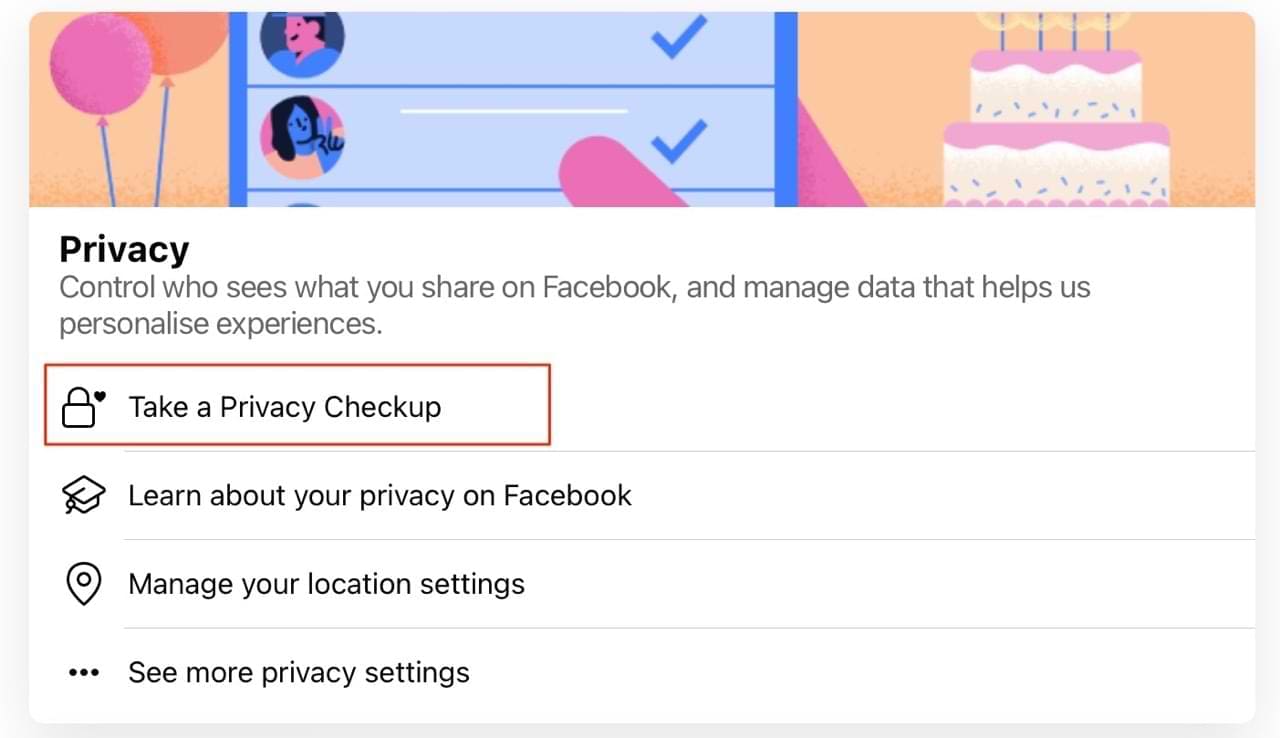
How to Perform a Privacy Checkup on Facebook for Your Smartphone or Tablet
Before you customize each setting on Facebook for your privacy, you might want to perform a privacy checkup. This will allow you to determine which areas need the most attention.
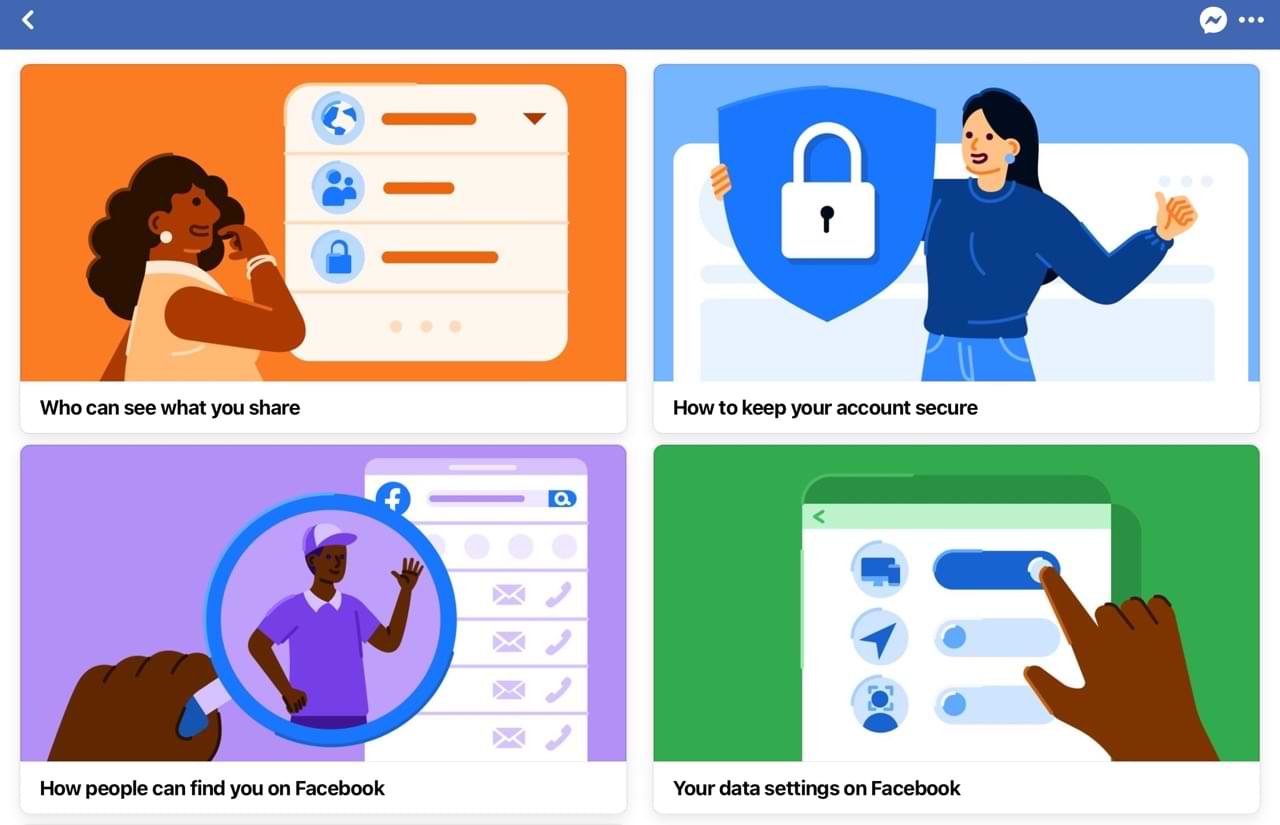
When performing a Facebook privacy checkup, you can see what your settings are like in each of the following areas:
- Who can see what you share
- How to keep your account secure
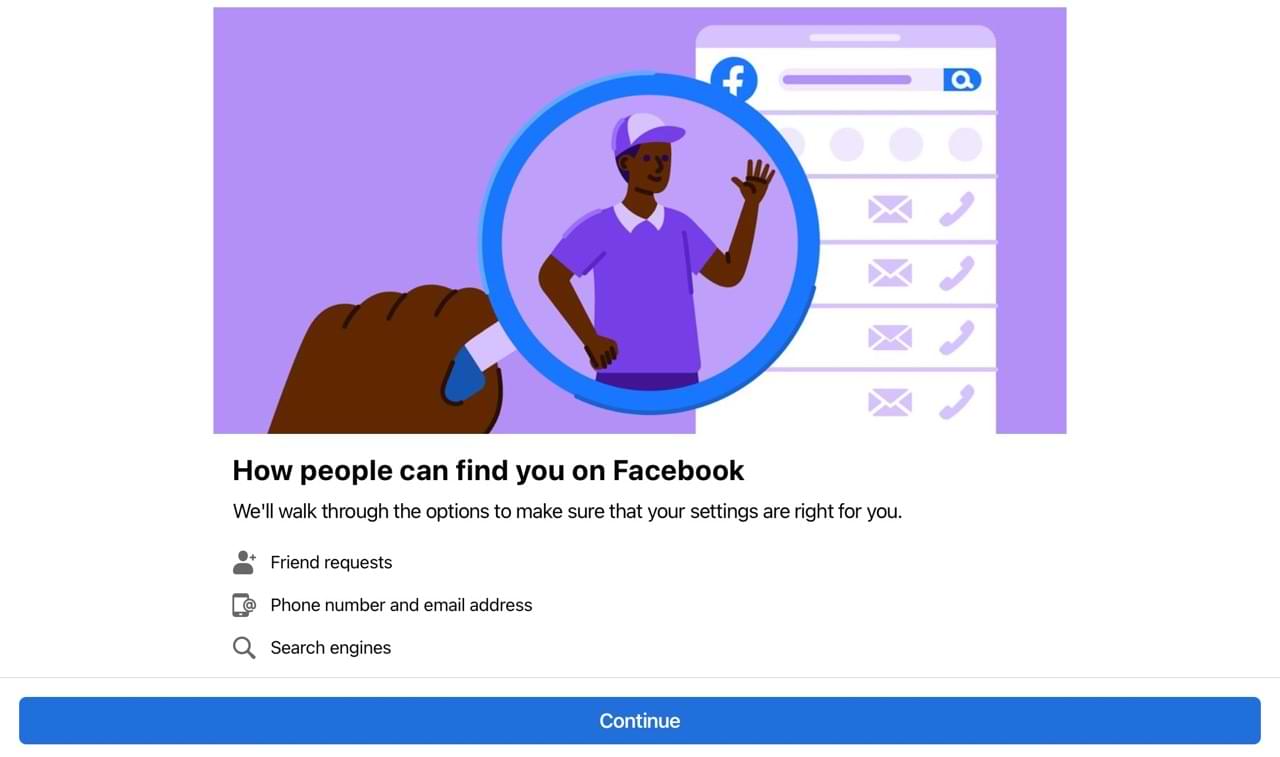
- How people can find you on Facebook
- Your Facebook data settings
- Your Facebook ad preferences
To perform a privacy checkup for any of the options listed above, follow these instructions.
- Go to your privacy shortcuts using the tips mentioned in the previous section.
- Click on Take a Privacy Checkup.

- Choose the option from the next window that you want to look closer at.

- Click on Continue when the next window appears.

- Adjust your settings however you feel is necessary.

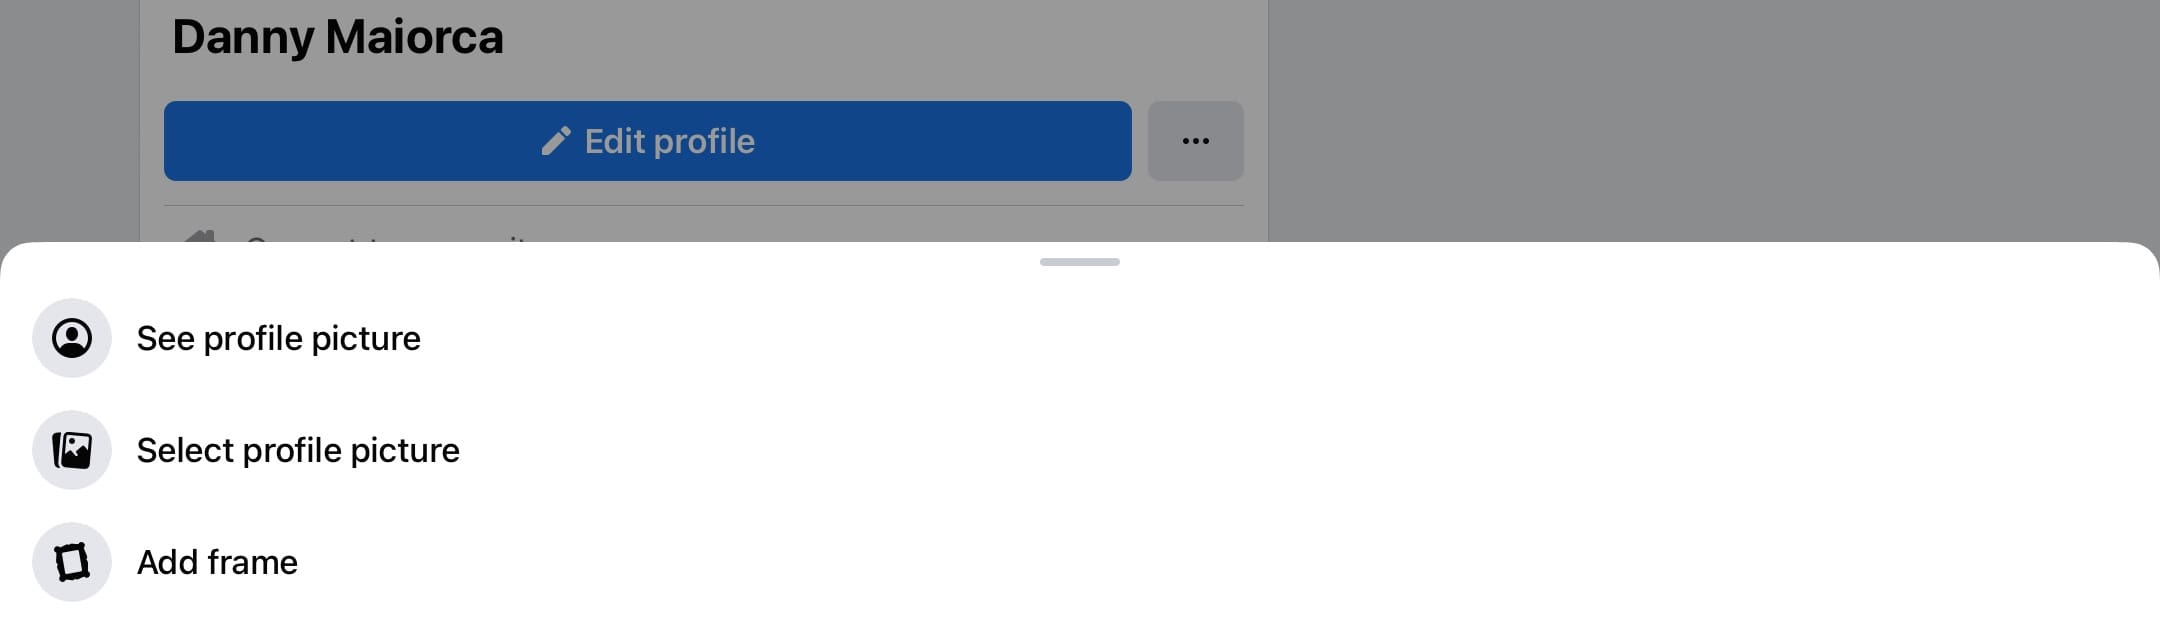
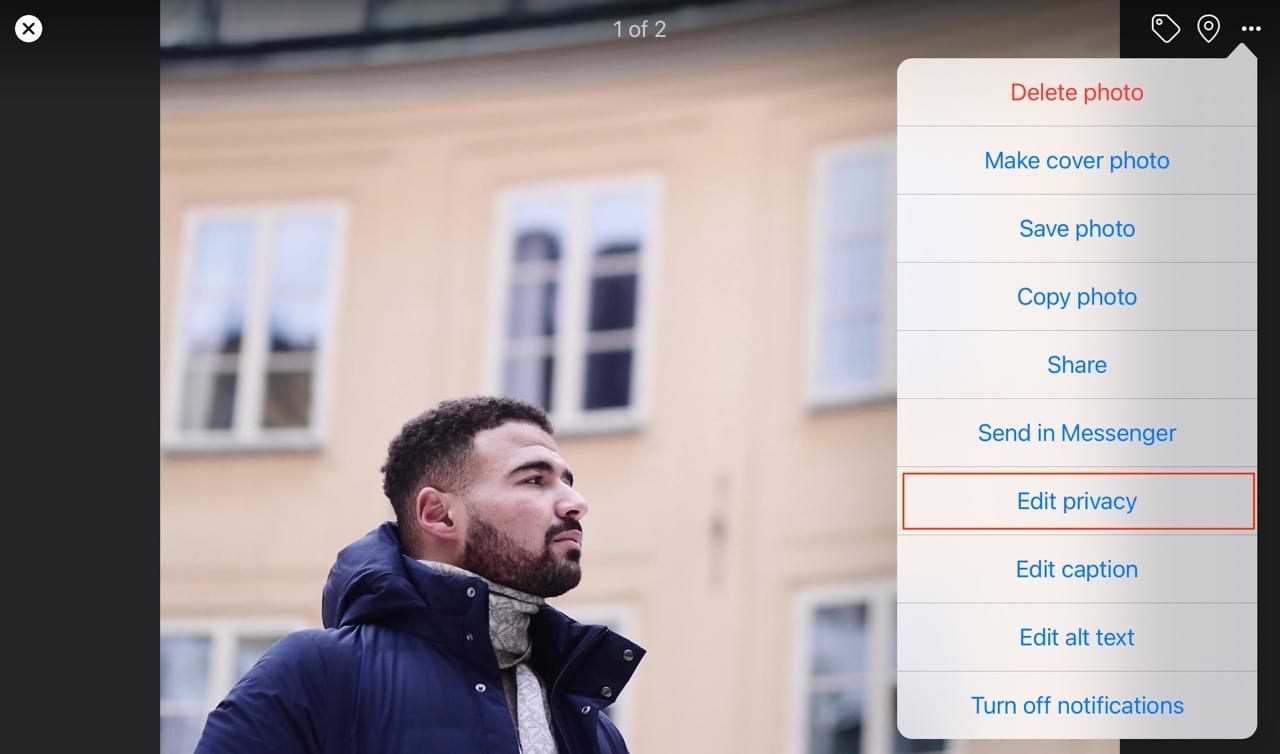
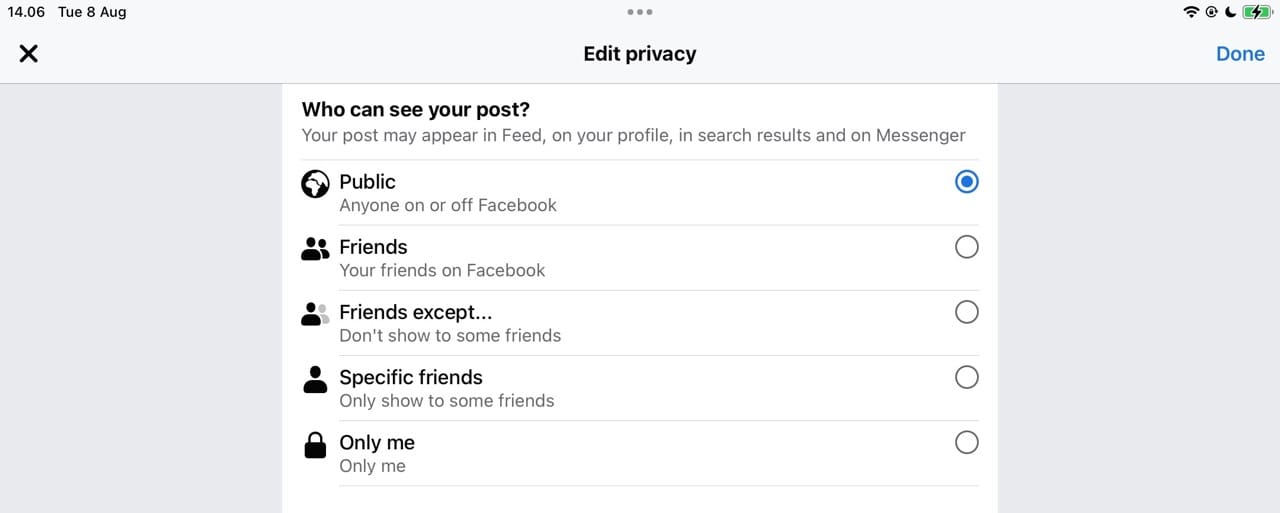
Profile Photo Privacy
First, let’s check the settings on your profile and cover photos.
- Head to your profile and click on your profile picture. If an option appears asking you what you want to do, select See profile picture.

- Click on the three dots and choose Edit privacy.

- Customize your privacy settings by choosing one option from the dropdown list. Then, when you’ve finished, tap the Done button to save your changes.

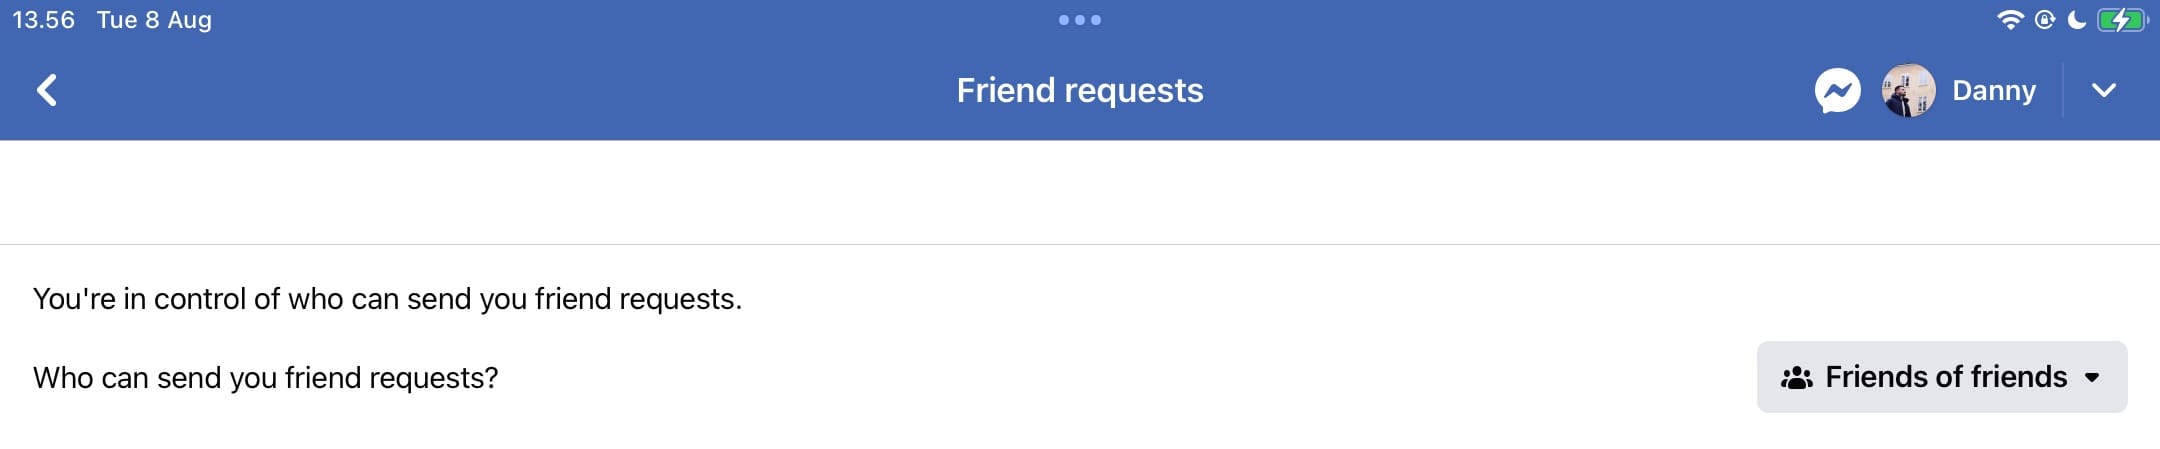
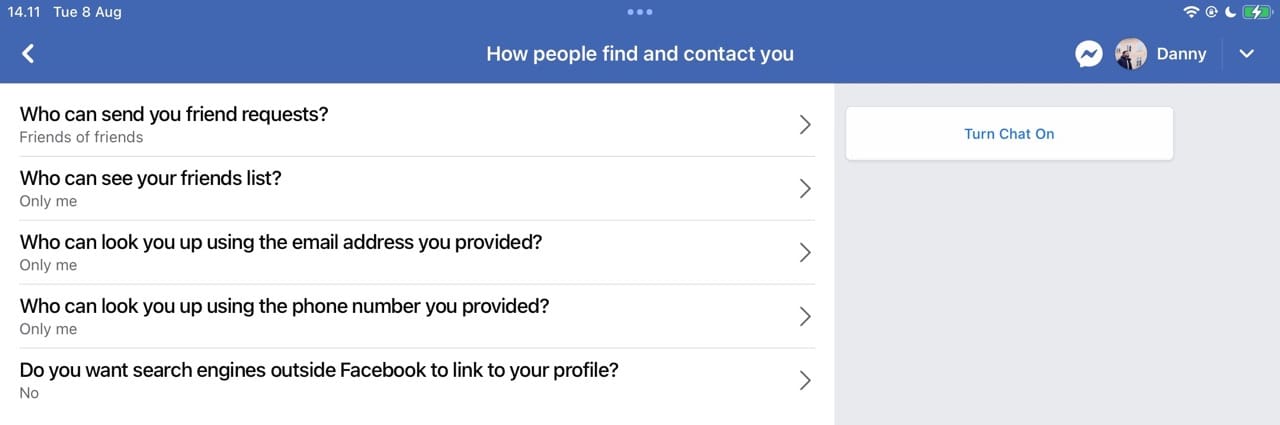
How People Find and Contact You
We spoke briefly about controlling friend requests, but you can make other changes to who can contact you on Facebook. For example, you can hide your profile from search engines if you don’t want other users to find you via those means.
To control how people find and contact you, follow these instructions.
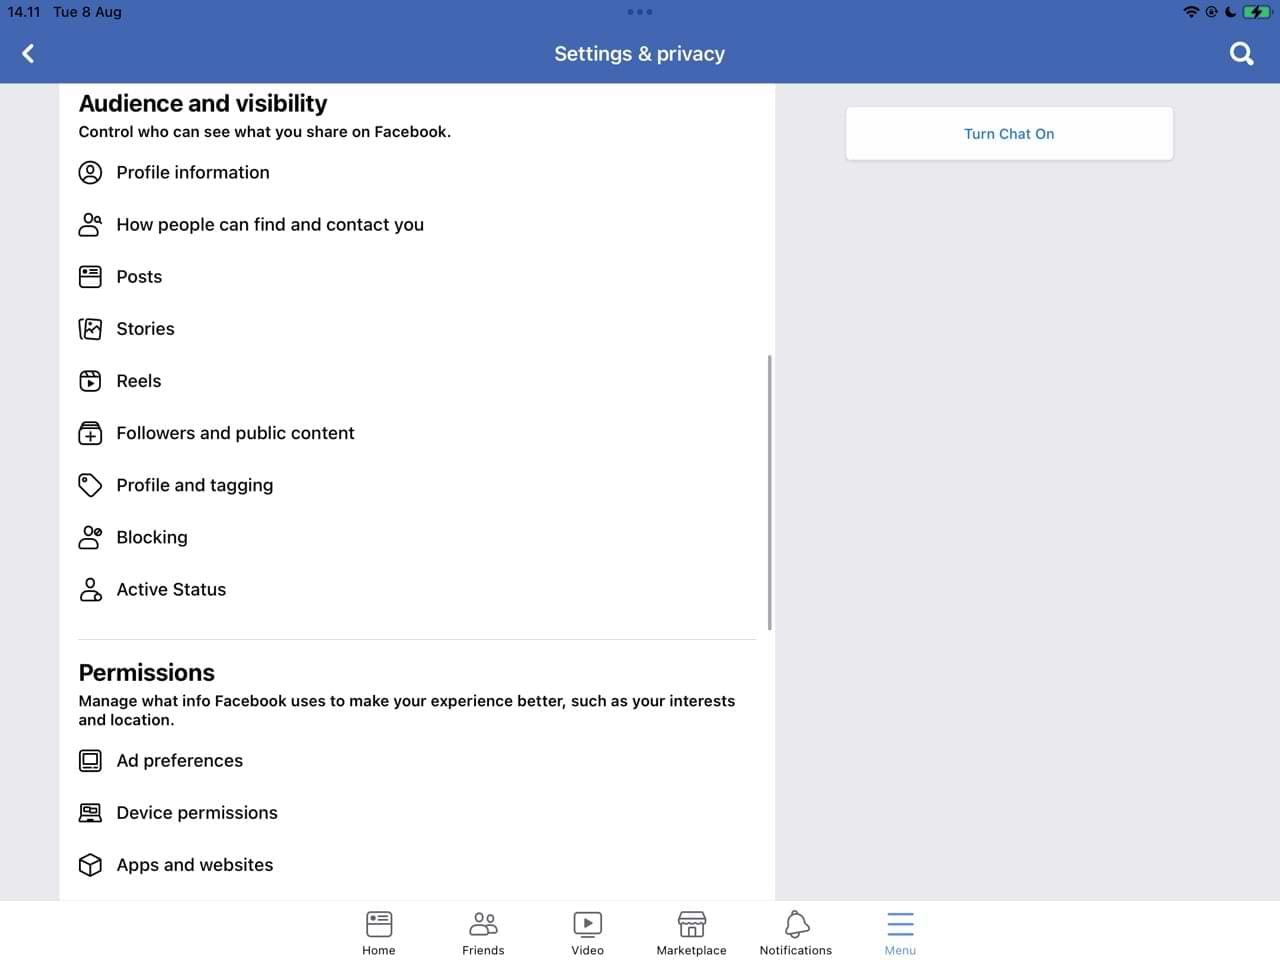
- Go to Privacy shortcuts > See more privacy settings > Audience and visibility.
- Select How people can find and contact you.

- Within each setting, customize your options to whatever you want. Your changes will take immediate effect.

Profile and Tagging
Profile and tagging allows you to choose who can see posts you’re tagged in on your profile, along with whether you want to review tags and more.
Like when deciding who’s allowed to find and contact you on Facebook, you’ll need to go to Privacy shortcuts > See more privacy settings > Audience and visibility. When you’re there, tap Profile and tagging. Once you’ve done that, change your settings to the choices that fit your needs.

Reviewing
You might not want certain posts that you’ve been tagged into to appear on your timeline. Thankfully, you can choose which posts you tag yourself in. Moreover, you have the option to pick whether a post appears on your profile before you’ve reviewed it.
These settings are available within Profile and tagging; just go to the Reviewing section to adjust these.
Public Posts
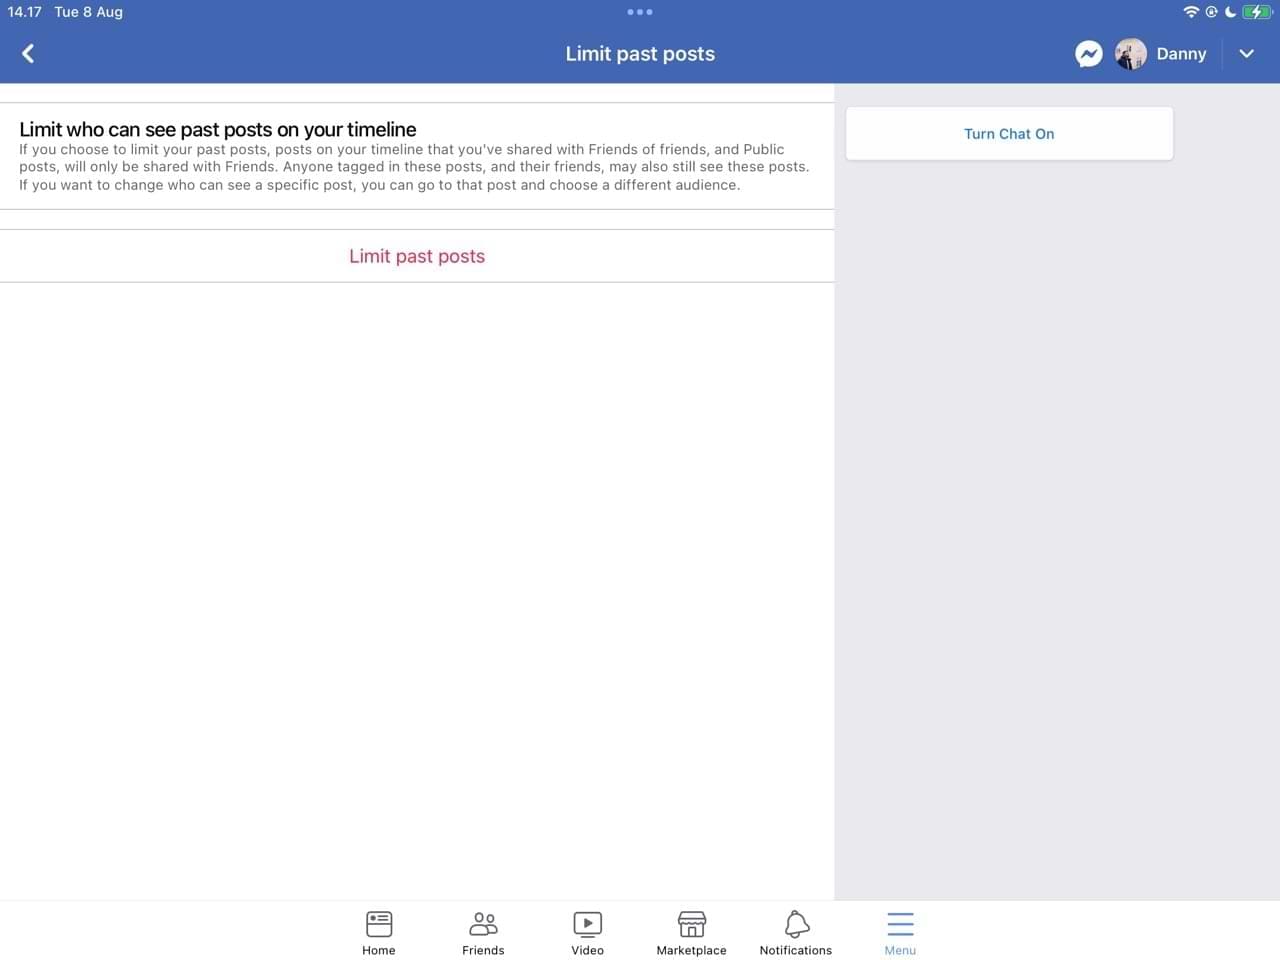
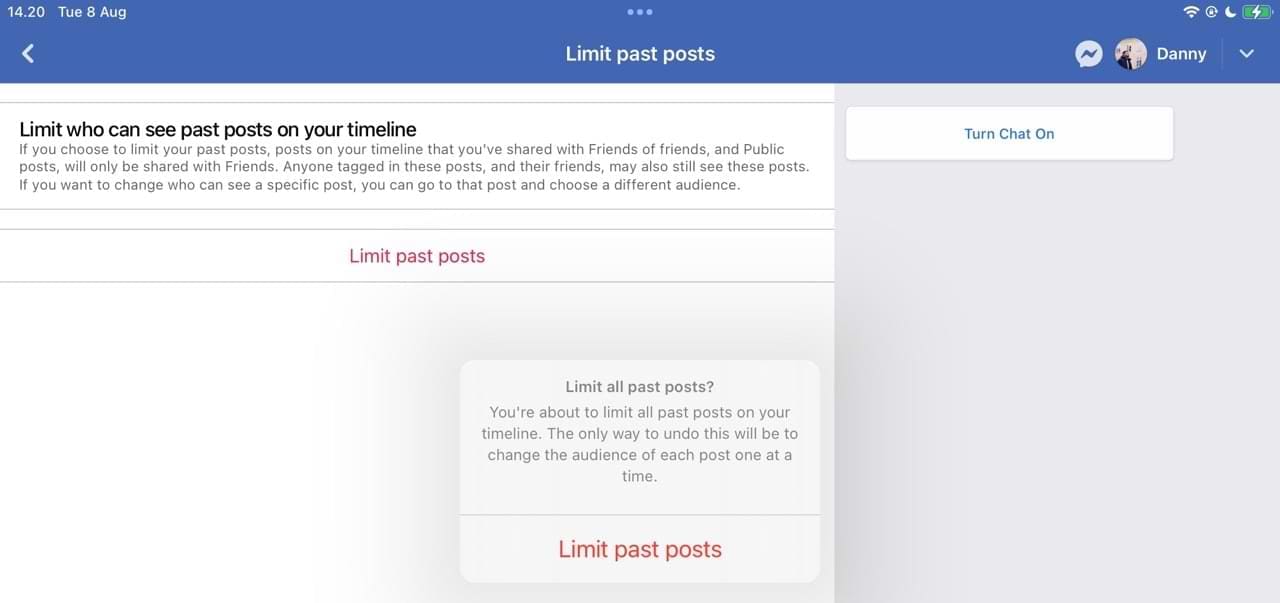
Of all the privacy settings on this list, many people will want to know how to change their post visibility the most. Facebook lets you control who sees your future posts, and you can opt to limit content you’ve already shared online.
When you limit past posts, only your Facebook friends can see your posts. Let’s look at how to use this feature:
- Go to Privacy shortcuts > See more privacy settings > Posts.
- Click on Limit who can see past posts.
- Select Limit past posts.
- When the pop-up window appears, tap Limit past posts again.

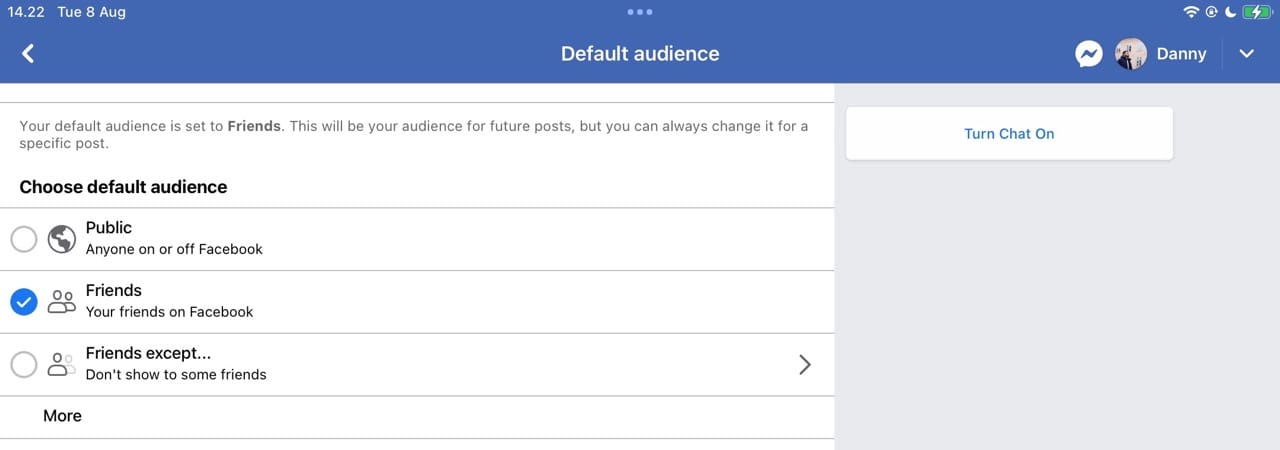
If you want to control who sees future posts, follow the first step outlined in the previous bit. Then, click on Who can see your future posts?. The options are below.
Blocking
The last Facebook privacy setting we are going to take a look at is the Blocking function. If someone has been harassing you, annoying you or just somehow needs to be kept permanently away from your Facebook profile, it’s quite easy to block them. Once someone is blocked, they’ll no longer be able to contact you — nor will they be allowed to add you as a friend. If they were already on your friends list, the user will be removed once you’ve blocked them.
To block a user on Facebook, follow these steps:
- Go to Privacy shortcuts > See more privacy settings > Blocking.
- Type the name of the user you want to block in the text box. Then, click on Block.


You can also click on the user’s profile, select the three dots, and tap Block.
Use These Tips to Change Facebook Privacy Settings on Your Phone or Tablet
Changing your Facebook privacy settings has become much easier in recent years, and the interface is much more intuitive than it used to be. You can easily change who’s allowed to send you friend requests, along with adjusting whether people that aren’t on your friends list can see your posts. And even better, you can change the people who see your posts as friends if you don’t want everyone to see everything.
Facebook has numerous other privacy settings that you can change on a phone or tablet. However, these are a useful starting point. Once you’ve made these adjustments, your profile should hopefully be more secure than was previously the case.


I have the fb app for android. How do I choose only one or two specific people only to see my relationship status? I’ve been trying to look for a way, it seems impossible.
I read the whole article and when on my phone there are no 3 lines in the upper left corner of my home page. Mine just says Facebook. I’m trying to find out if settings made on my Mac are going to be the same as my phone. Thanks
FB update as of around June 13 2019 on Samsung Galaxy S8 now only shows relevant comments. I cannot find any way to have the default be all comments. Is there a way?