
There are plenty of ways to organize your Gmail inbox and keep it clutter-free. If you receive tens or hundreds of emails every day, you need to make a conscious effort to keep things organized. One way to do that is to archive your emails. If you’re using Gmail, follow the steps below to get the job done.
Contents
How to Automatically Archive Emails in Gmail
Use Labels and Filters to Archive Your Emails
To automatically archive your emails in Gmail, you need to create specific labels. You can then use those labels to create filters that will automatically move your emails to a particular folder. Think of that folder as the archive for that specific category of emails.
How to Automatically Archive Emails Using Labels and Filters
- Go to Gmail, and select Settings.
- Click on See all settings.
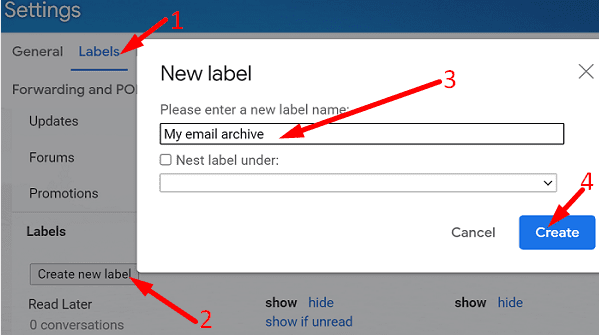
- Select the Labels tab.
- Then scroll down to Labels, and select Create a new label.
- Add the name of the new label and hit the Create button.

- Then, open one of the messages you want to archive.
- Click on More options (the three dots), and select Filter messages like this.

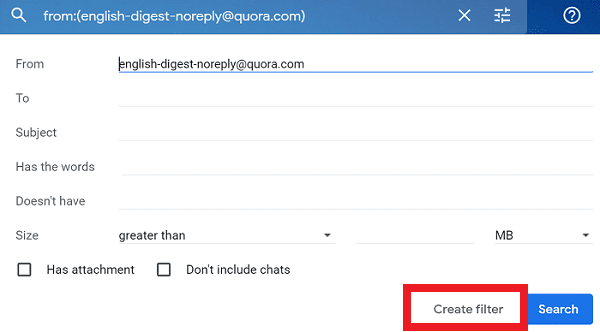
- Gmail will retrieve all the emails from that sender. You can further filter the messages based on specific words.
- Hit the Create filter button to create a specific filter for those emails.

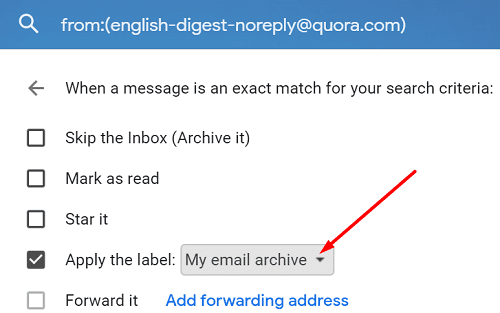
- Select the archive label you previously created. You can also select a specific category for your emails.

- Save the changes.

From now on, all the emails that meet the criteria will be automatically sent to your archive folder.
Alternatively, you can also use the “Archive” or “Send and Archive” options to archive your emails.
Archive All Your Emails
- Launch Gmail and log into your account.
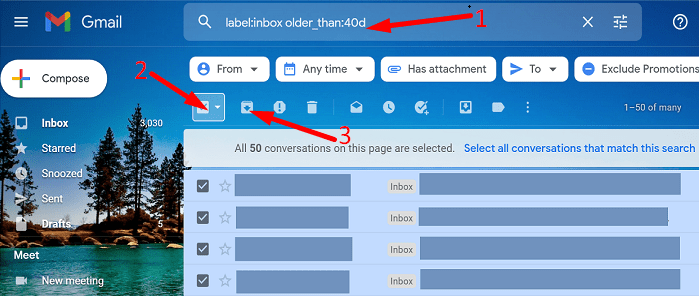
- Click on the Search field and filter the emails you want to archive using the following format:
- label:inbox older_than:Xd
- label:inbox older_than:Xm
- label:inbox older_than:Xy.
- X is the number of days, months, or years you want to use to filter your emails. For example, if you want to archive emails that are more than 40 days old, enter label:inbox older_than:40d.
- Hit Enter to list the filtered emails.
- Select all the emails. If you have more than 50 emails that match the search, click on Select all conversations that match the search.
- Then hit the Archive button.
⇒ Note: You can filter your emails by days, months, and years. For instance, if you want to archive emails that are more than 3 months old, use label:inbox older_than:3m. If you want to archive emails older than one year, use label:inbox older_than:1y.
Use the Send and Archive Option
You can also use the Send and Archive feature. The option is available next to the Send button and automatically sends your emails to the All Mail label. Gmail automatically moves the email back to your inbox when someone replies to it.
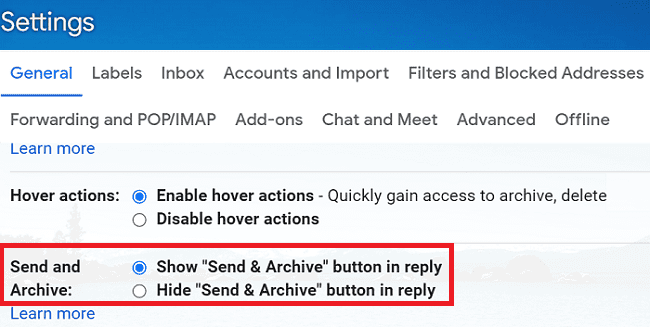
To enable this option, go to Gmail Settings, and select See all settings. Then click on the General tab and scroll down to Send and Archive. Select Show “Send & Archive” button in reply.
Conclusion
To automatically archive your emails in Gmail, create a specific label and then use it to create a filter that will apply that label to a set of emails. Alternatively, you can also use the “Archive” or “Send and Archive” options to get the archive of your emails.
How often do you use the Archive option in Gmail? Let us know in the comments below.