Now and then, Google Photos will show you pictures you probably forgot you even had. It’s usually nice to go down memory lane, but there might be people you would rather forget. So, seeing them appear in your Memories is something you would pass on. The good news is that Google Photos allows you to change how it shows you your memories. You can also do things such as create locked folders for those pictures that are only meant for you to see.
How to Hide Certain People from Your Google Photos Memories
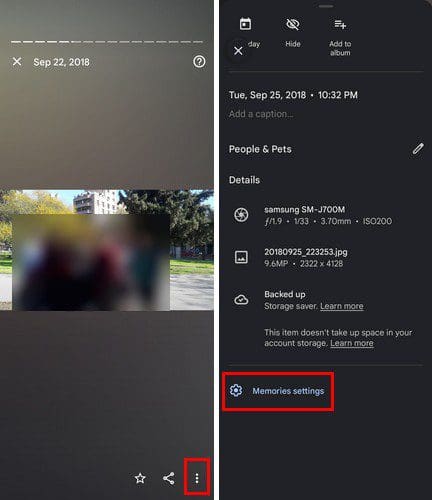
There are various things you can hide from your Google Photos memories. For example, if you would rather not see that person who used to be your best friend, you can. To make this change, you’ll need to access the settings for your Memories. While you’re viewing your memories, you should see dots at the bottom right corner. When you tap on them, swipe up on the window that appears and tap on the Memories option at the bottom.
Once you’re in Memory Settings, you’ll see options for everything you can hide. For example, you can choose from options such as:
- Hide people and pets
- Hide dates
- Advanced
If you hide people and pets, Google will ask you to choose who you want to stop seeing in your memories. An eye with a line across it will appear when you select someone. If that person has that icon on their picture, they won’t appear in your memories. You can choose as many faces as you want. Follow these steps if you ever change your mind and want to see that person in your memories. Tap on the face again, and the eye with the line across it will disappear.
Hiding dates is just as easy. Tap on the Hide dates option. That’s the second one from the list. You should see a button that says Add dates.

When you tap on the button, you’ll see a calendar. Tap on the pencil icon at the top right to add a start and end date of the picture you don’t want to see in your Google Memories. You can enter the dates manually by tapping on the pencil icon. You’ll see an example of the format Google Photos accepts. Once you’re done, don’t forget to tap on the blue checkmark at the bottom right.
A faster way of adding the start and end date is by tapping one day from the calendar above. The first one you choose will be considered the start date. The second one you choose will be the end date. The time frame you select will be highlighted for a better view of your choice.

If you made a mistake and want to choose a new start and end date, simply tap on the new start date, and the previous dates will disappear. Don’t forget to tap on a second date and close the time frame.
Advanced
The third option from the list was the Advanced option. When you choose this option, you can have various things disappear from your Google Memories. For example, you can remove:
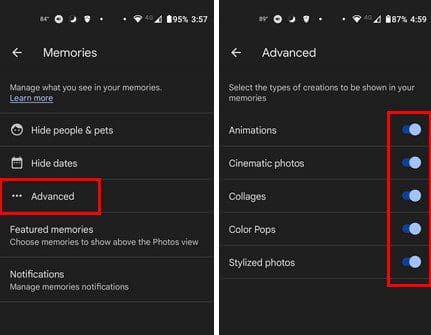
- Animations
- Cinematic photos
- Collages
- Color Pops
- Stylized photos
Toggle off what you don’t want to see anymore, and you’re good to go. You can turn it on again at any time. Below the Advanced option, you’ll also see the option to customize the Featured Memories. You can toggle off or on options for things such as Previous years, Recent highlights, and Themes memories. You can also change what you get notifications for.

In the Notifications option, you can toggle off notifications for things such as:
- Suggested sharing
- Previous years
- Themes memories
- Creations
- Suggested rotations
- Suggested Archive
Conclusion
Google Photos is a great way to remember those great memories you may have forgotten about. You can remember what you did that same week a year or two ago. It’s a great way to go down memory lane. But, there are things you would rather forget, and that is where the Google Memories settings come in. You can customize it, so you only see what you want. What things will you be leaving out? Let me know in the comments below, and don’t forget to share the article with others on social media.