
If you own a Lenovo or HP laptop and you try to access the camera on Zoom, Teams, Skype, or any other video meeting service, you may occasionally get the SPUVCbv64.sys BSOD error. Well, when you get a Blue Screen of Death error, you know things are really bad. Keep on reading this guide to learn how you can fix this error.
What is SPUVCbv64.sys?
SPUVCbv64.sys is your webcam’s driver. A SPUVCbv64.sys BSOD error indicates your webcam driver is either faulty, corrupted, or outdated. In other words, Windows 10 tried to access your webcam but was unable to due to major driver glitches.
How to Fix SPUVCbv64.sys BSOD Camera Errors
Update Your Webcam Driver
SPUVCbv64.sys errors indicate the OS could not access your webcam. Check if there’s an updated driver for your webcam and install it on your device.
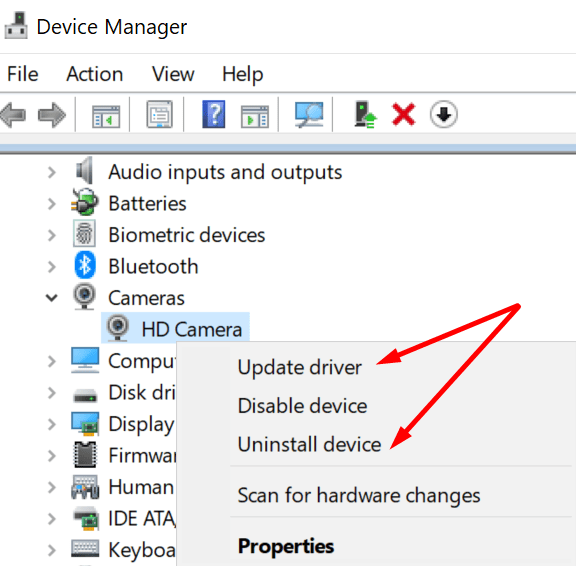
- Launch the Device Manager and expand the Cameras section.
- Right-click on your webcam and select Update driver.

- Wait until the system has installed the newest driver version and restart your computer. Check if you can use the camera now.
- If the issue persists, repeat the steps above but, this time, select Uninstall device. Basically, you’re going to uninstall your current webcam driver.
- Restart your computer and check if your OS can access the camera.
Alternatively, you can manually download the latest webcam driver on your computer directly from your webcam manufacturer’s website. Or you can download the driver from Microsoft’s Update Catalog website.
It is worth mentioning that a number of users confirmed they solved the problem by uninstalling and reinstall the camera driver three or four times in a row. Check if this method works for you as well.
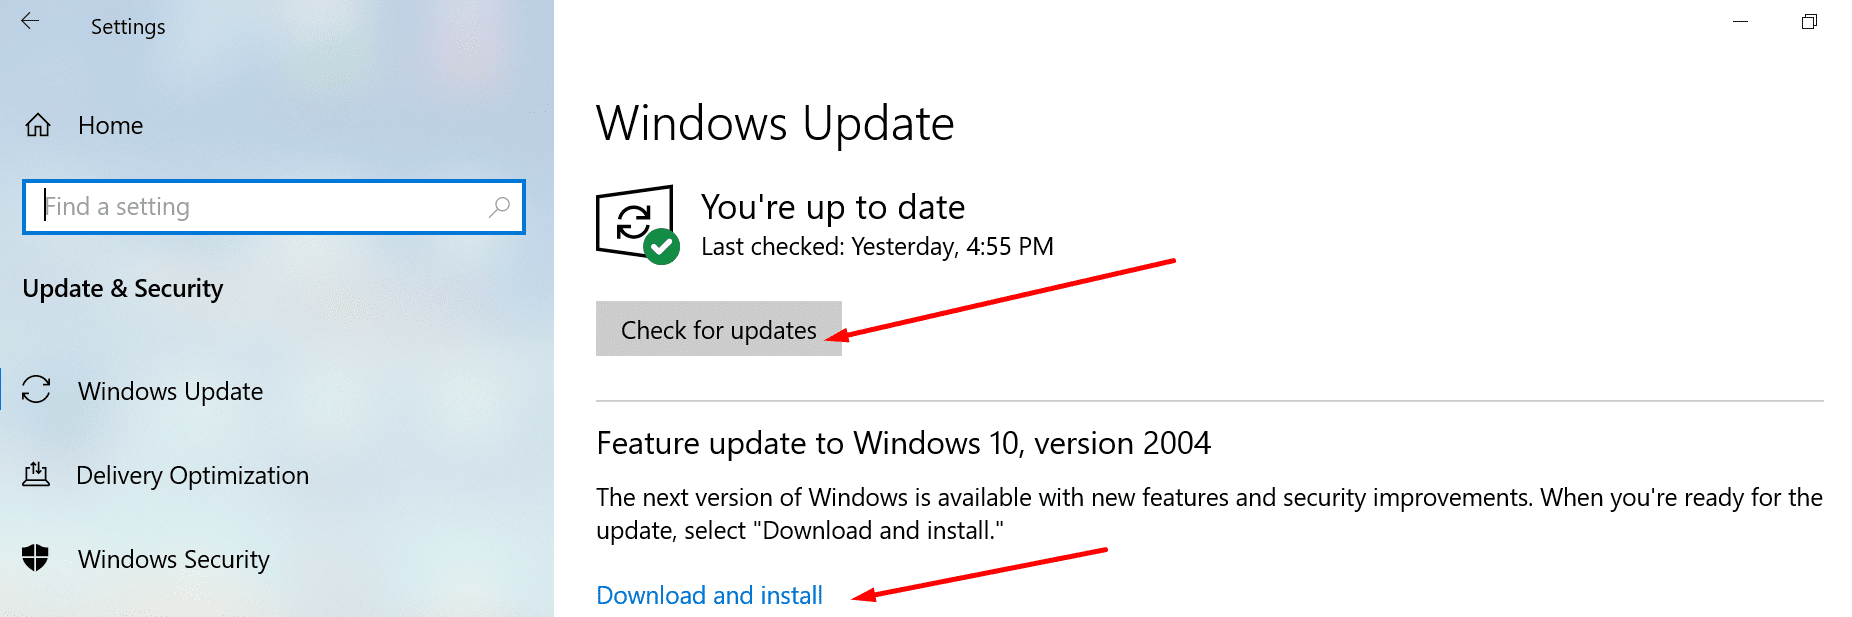
Speaking of updates, don’t forget to install the latest Windows 10 OS version on your machine. Go to Settings, select Update & Security, click on Windows Update and check for updates.
Unplug or Disconnect Your Webcam
If you use an external webcam, unplug it from your computer. If you use a Bluetooth webcam, remove it from your list of Bluetooth devices and restart your machine. Then reconnect your camera and check if the error SPUVCbv64.sys persists.
Roll Back the Driver
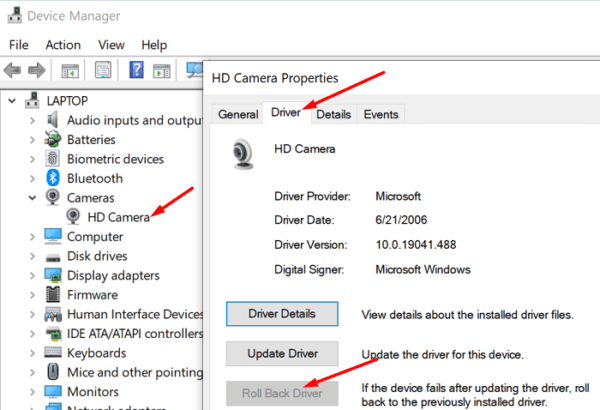
- Launch the Device Manager and select the Cameras section.
- Right-click on your camera and select Properties.
- Then click on the Driver tab and hit the Roll Back Driver button.

- Check if your camera works as it should now.
Run the Hardware Troubleshooter
Windows 10’s built-in hardware troubleshooter may help you to solve this problem.
- Launch Command Prompt as an admin and run the msdt.exe -id DeviceDiagnostic command.

- The Hardware and Devices troubleshooter should now be visible on the screen. Hit Next to launch the troubleshooter.
- Restart your computer and check if you can use your webcam now.

Scan and Repair System Files
If some of your system files got corrupted or you accidentally deleted them, run the System File Checker to troubleshoot the problem.
- Launch Command Prompt with admin rights and enter the sfc /scannow command.
- Press Enter to run the command. Wait until the SFC tool has repaired your files.
- Restart your computer and try to use your camera again.
Enable Camera Access
Ensure your apps can access and use your camera. Go to Settings, select Privacy and click on Camera (left-hand pane, under App Permissions). Then enable the following options: Allow apps to access your camera and Allow desktop apps to access your camera.

Conclusion
The SPUVCbv64.sys BSOD error indicates your webcam driver may be faulty or outdated. Install the latest webcam driver on your device, or simply reinstall it. A number of users solved this problem by rolling back the webcam driver. Use all these troubleshooting suggestions and check which one works for you. Feel free to share your feedback in the comments below.

La opción de revertir (retroceder) el controlador me funcionó en Lenovo Yoga para reactivar cámara, después de que las dos actualizaciones de hoy 22 sept 2022, la dejaron sin funcionar.
Gracias