

How often have you tried to send an email attachment only to be told it was too large? Perhaps you attempted to attach several things at once and received an error, thus having to send several separate emails just to get everything to the receiver? It can be maddening, I know. I have had to deal with this on occasion just like you. Thankfully, I am a research nerd and found several different methods you can utilize to get that precious data where it needs to be. Let’s dive in and discuss some of my favorites!
Contents
Option 1 – Compress the Files
This is one of the quickest and easiest ways to attach large files to an email. Zipping files simply means that their size is being reduced (compressed) and all of them are added to one folder. None of the data is lost during the compression. Redundant information within your text, photos or videos is shrunk into much more manageable iterations. Once the receiver unzips the created folder, everything is restored to the size it once was – exactly as you created or shared it to begin with.
As I said, creating a zipped folder is extremely quick.
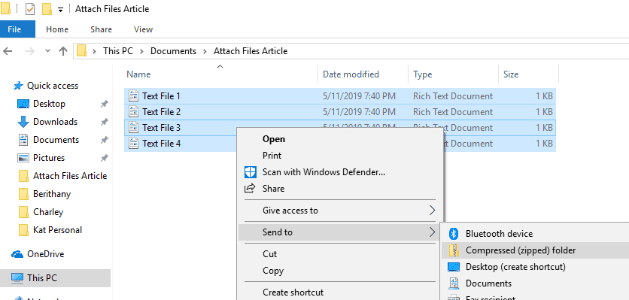
- Select all of the files you wish to add to the zip folder by holding down the CTRL key (in Windows) and clicking on each file.

- Once your files are all selected, right click on one of them and hover the cursor over where it says ”Send To”. Choose the second option on the list: ”Compressed (zipped) Folder”

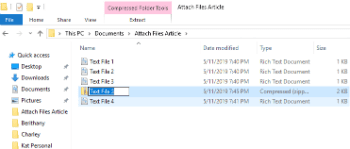
- As soon as you click this option, your new zipped folder will be created in the place where your files were. You will notice your original files are still there.

- Notice that the newly-created folder is ready for you to add a name of your choosing. Should you accidentally click off of it, you can right-click the new zip folder and choose ”Rename”.
- Head on back to your email and attach the new zipped folder just as you would any other file and send it off!

Option 2 – Send Files Via Dropbox
Dropbox is an amazing tool. You can store all of your photos, videos and files privately – for free up to 2GB! You can also create shared folders where you Invite anyone you choose to view or edit the things you have chosen. Let’s take a look at how to do this!
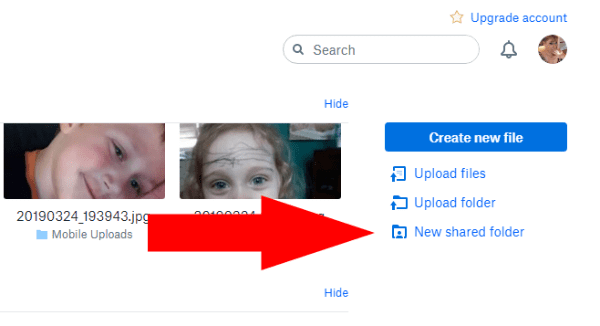
- Head over to Dropbox and create your free account and then select ”New Shared Folder” on the right-hand side.

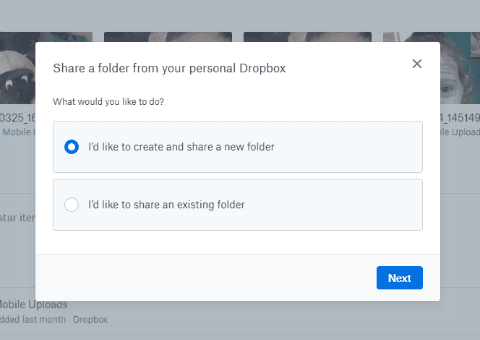
- Create a new folder or use an existing one (if you were already a Dropbox member.)

- Select ”I’d like to create and share a new folder”.
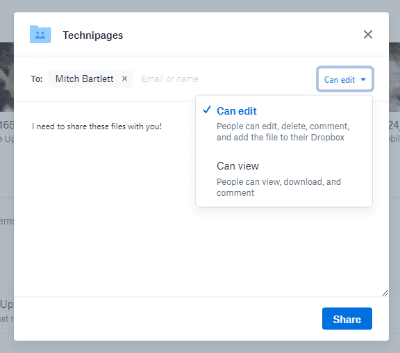
- Name your folder and enter the email addresses of those you are sending the files to. Choose if you want them to be allowed to edit things within the folder (edit, delete, comment and add to any file within the folder). Lastly, add a message if you wish to explain what is in the folder and why you are sharing it with them.

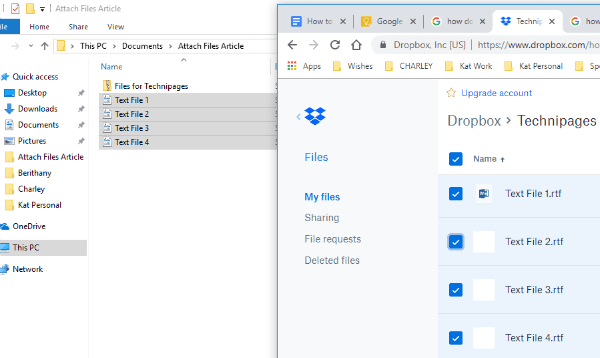
- Now it is time to add the files, photos or videos. You can drag and drop them into the folder and they will upload automatically. Or, go to each file separately, right-click on it and choose ”Copy.” Then, right-click anywhere within the Dropbox folder and choose ”Paste.” The last option you can use is to click ”Upload Files” on the right side of your screen. Choose your file/s and then Dropbox will ask you which folder to place them in. Be sure to choose the folder you just created.

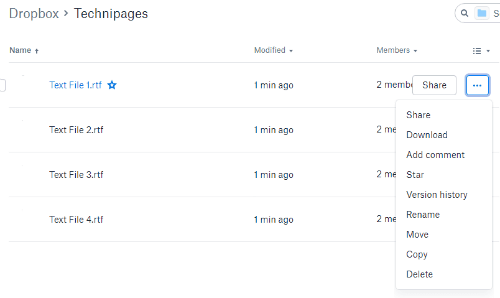
- Once your files have been added, an email has already been sent to the recipient/s and they have immediate access. However, you still have some things you can do to each individual file. On the right side of the file name line, you’ll see three dots. Click that to see the dropdown box of options. You can share that particular file with more people, download it to your device again, add comments, rename it, delete it and more.

That’s all there is to it! You have now successfully created a folder in your free Dropbox account, added files and shared them with the person/s you chose.
Sharefile is a paid service, mostly used in business settings. However, there is a 30-day free trial where no credit card is needed. The website was created by Citrix. This company has been putting out high-quality software for many years, and I personally promise you that it is safe and awesome.
Head over to the Sharefile site and create your free account before we get started. You will then be asked for your company website, industry and a phone number. After this, you will be sent a verification email where you will need to click to log in for the first time. Once logged in, you’ll confirm your personal information, choose a secret question and set a password.

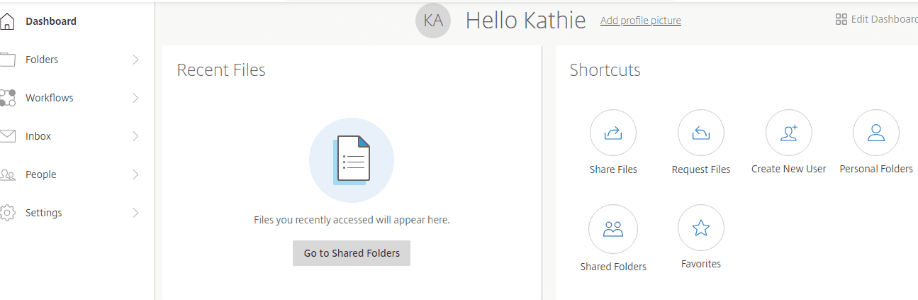
At this point, you will be on your personal homepage. You’ll notice that there are tutorials at the bottom-left of this page, so that you may figure out more ways to utilize this particular service. The top-left box is where the files you upload will appear, next to it are shortcuts to share or request files and more. Over on the very left side of the page, you can access your folders and more.
Obviously, the first thing you are going to do is to add files. Select the ”Share Files” option in your shortcuts box. Here, you are given four things to choose from: Email with ShareFile, Get a Link (to send via email, instant message or even text), Feedback and Approval and Send for Signature. Select ”Email with ShareFile”.
When this page opens, you’ll see you need to add your recipient/s email/s on the left, followed by a subject line and message. Then, on the right you will add the file/s you wish to send. That’s all there is to it, folks! When you are satisfied with the information on the right and all of your files, videos and/or photos have been added, click on the blue ”Send” button at the bottom-left of the page.

There are many more things you can choose to do with ShareFile that I will not go in to right now. As mentioned above, there are helpful tutorials on the site you can choose to utilize to help you understand what other things the site can be used for.
Option 4 – Sending Large Files Using Google Drive
The last method I am going to talk about is using Google Drive. Chances are, you are already using this phenomenal tool.
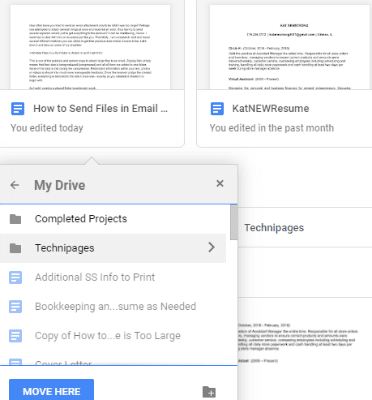
- At the top of the page, click the drop-down arrow next to where it says ”My Drive”. If you have not already uploaded the files you will need, please choose that option and do so now. Once they are all located within Drive, choose ”New Folder”.
- Name your folder and then click the ”Create” button, then name your folder.
- Right-click on a file you wish to add to the new folder, choose ”Move To” and then hover your cursor on ”My Drive” Click the little arrow on the right and select the folder you just created and then click the blue ”Move Here” button.

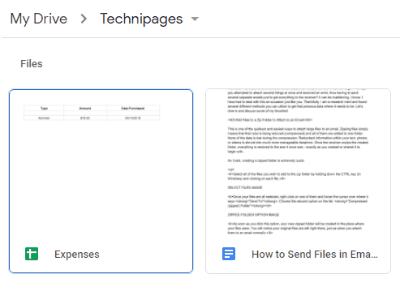
- Once you have finished moving files, double-click on the folder name just below those files to open it. You will see them listed there.

- If you still have files on your computer that have not yet been uploaded that you need to share, it is simple to do. Right-click inside your folder. Choose ”Upload Files” and then navigate to and select what you need.

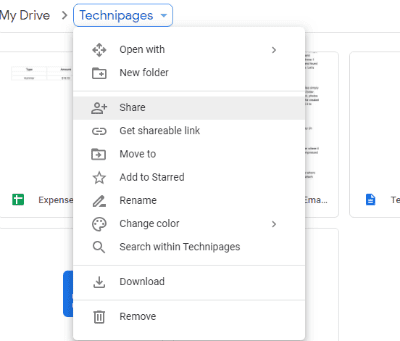
- When you have everything you need to share inside your folder, click the downward-pointing arrow next to the folder name at the top of the page. Choose ”Share”.

- Add the email address/es of the person/s you need to share with and select the send button!

You have now successfully shared your important documents, funny videos or treasured photos from within Google Drive.
What other file-sharing methods have you used or heard of? Are there any you need help figuring out how to use? As always, let me know in the comments and I will do my best to jump in and rescue you.
Happy file sharing!


One drive sharing works as does using a program like scp or ftp (which is overkill for a one time operation I guess.) SCP and ftp require you to keep your pc on all the time mind you.
If you are using Apple Mail and have an IMAP mail account you can send files up to 5GB in size using Mail Drop. If the recipient is using Apple Mail the file will be seen as a normal attachment. If the recipient is not using Apple Mail it will appear as a link at which the file may be downloaded.