Notes are a great way to save information for later. When you’re not in a hurry, there are various ways to not only keep your info but to personalize it. But, when the last thing you have is time, you need to have quick and trustworthy ways to create notes.
In iPadOS, there are a few ways you can quickly create notes for those times when you’re on the run. But, when you do have some time to spare, there are some great apps you can use to give your notes you’re personal touch.
Contents
1. Quickly Create a Note Using the Notes Icon
A fast way to create a note is to long-press on the notes icon. After a few seconds, a series of options will appear below the notes icon. The New Note option will be the first one on the list.

2. Create a Note Adding a Note Widget to Your Today View Screen
If you check your Today View screen regularly, having a quick way to create there is a great idea. To access your Today View swipe left from your home page if your iPad is in portrait mode. If you’re in landscape mode, swipe all the way down in Today View on the left side of the display and tap on the Edit option.

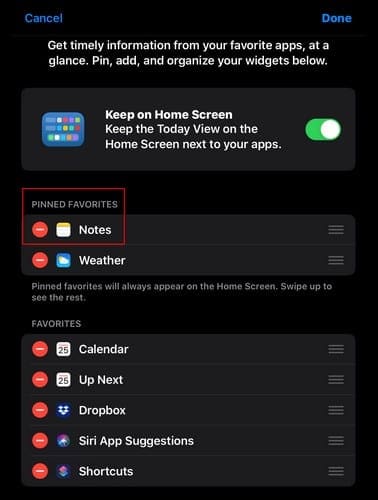
Swipe down to the More Widgets section and tap on the green plus sign to add it to favorites. If you think you’re going to need the notes app regularly, it’s best to pin it to favorites. You can do this by pressing on the three lines and dragging it to the Pinned Favorites section.
Now, every time you have your iPad in landscape/portrait mode, it’s going to be the first widget on the list.
3. Create Quick Notes on iPadOS Using Siri
If you have Siri set up, you can create a quick note saying, ¨Hey Sir, create a note¨. Siri will ask you what you want the note to say and ready it back to you when you’re done.

4. Create Notes from the Control Center – iPadOS
By adding the notes icon to the control center, you have another option to create quick notes on your iPad. To add the notes icon to the Control Center, go to Settings > Control Center > Customize Controls. Look for the Notes option and tap on the green button to add it to the section above called Included.
![]()
Once you’ve done that, head on over to the Control Center, and the notes options will be towards the bottom.

When you tap on the notes icon, it will open the notes app. Once the notes app opens, tap on the compose button, and you’re good to go.
Conclusion
Whenever you need to do something, it’s always good to know that you have more than one option. Which one you choose is going to depend on how much time you have on your hands at the moment. Which method do you think you’re going to use the most? Share your thoughts in the comments below.