When you configure your webcam to work in Zoom you generally do so in one of two ways. The first way is the standard setup, through the app settings. The second method is through the rush set up, which generally occurs when you’re using Zoom for the first time, haven’t configured it before, and are under time pressure to join a call.
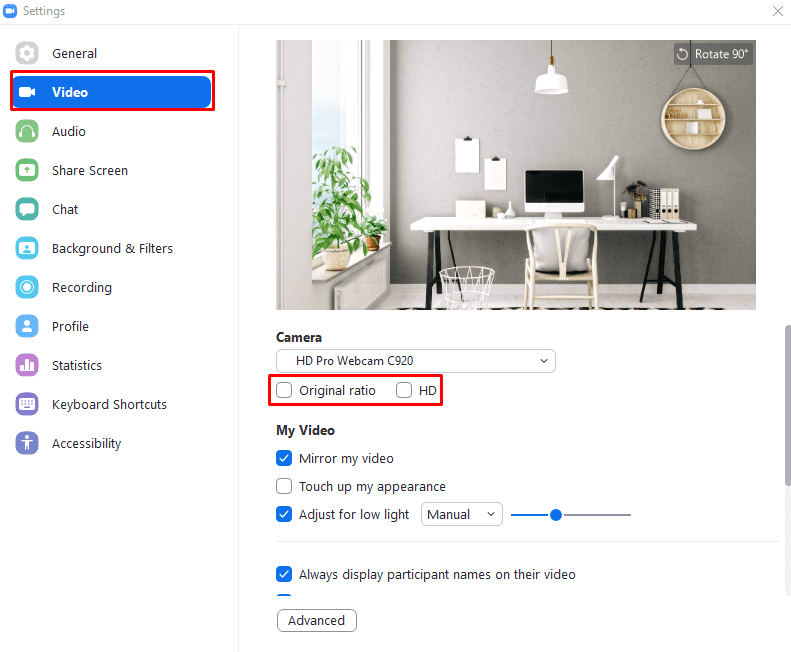
If you’ve gone through the rush set up, then you probably just settled for the first setting that got your webcam working. Once you’ve got some more time to actually go through the standard setup process you may notice the “Original ratio” and “HD” options under the webcam selection dropdown box. By default, your webcam image is actually slightly zoomed in. Enabling “HD” forces your webcam into using the highest available 16:9 resolution your webcam supports. The “Original ratio” option forces your webcam to use its maximum resolution, even if that isn’t in a standard 16:9 ratio.
Tip: If your webcam doesn’t support HD video then the “HD” setting won’t be able to force it to upgrade, it will however switch the webcam to using the highest 16:9 resolution it supports.
To be able to configure these options, you need to go into Zoom’s settings. To do so, click on your user icon in the top-right corner, then click on “Settings”.

Once in the settings, switch to the “Video” tab. To configure your webcam to use the highest 16:9 resolution it supports, tick the “HD” checkbox, found just under the “Camera” dropdown box used to select the webcam video input device. You can also force your webcam to use its highest possible resolution by ticking the “Original ratio” checkbox instead.
Tip: If both options are enabled, then the “HD” setting will take precedence and the resulting video will be in the 16:9 ratio.