Take a look at your phone. Imagine the red and green look the same – or even that the whole thing is grey. What if you pulled up something on google and saw that all the blue links are faded – in fact, it’s hard to see most of the brightly colored, itty-bitty print on your screen. This is the reality that those who are colorblind deal with. Fortunately, Apple Support has accessibility options for those dealing with colorblindness.
Contents
How Colorblindness Affects Your iPhone Settings
My grandfather was a dapper dresser. I never saw him in what we would consider casual clothes – and everything was perfectly coordinated. It always amazed me as a child that not a shirt, tie, or sock was ever out of place. It wasn’t until I was older that I learned that my grandfather was part of the 8% of men in the world who are colorblind.
People who are colorblind, whether from birth or due to eye injury or trauma, cannot see colors as others do. For those with mild colorblindness, they may be able to see colors as everyone else does, unless the light is dim.
Others can’t distinguish between colors, for example, red and green or blue and black. Those with the most severe form of colorblindness can’t see color at all, just various shades of gray. Grampa organized his closet and drawers so that he could dress without his clothes clashing – he couldn’t see the full-color spectrum.
Color Filters is available on iPhones to assist users with colorblindness, and not only is it easy to set up, but it can also be individualized to fit your personal needs.
In fact, they’re so handy, users who aren’t colorblind can find Color Filters helpful for reducing eye strain and making text easier to read.
How to Turn On iPhone Color Filters
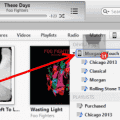
Accessing Color Filters on your iPhone is simple:
- Select “Settings”
- Select “Accessibility”
- Select “Display and Text Size”
- Select Color Filters
- Slide the Color Filters “button” to the right to turn the filters on.
Picking a Filter
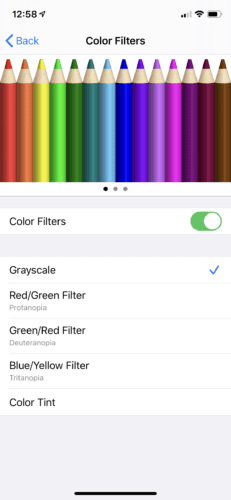
You’ll see a series of options for adjusting the filters to your specific needs. At the top of your phone, you’ll have the option of choosing from three pictures to help you adjust your filters – a set of colored pencils, a gridded rainbow showing various colors at separate intensity levels, and a honeycombed picture representing background options.
Using your finger, swipe left or right to see all three pictures. There are four preset filters to choose from, based on the various types of colorblindness:
- Greyscale
- Protanopia (red/green)
- Deuteranopia (green/red)
- Tritanopia (blue/yellow)
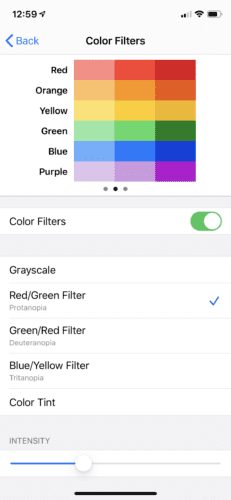
Choose your filter, then use the slide bars underneath the four options to adjust the intensity and hue. As you make your adjustments, scroll through all three pictures to see the changes your adjustments are making once you’ve got your filters set to the way you want them, exit settings. It’s that easy.
Turn off the Filters
If you ever want to remove the filters from your phone, follow the steps listed above to access Color Filters, and then slide that button to the left to turn it off. Doing so resets your phone to standard settings.
Color Filters and Colorblindness
It’s important to note that using Color Filters does not “fix” colorblindness so that users can view items on the screen as though they weren’t colorblind. The filters are meant to help users to “differentiate between colors.” The filters will have a direct effect on how items on your screen look, so you may decide the feature is better for limited use rather than keeping it on at all times.
There are many versions of vision impairment, including color blindness, astigmatisms, and light sensitivity. Smartphones are practically a staple of everyday life – almost a requirement for success. I appreciate Apple’s efforts to increase accessibility and ease of use for those with vision issues.