• Skip to main content
  • Skip to primary sidebar

Technipages

Tutorials and fixes for smartphone, gadget, and computer problems

  • Topics
    • Android
    • Browsers
    • Gaming
    • Hardware
    • Internet
    • iPhone
    • Linux
    • macOS
    • Office
    • Reviews
    • Software
    • Windows
    • Definitions
  • Product Reviews
  • Downloads
  • About

How to Add or Remove Fonts from macOS

January 6, 2019 by Mitch Bartlett Leave a Comment

You can download fonts from sites like Google Fonts. What do you do with them once you download them though? If you want to use new fonts in your MacOS applications, you can install and enable themĀ using these steps.

Option 1 – Open Font File

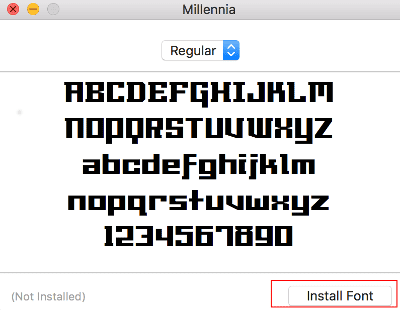
Font files will typically come with the extension of “ttf”, “otf”, or “ps”. You can install fonts by simply opening the file. Once opened, a window will appear where you can select “Install Font“.

Selecting “Install Font” will place it in the ~/Library/Fonts folder where it will be available for the single user to use.

Option 2 – Drag & Drop to Folder

You can directly drag and drop font files depending on the situation for which you intend to use the fonts.

Drag the font files to one of the following locations:

  • ~/Library/Fonts = Fonts a specific user can use.
  • /Library/Fonts = Fonts available to any user on the system.
  • /Network/Library/Fonts = Fonts made available to users on the network.
  • /System/Library/Fonts = Fonts used by the MacOS system. Don’t mess with these too much unless you know what you’re doing.
  • /System Folder/Fonts = Legacy location for fonts for applications built for older versions of MacOS.

You Might Also Like

  • Changing Fonts on PDF Expert
    Changing Fonts on PDF Expert
  • How To Embed Google Fonts Into Powerpoint
    How To Embed Google Fonts Into Powerpoint
  • Windows 10: How to Install TrueType Fonts
    Windows 10: How to Install TrueType Fonts
  • Windows 10: Disable Smooth Edges For Fonts
    Windows 10: Disable Smooth Edges For Fonts
  • Windows 11: Use Fonts and Make Your Text Fantastic
    Windows 11: Use Fonts and Make Your Text Fantastic
  • Linux Mint: How to Change the Default Fonts and Font Sizing
    Linux Mint: How to Change the Default Fonts and Font Sizing

Filed Under: macOS

Reader Interactions

Did this help? Let us know!

Your email address will not be published. Required fields are marked *

This site uses Akismet to reduce spam. Learn how your comment data is processed.

Primary Sidebar

Recent Posts

  • Windows 11: What is Dynamic Lock and How to Set It Up
  • How to Use Google Pay on Android
  • What is a Firefox Primary Password and How to Create One
  • Fix: Windows 11 Mic Not Working
  • How to Update Galaxy Tab S8
  • How to View a List of Recently Uninstalled Apps on Android
  • How to Sign Into WhatsApp on Multiple Devices
  • Dedicated Server vs. Shared Hosting Server

Who’s Behind Technipages?

Baby and Daddy My name is Mitch Bartlett. I've been working in technology for over 20 years in a wide range of tech jobs from Tech Support to Software Testing. I started this site as a technical guide for myself and it has grown into what I hope is a useful reference for all.

© Copyright 2023 Guiding Tech Media · All Rights Reserved · Privacy